Norway Hiking: The 10 Best Hikes in Norway

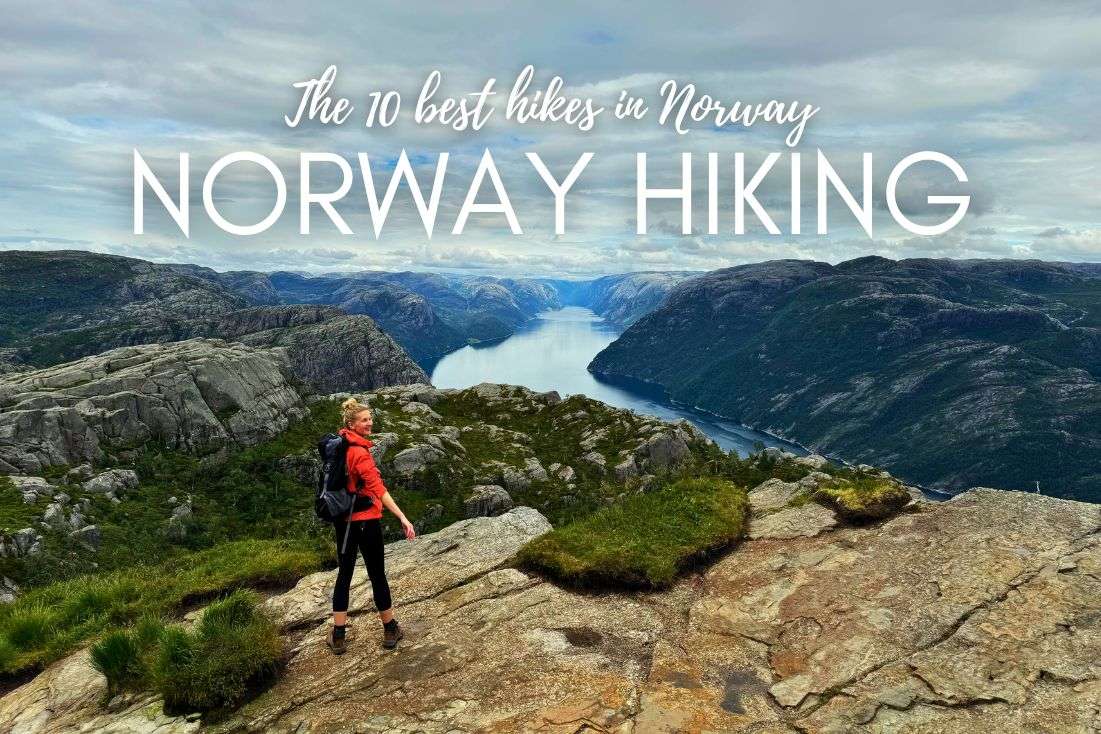
I've spent a lot of time in Norway hiking, so hear me when I say: this nation takes hiking to a whole new level. Norway's mountainous and glacial landscapes are nothing short of magical, and within them, there are thousands of great hikes to choose from.
For those of us that don’t have infinite time and money, I’ve taken my own experiences and narrowed these trails down to just 10 best hikes in Norway. This list covers the most beautiful trails that Norway has to offer in four top hiking areas: around Lysefjord, around Hardangerfjord, and in the Jotunheimen and Jostedalsbreen National Parks.
Going hiking in Norway as part of a longer trip? Be sure to check out my detailed 2-week itinerary! Or, learn more about Norway.
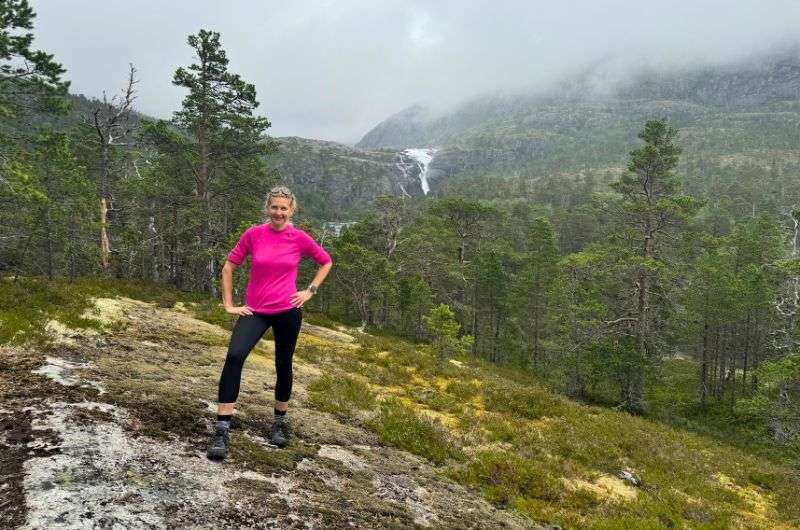
Norway is amazing!
In my opinion, these are the best trail options for your Norway hiking adventure:
Lysefjord hikes:
- Pulpit Rock (Preikestolen)
- Kjerag and Kjearagbolten
Hardangerfjord hikes:
- Trolltunga
- Folgefonna glacier
- Buarbreen glacier
- Nykkjesøyfossen
Jotunheimen National Park hikes:
- Galdhøpiggen
- Besseggen Ridge
Jostedalsbreen National Park hikes:
- Briksdal glacier
- Oppstryn Skule to Segestad
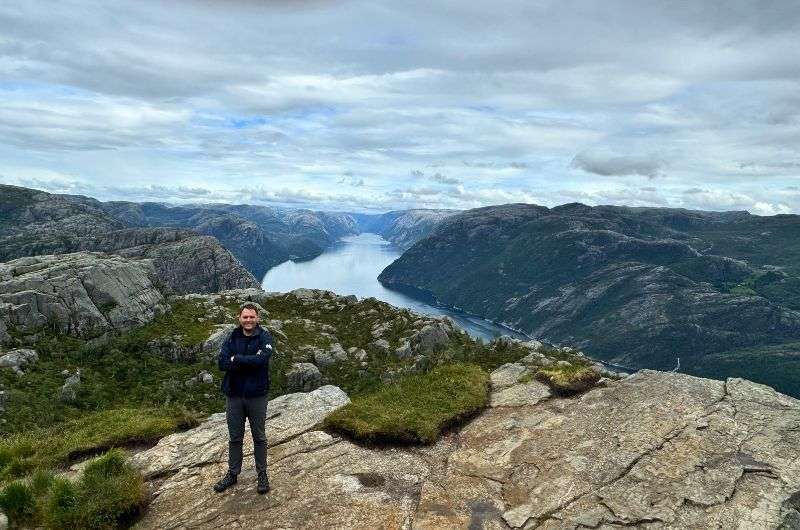
This picture is from Pulpit Rock hike. One of my favorite hikes in Norway
Sometimes, all you need to do is take the first step... I've filtered out the best hotels in Norway for you
Save it for yourself to come back to later, or share with your friends on social media!
Norway hiking logistics: What you need to know
- If you’re wondering whether you’ll see any fjords on your Norway hiking holiday, rest assured, all you’ll see is fjords.
- Fjord ferries are like big car buses, mostly operated by Fjord1. They’re medium-sized, punctual, and have restrooms and food onboard. You don't book in advance, but you should register your car’s license plate online at ferrypay.no.
- Check webcam views, as well as the weather forecast, before you head out on any hike. Many established viewpoints in Norway are broadcast live online via webcam.
- Accommodation in rural areas is often pricey and not that great.
- Be prepared to do a lot of driving. Gas stations in Norway use dynamic pricing, but they are the same everywhere. And be prepared to pay a pretty penny for trailhead parking.
- Norwegian sunsets are a mystery, especially in the summer. You’ll feel like it’s about to set in half an hour, but it’ll stick around for another three hours.
- Gear-wise, you'll want durable, waterproof stuff that can handle rocky trails, changing weather, and varying terrains. Here’s a breakdown of essentials:
- Layers: Breathable base layers, a fleece, and a weather-resistant outer shell are a must. Norway’s weather can switch from sunshine to rain fast, especially in fjord areas.
- Waterproof hiking boots: Sturdy, gripping boots are essential for navigating slick rocks and wet glacier trails.
- Gloves and a hat: Even in summer, the wind on glaciers (like Folgefonna and Buarbreen) can be chilly.
- Backpack with rain cover: Useful for carrying snacks, water, and extra layers.
- Microspikes or crampons: Needed for glacier hikes where icy patches are common.
- Trekking poles: Helpful for the steeper, rockier trails like Kjerag and Trolltunga.
- Navigation and map: Phone signal can be spotty, so a map or GPS device is handy in remote areas.
- Layers: Breathable base layers, a fleece, and a weather-resistant outer shell are a must. Norway’s weather can switch from sunshine to rain fast, especially in fjord areas.
- Finally, everywhere in Norway is so stunning, the country is like one big national park. There’s almost no need for detailed notes; just know it’s beautiful all around.
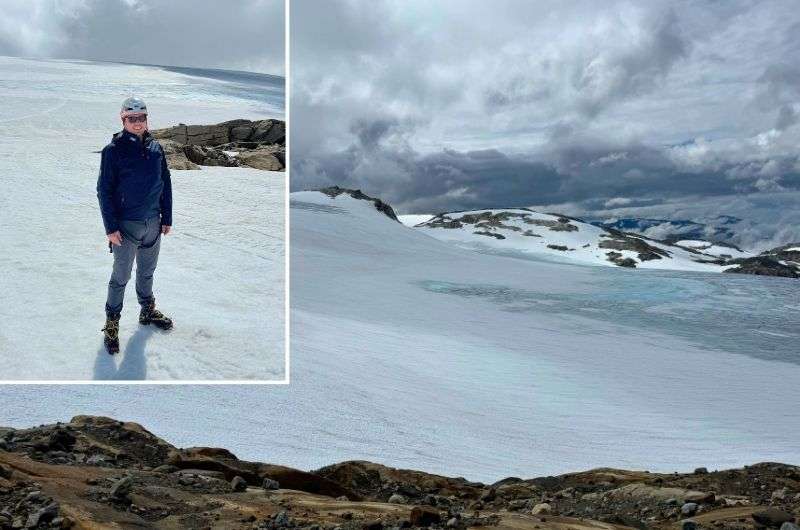
Prepare for changing weather and temperature fluctuations
Lysefjord hikes: An overview
- My hotel recommendation: Ydalir Hotel, Stavanger
Lysefjord, around an hour’s drive from the city of Stavanger, is Norway at its most epic. And by “epic,” I mean wild cliffs, unpredictable weather, and hikes that feel part workout, part survival course.
Picture Pulpit Rock: 600 m (1,969 ft) straight up, with no guardrails. Then there’s Kjerag, a beastly trek with calf-burning granite slabs that’s certainly not for the faint-hearted. Both are two of Norway’s most popular and most Instagrammed hikes, and I’m about to explain why.
The best hikes around Lysefjord (map)
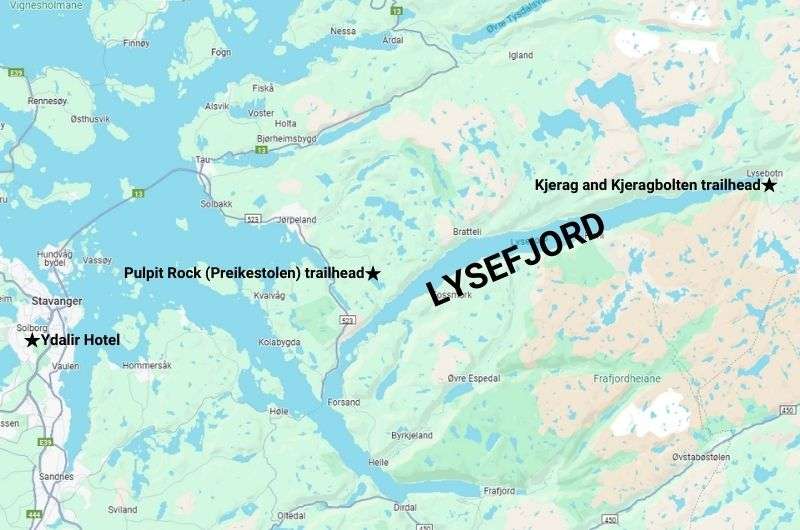
Map of Lysefjord and the surrounding area
1. Pulpit Rock (Preikestolen)
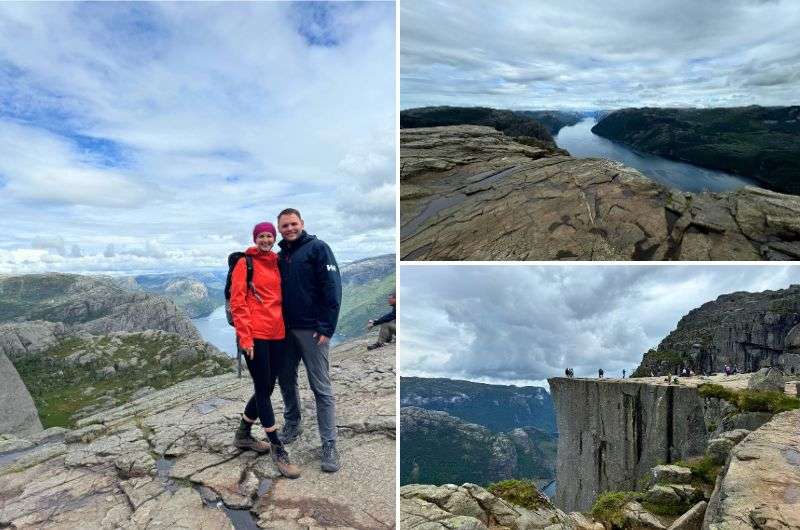
Pulpit Rock
- Distance: 8 km (5 mi), out-and-back
- Elevation gain: 398 m (1,306 ft)
- Difficulty: Moderate
- Hiking time: 4–5 hours
- Trailhead: Google Maps link to trailhead
If you only have time for one hike in Norway, that’s sad, but you should probably make it this one. With some 300,000 people attempting it every year, the Pulpit Rock (or Preikestolen) hike is of the most famous treks that the country has to offer.
Why’s it so popular? Well, who wouldn’t love to be standing on a cliff platform 600 m (1,969 ft) above a gorgeous fjord? And as far as hiking in Norway goes, it’s not that difficult, either. Read all about my own experience on the Pulpit Rock hike in this article.
Getting there
Pulpit Rock is located near Stavanger, and the main trailhead is about an hour’s drive from the city. To get there, you can drive, take a Lysefjord ferry, or use public transport with buses from Stavanger. Parking at the trailhead is ample but paid, and it fills up quickly during peak times, so it’s best to arrive early.
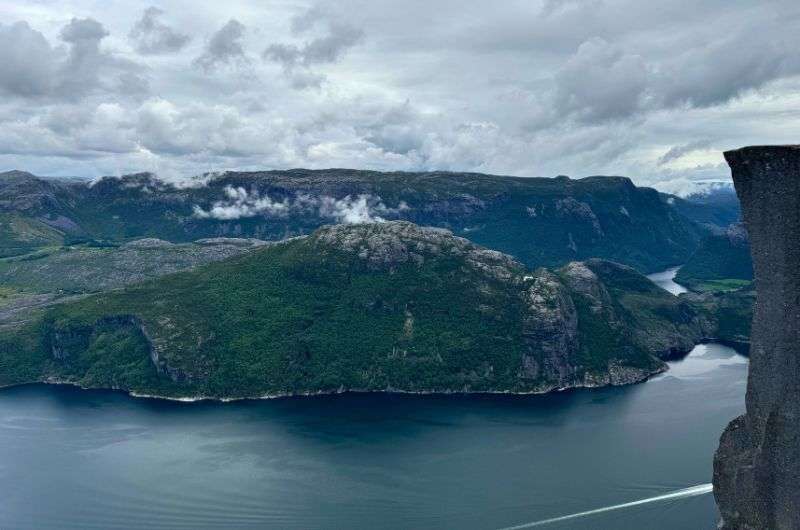
The views from Pulpit Rock are just indescribable. These pictures capture a glimpse, but standing there in person is an entirely different experience—breathtaking and humbling all at once
Trail conditions
The trail is well-marked, but it does involve some rocky and uneven terrain. While the incline is moderate, there are some steep sections. Good hiking shoes are recommended for stability, especially on wet days when rocks can be slippery.
Tips for hiking Pulpit Rock
- The best time to go: Early morning or late afternoon to avoid crowds, especially in summer. Sunrise and sunset hikes are stunning but require flashlights.
- Facilities: There are restrooms, a café, and a small shop at the trailhead. The café also has lockers if you need to store items.
- The cliff edge: There are no railings, so exercise caution near the edge. The drop is over 600 m (1,969 ft), and the wind can be strong.
- Photo opportunities: Expect a line at the edge for photos, especially in peak season. Bring a wide-angle lens if you want to capture the dramatic views.
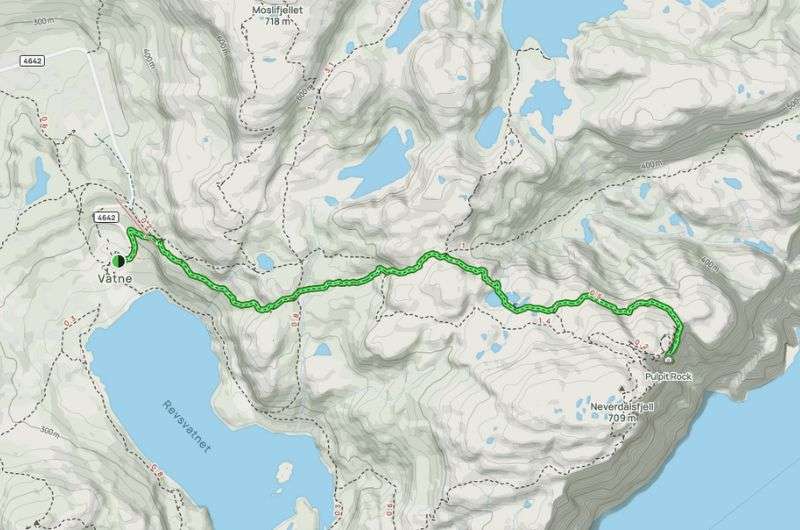
See the Pulpit Rock route in more detail on Alltrails
2. Kjerag and Kjeragbolten
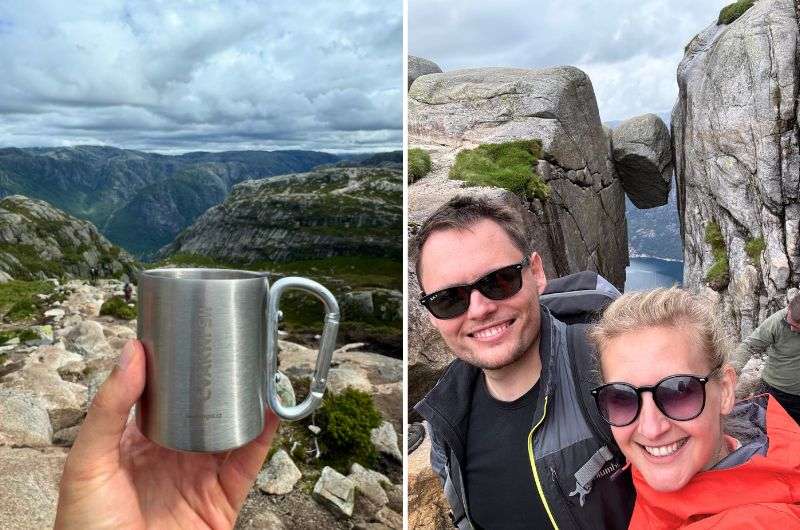
Us after conquering Kjeragbolten with the help of what's inside that lovely carabiner mug
- Distance: 9.3 km (5.8 mi), out-and-back
- Elevation gain: 583 m (1,913 ft)
- Difficulty: Hard
- Hiking time: 6 hours
- Trailhead: Google Maps link to trailhead
If Pulpit Rock sounds too easy for you, I can promise that you definitely won’t be laughing on this hike. Located at the other end of Lysefjord, I call Kjerag “the mother of steep climbs”. It’s tough and uncompromising, but it’ll be an experience you’ll never forget. Expect to cling to chain ropes for dear life.
You might be blown away first by the parking fee (NOK 300 [USD 27]), but the real showstopper is at the top of the mountain: Kjeragbolten. This is a large boulder wedged between two cliffs, luring thrill-seekers to step onto it. I didn’t indulge, personally, because I quite enjoy living.
Fun fact: At 1,100 m (3,608 ft), Kjerag is the highest peak around Lysefjord. The look down from the top is honestly one of the most insane drops I’ve ever seen.
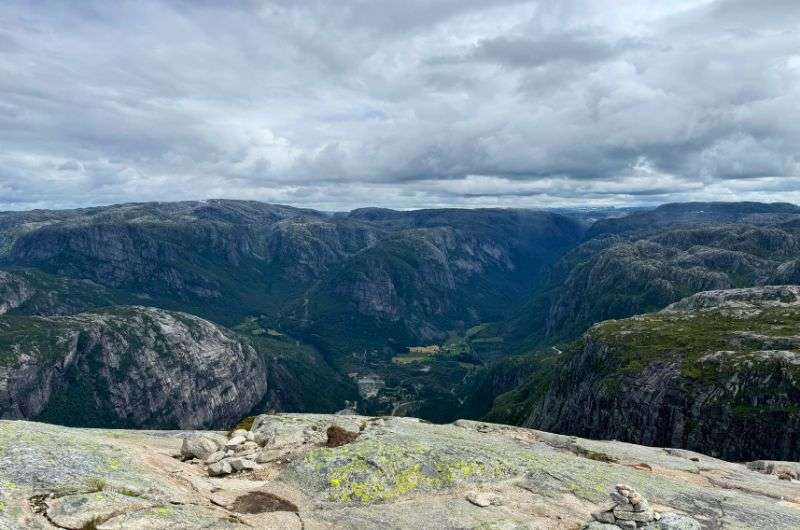
The Kjerag hike goes really high really fast (=it’s steep!)
Oh, and an important note: NEVER attempt this hike in stormy weather. The chains on the path are at risk of becoming lightning rods.
Getting there
Kjerag is located near Lysebotn and is best accessed from Stavanger. The drive to the trailhead parking lot takes around 2.5 hours and includes a scenic, winding mountain road. Alternatively, you can take a ferry across Lysefjord to Lysebotn. Parking is ample but paid, and it fills up quickly on summer weekends, so arriving early is recommended.
Trail conditions
The trail to Kjerag is challenging, with steep sections and some scrambling over rocky terrain. Steel chains are installed on some of the steeper areas for assistance. The trail is slippery when wet, and sturdy hiking boots with good grip are essential.
Tips for hiking Kjerag
- The best time to go: Early morning or late afternoon in summer to avoid crowds at Kjeragbolten (the famous boulder) and to secure parking.
- Facilities: There are restrooms and a café at the Øygardstøl trailhead, where you can grab snacks and water before starting the hike.
- The boulder: Kjeragbolten is suspended over a 984 m (3,228 ft) drop—approach with caution, as there’s no railing, and the rock can be slippery.
- Photo opportunities: A wide-angle lens is ideal for capturing the scale of the fjord below. Be prepared for a line if you want a photo on the boulder.
Read more about my adrenalicious time hiking Kjerag in this article:
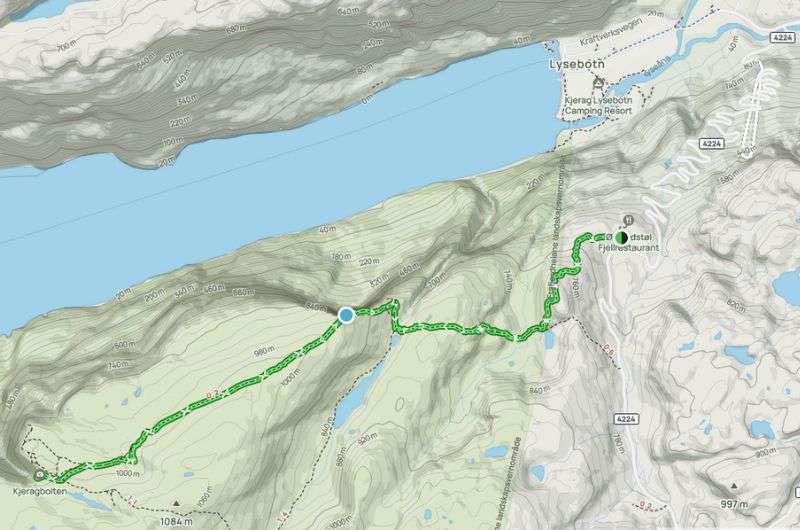
See the Kjerag route in more detail on Alltrails
Hardangerfjord hikes: An overview
- My hotel recommendation: Trolltunga Hotel, Odda
Hardangerfjord serves up some of Norway’s wildest, most jaw-dropping adventures. It's a place where nature just doesn’t know how to hold back.
First up is Trolltunga, a 10-hour commitment that pays off with a rock ledge that juts out high above the water. Then there’s Folgefonna glacier, for those who enjoy their hikes with crampons and a constant chill. Buarbreen glacier offers its own icy workout, while Nykkjesøyfossen takes you through waterfalls that are basically nature’s “no shower needed” excuse.
Tip: There’s a cluster of accommodation options around the villages of Odda and Tyssedal, so you’d best base yourself here. Now you just need to get ready for steep climbs, epic views, and temperamental weather.
The best hikes around Hardangerfjord (map)
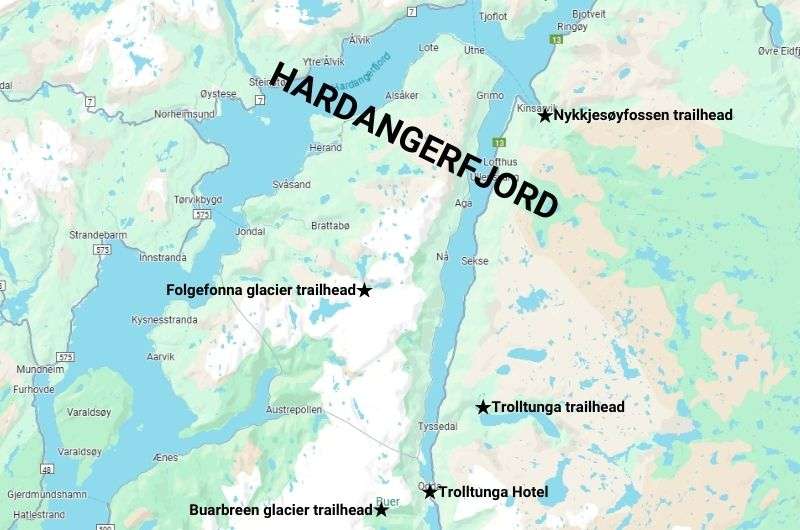
Partial map of Hardangerfjord and the surrounding area
3. Trolltunga
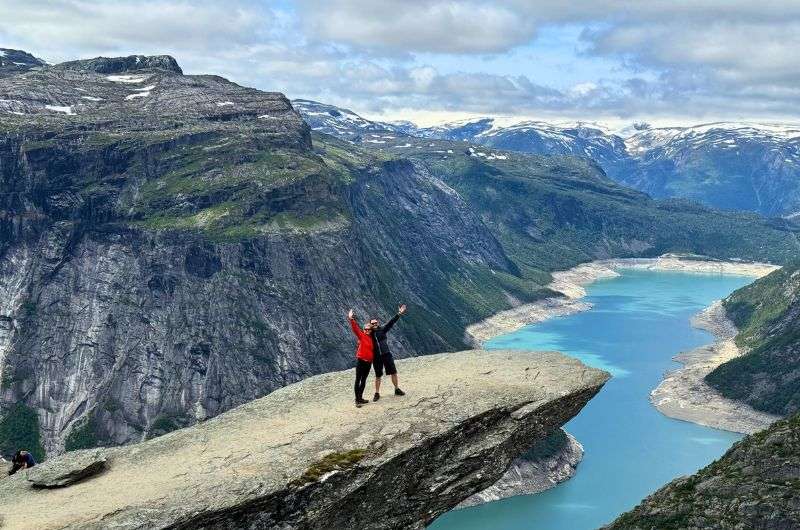
The famed Trolltunga hike and us out on the troll’s tongue
- Distance: 25.7 km (16 mi), out-and-back
- Elevation gain: 1,221 m (4,006 ft)
- Difficulty: Hard
- Hiking time: 8–9 hours
- Trailhead: Google Maps link to trailhead
Another one of Norway’s most popular hikes, Trolltunga isn’t for the faint of heart. Like Pulpit Rock, the Trolltunga hike culminates in a stomach-churning cliff edge, only Trolltunga’s platform is much smaller and narrower. Hence the name, which translates to “Troll’s tongue”.
The drop from the “tongue” to Ringedalsvatnet lake below is around 700 m (2,297 ft). Getting there requires a good level of stamina as well as physical fitness—the trail is over 20 km (12 mi) long and the round trip takes a full day.
Here’s my article on my experience with the Trolltunga hike. I’ll be honest—it was much a mental struggle as it was a physical one, but the stunning views from the top made it all worth it.
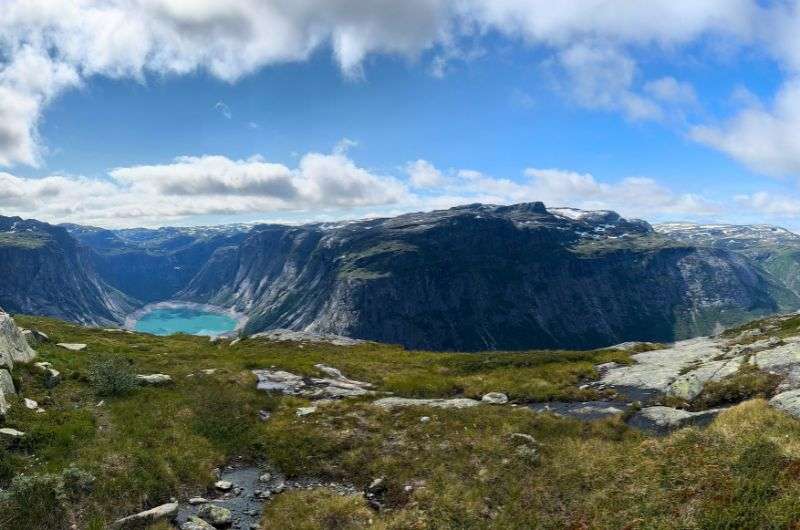
The views look like posters. Amazing!
Getting there
The hike begins at the Skjeggedal parking lot, just up the road from Odda. Parking is limited and fills up early, so aim to arrive before 6:00 am. Overflow parking is available at Tyssedal, with shuttle buses to the trailhead. Book shuttle tickets online in advance to avoid stress.
Trail conditions
The trail is well-marked with red "T"s, but expect steep ascents, rocky terrain, and some muddy areas, especially after rain. Good waterproof hiking boots and trekking poles are essential. The hike is long and physically demanding—be prepared for changing weather conditions and carry layers, water, and snacks.
Tips for hiking Trolltunga
- The best time to go: Start early in the morning to secure parking and avoid crowds, especially in summer. Weekdays are less busy.
- Facilities: There are toilets and a kiosk at the trailhead, but no facilities on the trail. Pack everything you need.
- The tongue: Be ready for long waits to take a photo on the ledge and be cautious while stepping out onto it.
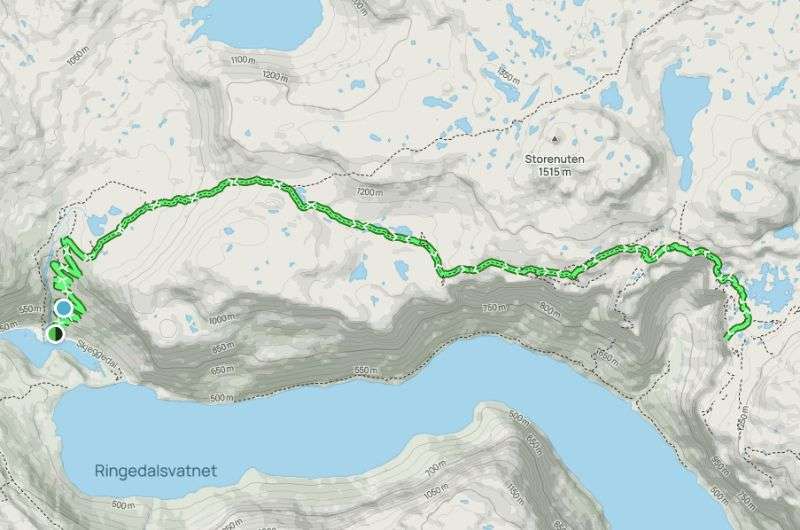
See the Trolltunga route in more detail on Alltrails
4. Folgefonna glacier
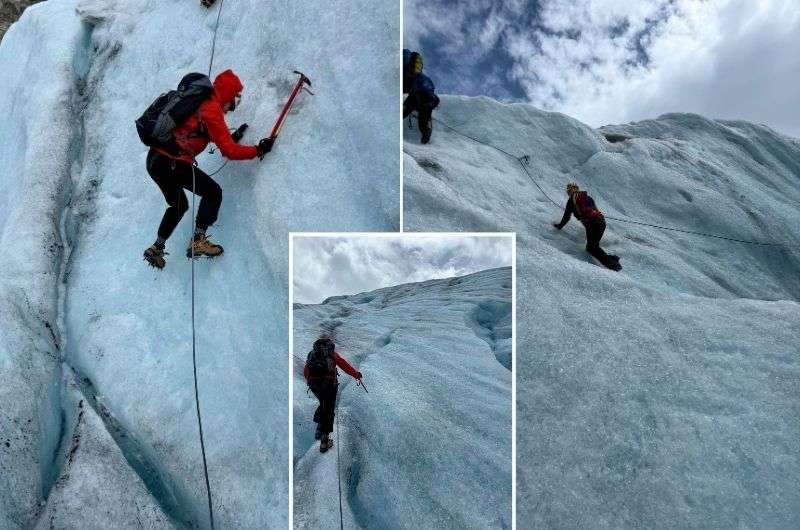
Folgefonna wasn't just hiking, it was literal climbing!
- Distance: 6 km (5 mi), loop
- Elevation gain: 400 m (1,312 ft)
- Difficulty: Moderate
- Hiking time: 5 hours
- Trailhead: Google Maps link to trailhead
Folgefonna is a unique maritime glacier, fed by massive rainfall from Norway’s west coast (via the city of Bergen, Europe’s unofficial rain capital). Its crevasses aren’t too deep, around 25 m (82 ft) at most, and I can confirm that walking on it is a really cool experience—figuratively and literally.
The thing is, practically, you can only hike the Folgefonna glacier as part of a guided tour. For NOK 1,905 (USD 174), Go Fjords offer 5-hour tours of Folgefonna, including transport to and from Bergen, as well as ice hiking equipment. Oh, and the other thing is that you can only do it in summer.
I highly recommend this hike, but here’s a tip: if you can afford it, hire a private guide instead. I would have appreciated covering more ground at my own pace.
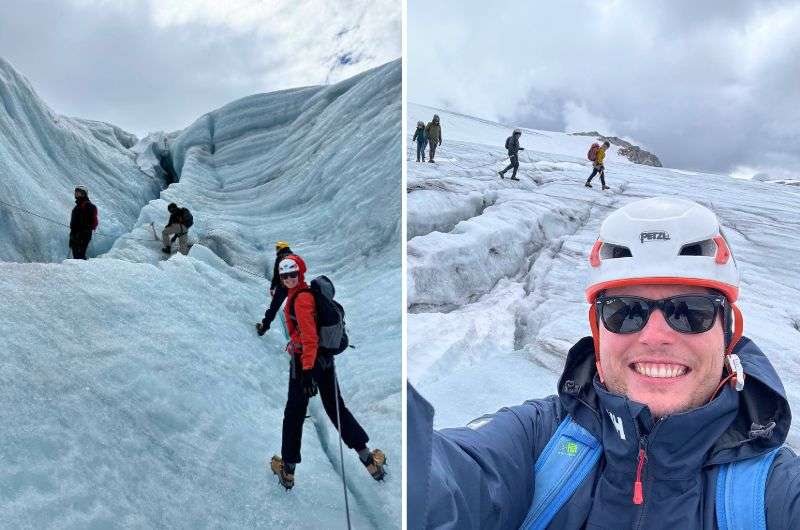
This was fun! And a little scary... but fun!
Getting there
Tours start at FONNA Glacier Ski Resort near Jondal, about an hour’s drive from Odda. Parking is available near the resort but can be limited in summer. Public transport options include guided packages from Bergen, as mentioned above.
Trail conditions
You’ll be walking on ice, so expect uneven surfaces, crevasses, and meltwater streams. Guided tours provide essential gear like crampons, harnesses, and ice axes. Always follow your guide’s instructions, as venturing off the designated route can be dangerous.
Tips for hiking Folgefonna
- The best time to go: June to September, when the glacier is stable and accessible. Morning tours are less crowded.
- Clothing: Wear warm, waterproof layers, gloves, and sunglasses for sun glare.
- Facilities: Fonna Glacier Ski Resort has basic amenities, including restrooms and a café, but bring your own snacks and water.
- Private tours: Consider hiring a private guide for a more personalized experience and access to quieter spots.
- Photos: Bring a waterproof camera or case to capture the incredible blue tones of the ice.
5. Buarbreen glacier
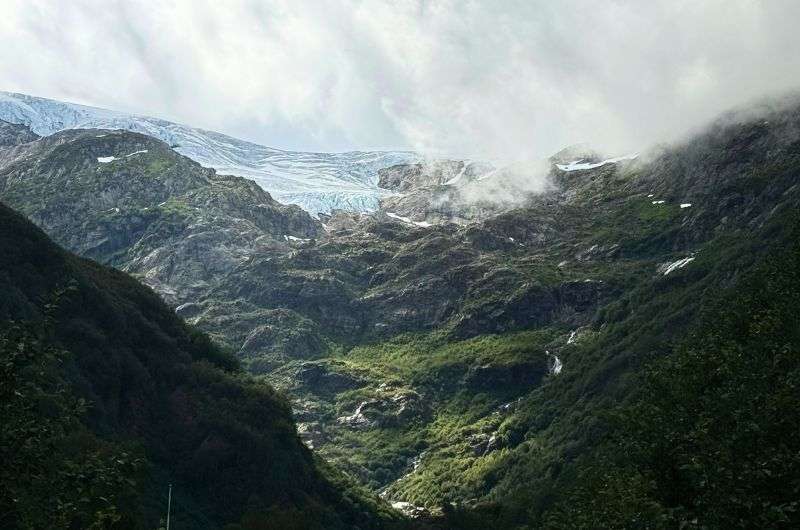
Buarbreen glacier
- Distance: 5.5 km (3.42 mi), out-and-back
- Elevation gain: 407 m (1,335 ft)
- Difficulty: Hard
- Hiking time: 3 hours
- Trailhead: Google Maps link to trailhead
If you’re up for a challenging scramble over rocks, ropes, and streams, this is the Norwegian hike for you. Buarbreen glacier is basically one of Folgefonna’s babies, but don’t be fooled—this hike is small but mighty. In other words, it's a natural obstacle course with a challenging incline.
Fun fact: Glacier ice looks blue because glaciers only reflect blue light. Put on some sturdy, waterproof boots, and get ready for some epic aquamarine views!
Getting there
The Buarbreen glacier trailhead is located near Odda, about a 10-minute drive from the village. Parking is available but limited and fills up fast in summer, so aim to arrive early.
Trail conditions
This challenging trail involves steep, rocky terrain and several sections with ropes to help you cross streams and navigate steep areas. Good hiking boots and rain gear are essential, as the trail can be muddy and slippery, especially after rain.
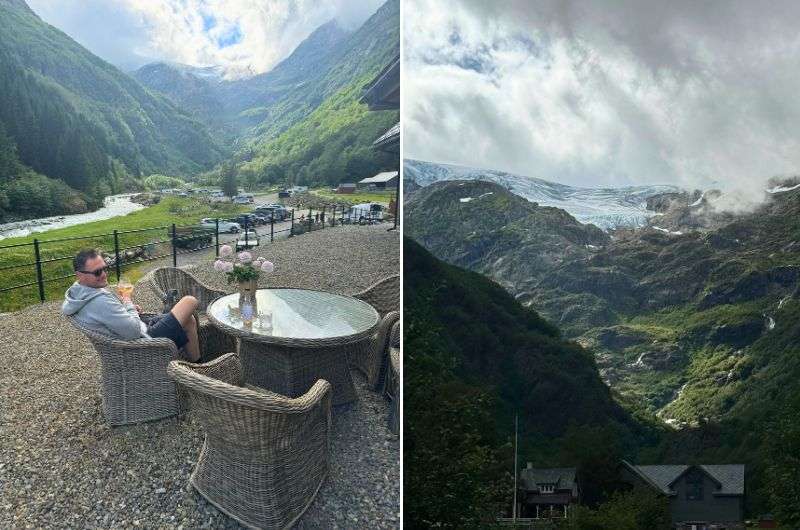
But you can always just chill and enjoy the view with a drink in your hand...it’s up to you
Tips for hiking Buarbreen Glacier
- The best time to go: Mornings to avoid crowds, especially in peak season.
- Facilities: Limited; no amenities at the trailhead, so bring water and snacks.
- Photo opportunities: The views of the glacier and surrounding valley are breathtaking, especially as you get closer to the ice.
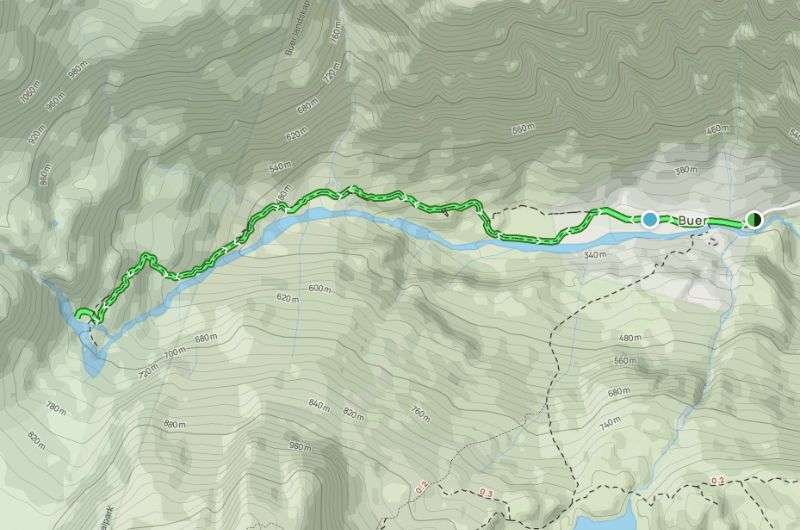
See the Buarbreen glacier route in more detail on Alltrails
6. Nykkjesøyfossen
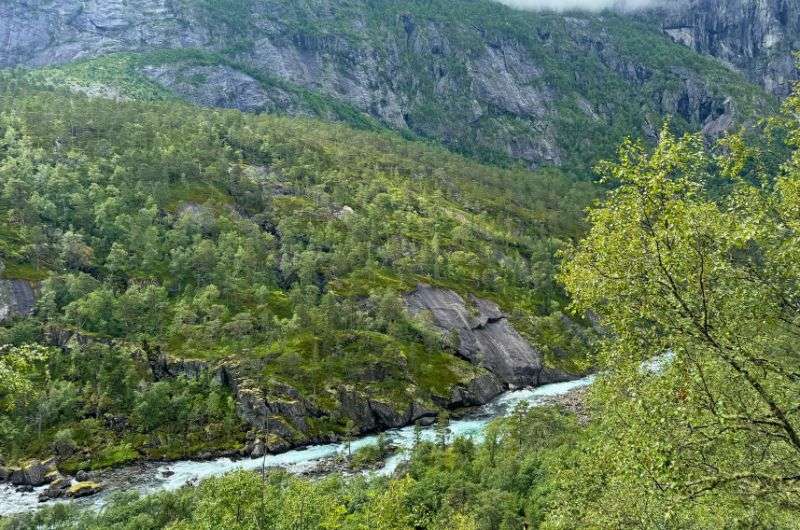
The journey to the waterfalls
- Distance: 10.8 km (6.7 mi), out-and-back
- Elevation gain: 617 m (1,335 ft)
- Difficulty: Hard
- Hiking time: 4 hours
- Trailhead: Google Maps link to trailhead
Waterfall enthusiasts, rejoice! Slightly inland from Hardangerfjord's Sørfjorden branch, the hike to the Nykkjesøyfossen waterfall takes you past two other falls! Okay, it’s not exactly Niagara, but this right here is some of the best waterfall-based hiking Norway has to offer.
It’s slippery and otherwise challenging (read: steep), but the three waterfalls greatly liven up the ordeal. First up is Tveitafossen at 200 m (656 ft) above sea level, then Nyastølfossen at 400 m (1,312 ft), and Nykkjesøyfossen tops it all off at 600 m (1,969 ft).
Good to know: There’s free parking at the trailhead, which is something of a rarity in Norway. Also, bring a good-quality rain jacket because you're bound to get wet at several points.
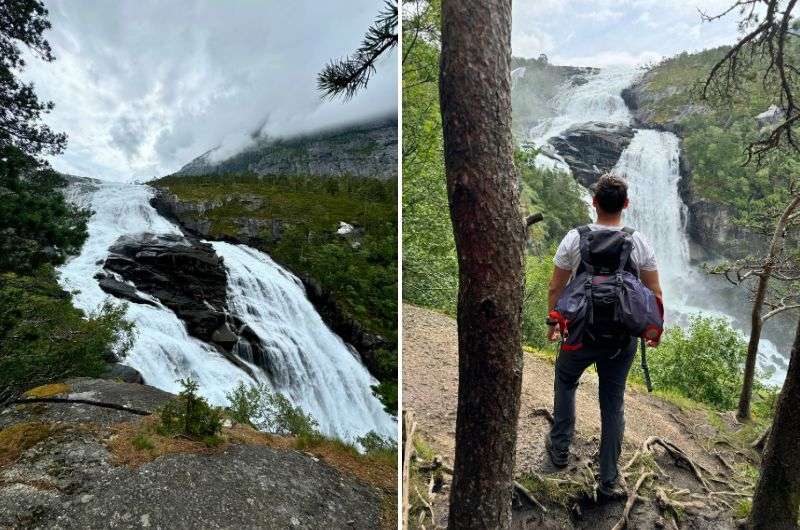
And then we spotted them: the beautiful waterfalls on the Nykkjesøyfossen hike
Getting there
The trailhead for Nykkjesøyfossen is just outside the village of Kinsarvik. Parking is limited, so it’s best to arrive early, especially at weekends.
Trail conditions
This moderate trail takes you through lush forest and along rocky paths. Expect some steep and slippery sections, especially near the waterfalls. Waterproof hiking boots are recommended, as the mist from the falls can make the rocks wet.
Tips for hiking to Nykkjesøyfossen
- The best time to go: Early morning or late afternoon for fewer crowds and softer light for photos.
- Facilities: No amenities at the trailhead, so bring water and snacks.
- Photo opportunities: The waterfall is spectacular, with a great view from the base. Bring a waterproof case for your camera or phone due to the mist.
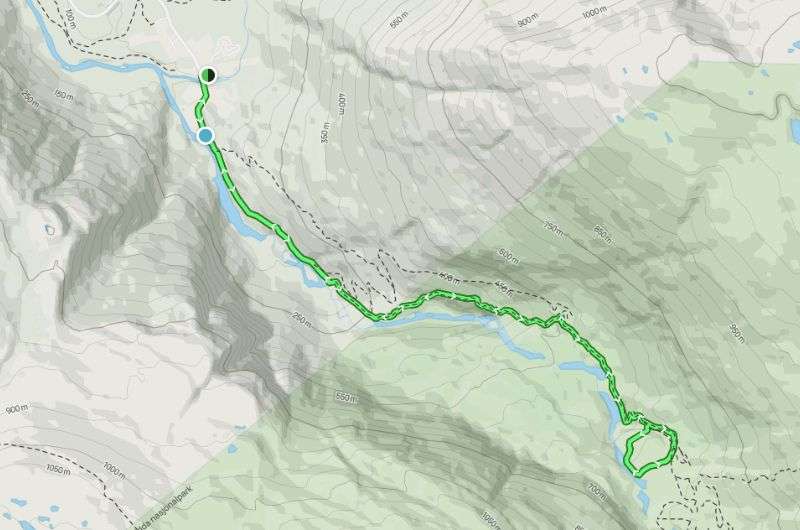
See the Nykkjesøyfossen route in more detail on Alltrails
Jotunheimen National Park hikes: An overview
- My hotel recommendation: Radisson Blu Resort, Beitostølen
Jotunheimen National Park, located in the middle of Southern Norway, is the country’s wild, high-altitude playground. This is where you come for towering peaks, glacial valleys, and hikes that feel both exhilarating and humbling.
Jotunheimen is home to Galdhøpiggen, Scandinavia’s highest mountain. At 2,469 m (8,100 ft), this is a rocky scramble that rewards you with sweeping, snow-dusted views. Then there’s Besseggen Ridge—a hike with enough jaw-dropping ridge-walking to cure anyone’s fear of heights.
Both trails offer epic views and test your endurance, and I’m here to tell you why they’re worth it.
The best hikes in Jotunheimen National Park (map)
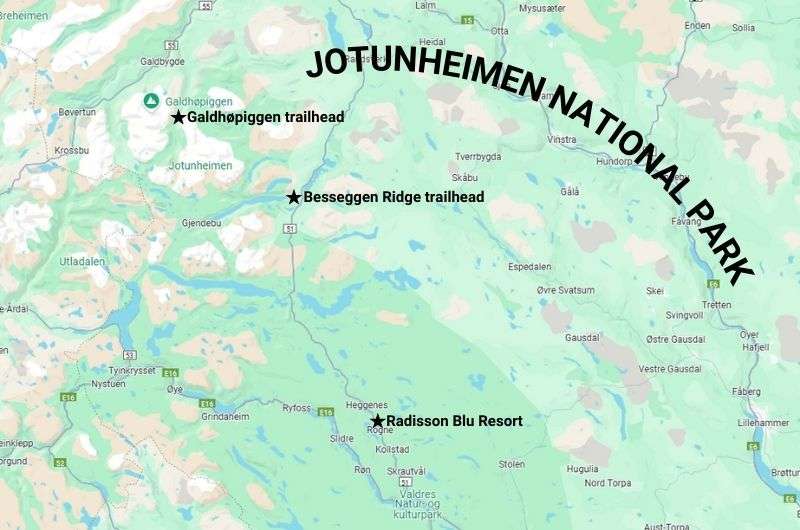
Partial map of the Jotunheimen National Park area
7. Galdhøpiggen
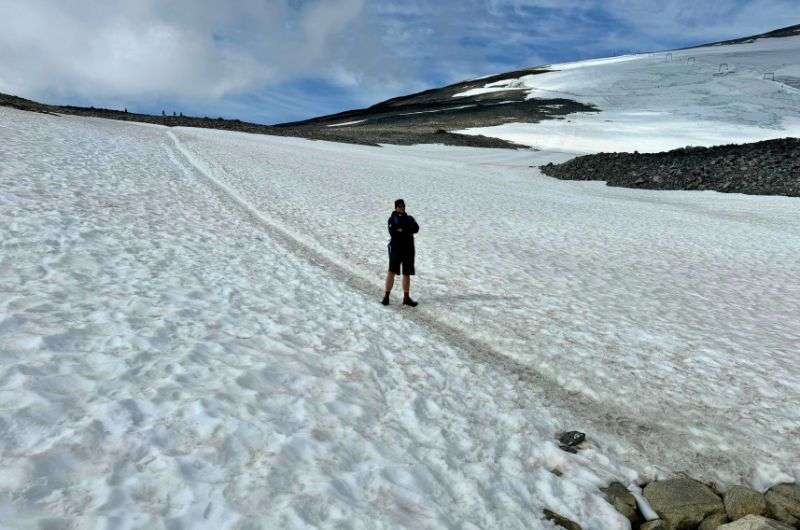
Galdhøpiggen is a challenging one. Oh, and get ready for snow!
- Distance: 12.2 km (7.6 mi), out and back
- Elevation gain: 1,482 m (4,862 ft)
- Difficulty: Hard
- Hiking time: 7–9 hours
- Trailhead: Google Maps link to trailhead
Galdhøpiggen is Norway’s (and Scandinavia’s) tallest mountain; the crown of Northern Europe right in the middle of Jotunheimen National Park. Climbing it is like taking leg day to a whole new level—2,469 meters, to be exact. I loved that the rocky ascent kept me guessing, and the amazing views make every breathless step worth it.
Tip: As ever when going on a glacier hike, my advice is to wear layers. But because this particular mountain path is so long exposed, make sure you can peel your layers off easily as needed, especially if you attempt the hike in summer.
At the summit, you’ll feel like you’re on top of the world (figuratively and literally), and it might just be the quietest place you’ll ever experience. That is, if you ignore your screaming leg muscles.
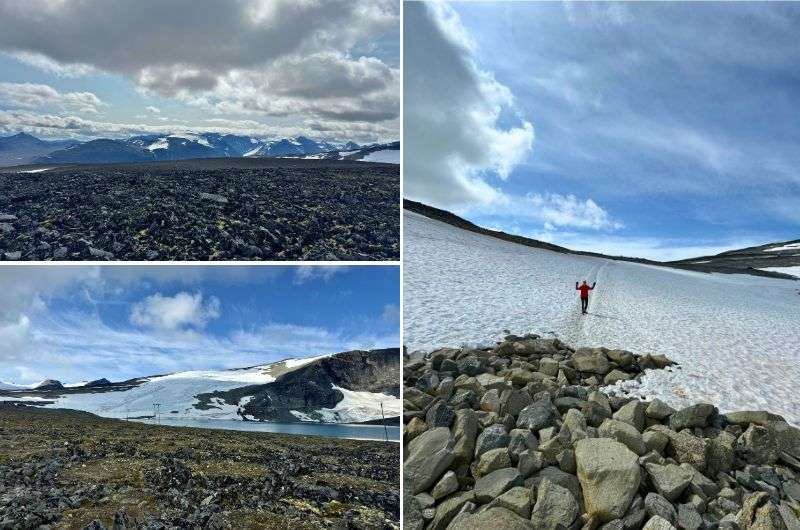
The terrain on the Galdhøpiggen hike will give your legs a real workout
Important note: Do NOT attempt to reach the Galdhøpiggen summit in bad weather.
Getting there
The main trailheads for Galdhøpiggen are Juvasshytta and Spiterstulen. Juvasshytta is accessible by car and includes a glacier crossing (guided tour required), while Spiterstulen offers a longer, non-technical route. Both have paid parking, which can fill up during peak season.
Trail conditions
From Juvasshytta, the hike includes a glacier crossing with crevasses (guided only). The Spiterstulen route is challenging, with steep, rocky terrain and substantial elevation gain. Both routes require sturdy hiking boots, warm layers, and weatherproof gear.
Tips for hiking Galdhøpiggen
- The best time to go: Summer months (June–September) for safer conditions; morning starts are best.
- Facilities: Both Juvasshytta and Spiterstulen trailheads have restrooms, cafés, and gear rentals.
- Photo opportunities: Panoramic views from Norway’s highest peak; a wide-angle lens is ideal for capturing the vast landscape.
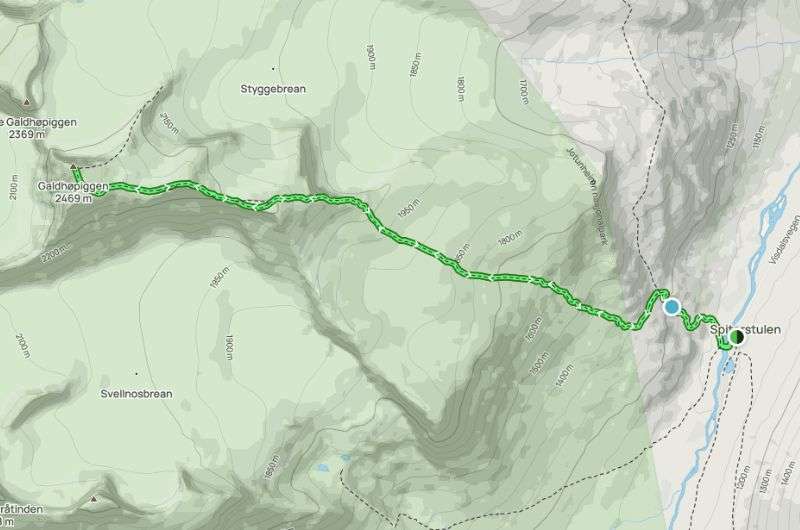
See the Galdhøpiggen route in more detail on Alltrails
8. Besseggen Ridge
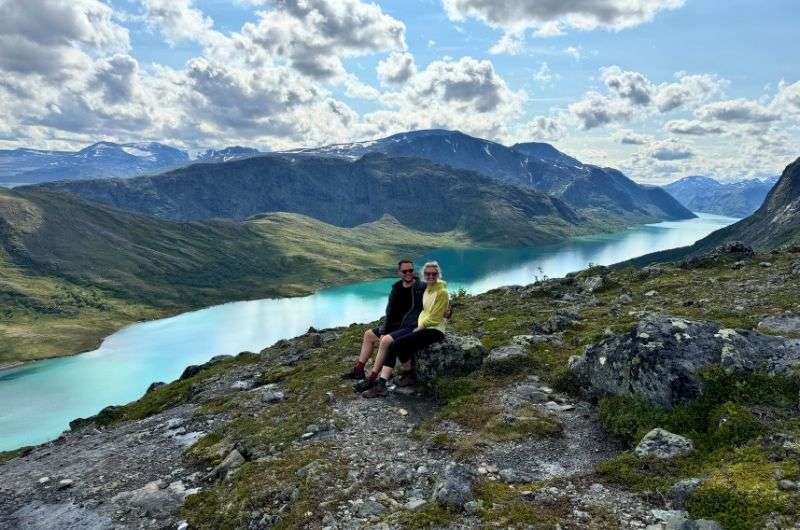
The turquoise color of the water is unreal! @ Besseggen hike
- Distance: 14.3 km (8.9 mi), point-to-point
- Elevation gain: 1,074 m (3,523 ft)
- Difficulty: Hard
- Hiking time: 6–8 hours
- Trailhead: Google Maps link to trailhead
Fun fact: The Besseggen Ridge is Norway's most popular one-day hike, with over 30,000 people completing it every year. It's a real hikers’ highway, but pro tip: you can avoid the worst of the crowds by not planning your trip for July or August, and by setting off as early in the day as possible.
Given it’s such a busy trail, should you bother with the Besseggen Ridge hike? Yes, yes, ALWAYS yes! Walking along a narrow pass between two bodies of water made me feel like Jesus—powerful, unstoppable, and proud.
What’s more, the atmosphere on the hike feels totally unique in Norwegian terms; there’s this almost American West vibe about it. Sure, it’s a hike in Norway that everyone wants to do, but there are completely sound reasons for it.
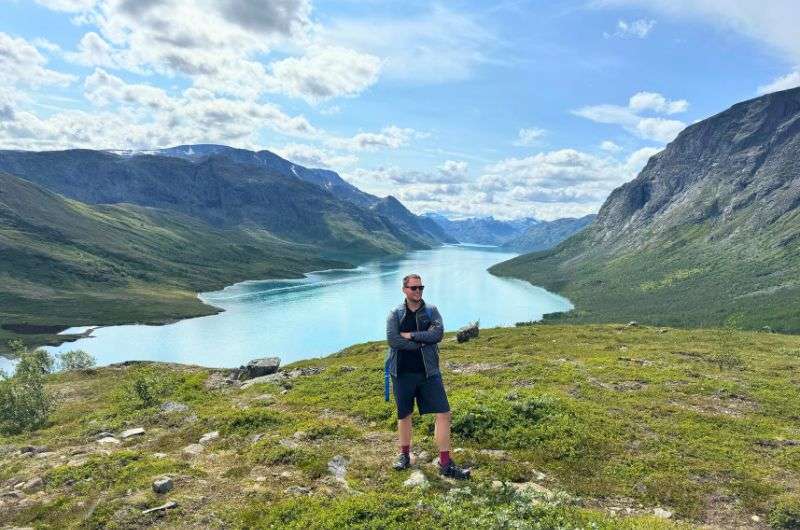
I got a good dose of endorphins after the Besseggen Ridge hike, smiling all the way back down
Getting there
The Besseggen Ridge hike starts in the village of Gjendesheim. Most hikers take the morning ferry from Gjendesheim to Memurubu and hike back, but it’s possible to do it the other way around (like I did). Ferry tickets can sell out in peak season.
Trail conditions
This challenging trail includes steep ascents and a dramatic ridge section with exposed areas. The trail is rocky and can be slippery, especially in wet weather. Good hiking boots and trekking poles are highly recommended.
Tips for hiking Besseggen Ridge
- The best time to go: Early morning, especially if using the ferry, to avoid peak crowds on the trail.
- Facilities: Gjendesheim has a café, restrooms, and a small shop. There are no facilities along the trail.
- Photo opportunities: Incredible views of the turquoise Gjende lake and surrounding peaks; consider bringing a wide-angle lens.
Be sure to read my 8 ULTIMATE tips on hiking the Besseggen Ridge!
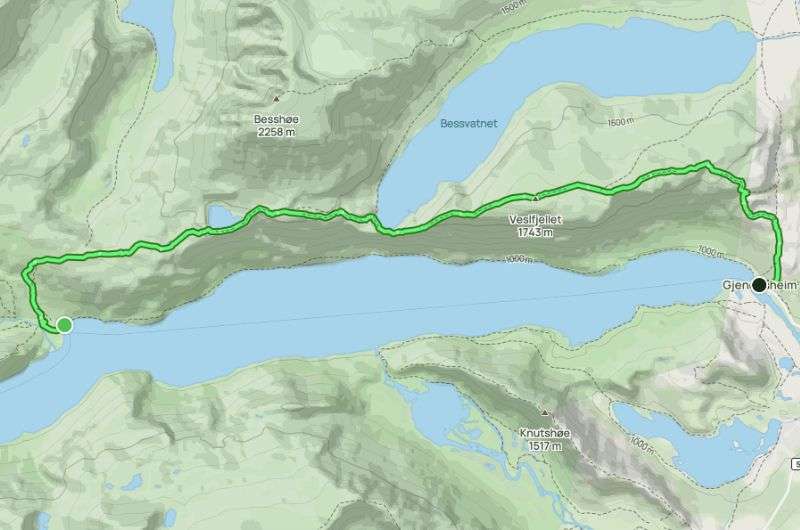
See the Besseggen Ridge route in more detail on Alltrails
Jostedalsbreen National Park hikes
- My hotel recommendation: Stryn Hotel, Stryn
Finally, Jostedalsbreen National Park between Ålesund and Bergen is glacier central, where Norway’s wildest landscapes are served icy cold and undeniably massive.
Start with the Briksdal glacier, a short but unforgettable trek with glacier views and waterfalls that practically chill the air around you. For something different, the Oppstryn Skule to Segestad trail takes you from an old schoolhouse up into mountainside farms, mixing Norwegian history with sweeping valley views.
Bear in mind that hotels in Jostedalsbreen are few and far between. I recommend staying in the small village of Stryn, right by the water.
The best hikes in Jostedalsbreen National Park (map)
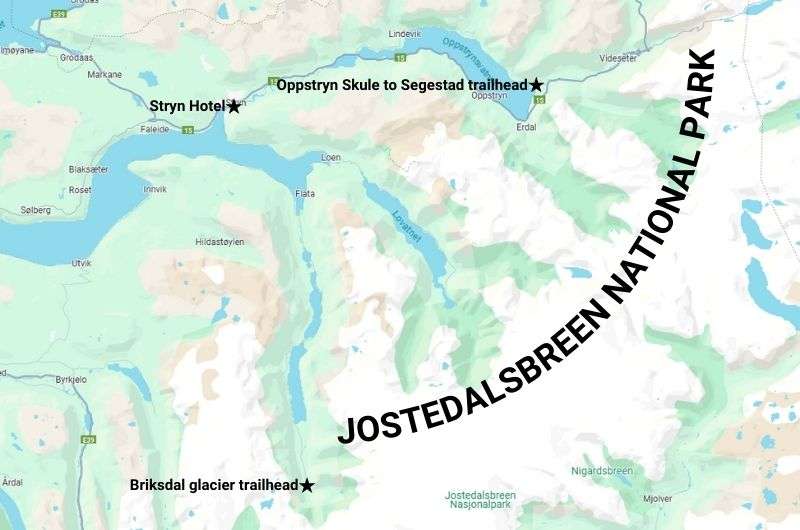
Partial map of the Jostedalsbreen National Park area
9. Briksdal glacier
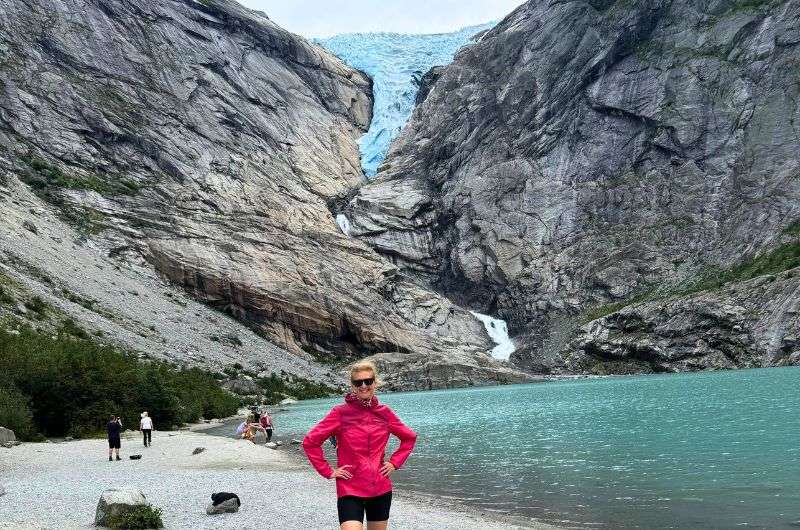
Briksdal Glacier cascading down the rocky mountain
- Distance: 5.3 km (3.3 mi), out and back
- Elevation gain: 1,063 m (3,488 ft)
- Difficulty: Easy
- Hiking time: 4–5 hours
- Trailhead: Google Maps link to trailhead
Not to flex too hard, but as a relatively experienced hiker, I almost never do “easy” trails. But I was told that Briksdal glacier has everything, and in short, yes, it’s pretty much true.
With massive rocks, thunderous waterfalls, and those crazy glacier views, who cares if this isn’t a proper hike when the scenery is this unreal? Be ready for traffic, though, especially if you’re visiting in peak season.
You’re overdue a fun glacier fact at this point, so here you go: These Norwegian glaciers are about 9,000 years old, having been around since the last ice age. The ice is now a shocking shade of blue due to its compact, airless structure.
Pro tip: If you’ve got kids, this is one hike they’ll love, with waterfalls and glacier mist everywhere. Informative signs also line the path, showing where the ice has reached at different points over the centuries.
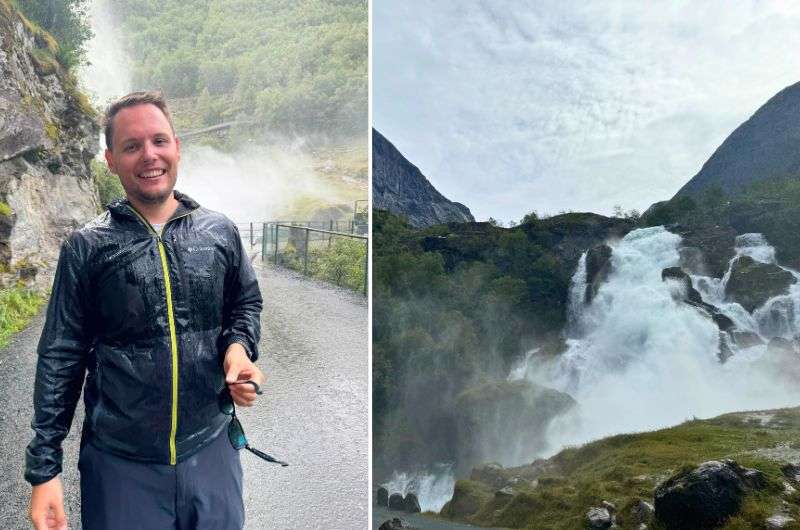
From my own experience I can recommend waterproof clothing on this hike, lol @ Briskdal Glacier hike
Getting there
The Briksdal glacier trailhead is near Olden, about a 40-minute drive from Stryn. Paid parking is available at Briksdalsbre Mountain Lodge, which serves as the starting point for the hike.
Trail conditions
This is a relatively easy, well-maintained trail, suitable for most fitness levels. The path includes some gentle inclines and paved sections but can be wet and slippery near the glacier due to melting ice and mist. Good shoes and a waterproof jacket are recommended.
Tips for hiking Briksdal glacier
- The best time to go: Early morning or late afternoon for fewer crowds.
- Facilities: Briksdalsbre Mountain Lodge has restrooms, a café, and a gift shop.
- Photo opportunities: Stunning views of the glacier as you approach; mist can enhance photos, so bring a camera cover.
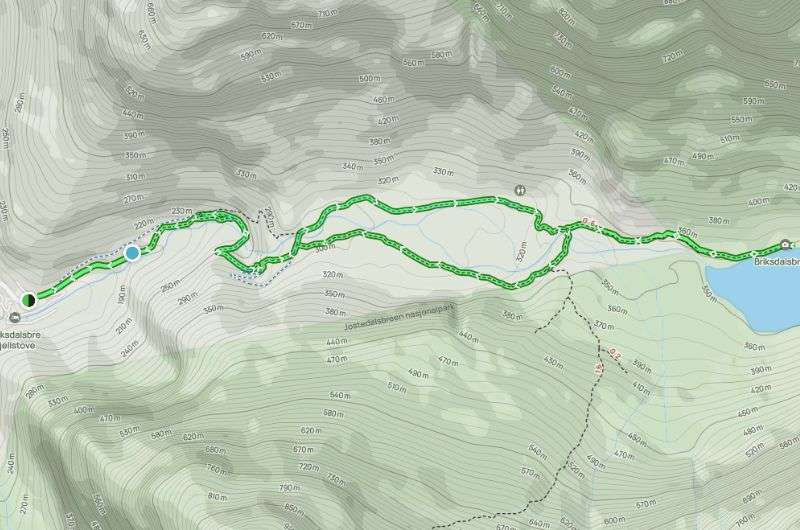
See the Briksdal glacier route in more detail on Alltrails
10. Oppstryn Skule to Segestad
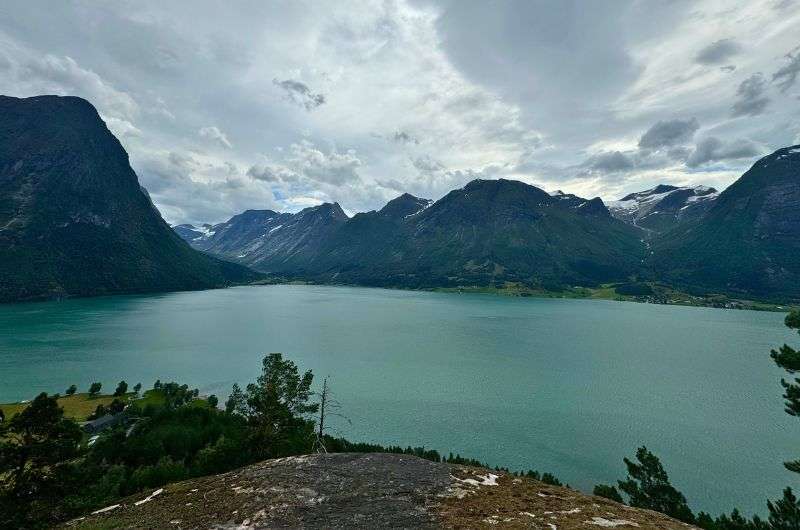
More poster-worthy scenery in Norway (but it never gets old, does it?)
- Distance: 4.7 km (2.9 mi), out and back
- Elevation gain: 296 m (971 ft)
- Difficulty: Moderate
- Hiking time: 2 hours
- Trailhead: Google Maps link to trailhead
Finally, this wonderful hike starts from the village of Hjelle—or more precisely, at Oppstryn Skule, the local school. (Yeah, I also thought it was a bit of a weird choice for a trailhead.) If I had no real-world responsibilities, this is the sort of scenic place I’d love to build my own little cabin. Hjelle, I mean; not the school.
Anyway, this dramatic Erdal Valley trail takes you through rugged granite formations with the vast, clear Oppstrynsvatn lake in view. It's a steep one with some killer viewpoints along the way, and the surrounding mountains rise around 1,300 m (4,265 ft), giving you that small-in-the-world feeling.
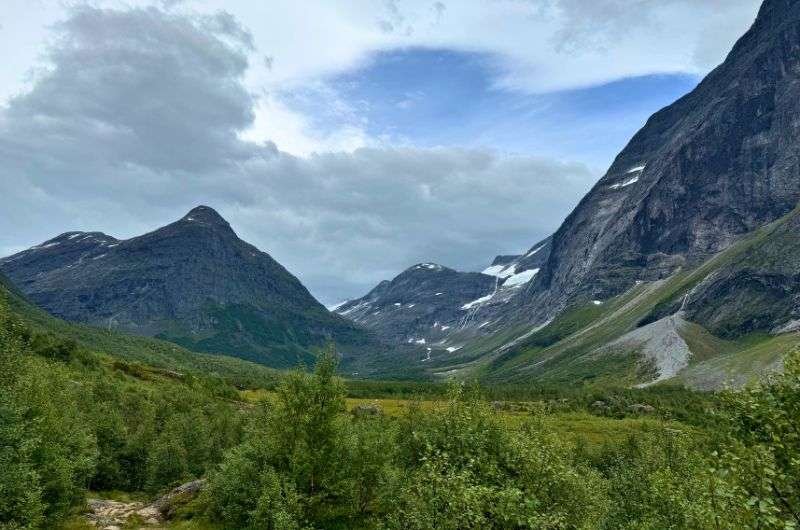
Erdal Valley
Segestad is the name of the climax of the trail. It sounds like a proper settlement, but it’s actually just a little old hut perched on the side of the mountain. Allow around an hour to reach it; this is a short hike, but it sure is rich in amazing scenery.
Getting there
The hike to Segestad begins at Oppstryn Skule, about a 10-minute drive from Stryn. Look for signs for "Oppstryn Skule" and "Segestad" near the school. Parking at Oppstryn Skule is free, but spots can fill up in peak season, so early arrival is recommended.
Trail conditions
This moderate hike follows a well-marked path with a steady incline. The trail can be muddy and slippery, especially after rain, so good hiking boots are essential.
Tips for hiking from Oppstryn Skule to Segestad
- The best time to go: Early morning or late afternoon to enjoy a quieter trail.
- Facilities: No facilities along the trail, so bring water and snacks.
- Photo opportunities: Beautiful views of Oppstryn Lake and the historic Segestad farm; great for capturing traditional Norwegian landscapes.
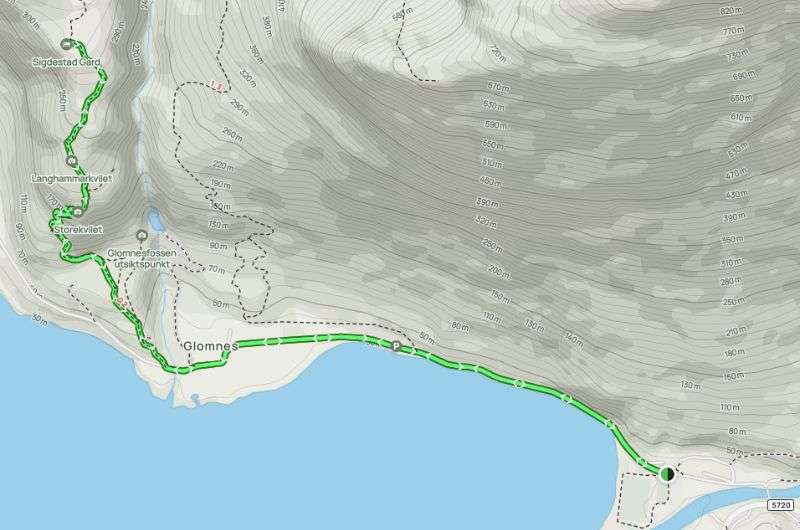
See the Oppstryn Skule to Segestad route in more detail on Alltrails
FAQ 1: Is hiking the Folgefonna glacier worth it?
Even though the price of the guided tour is a little steep (no pun intended), hiking the Folgefonna glacier is a worthwhile and unforgettable experience. The views of ice-blue crevasses, snow-covered peaks, and sweeping fjord landscapes below are simply surreal. It’s a good way to learn about Norway’s unique natural beauty up close, and it’s an all-around fantastic adventure. Just be prepared for chilly conditions!
FAQ 2: When is the best time for a hiking holiday in Norway?
Peak hiking season in Norway is between June and September. This is when trails are (mostly) clear of snow, temperatures are mild, and daylight lasts well into the evening.
July and August are the most popular hiking months as this is when the weather is the warmest, but for fewer crowds and colorful fall landscapes, try planning your Norway hiking holiday for early September.
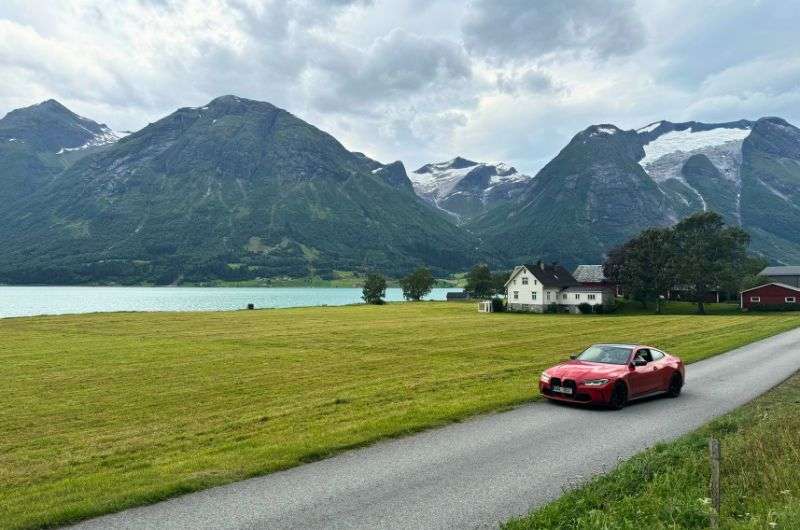
There are so many amazing hikes in Norway
When is the rainiest month in Norway?
The rainiest month in Norway is typically October, especially along the western coast where fjord regions get frequent downpours. Be prepared for wet conditions if you're visiting in fall—though rain can (and believe me, does) happen anytime in Norway, October often takes the prize for the most consistent showers.
You might also want to read my article on the best time to visit Norway for the fjords and northern lights:

FAQ 3: What is the most iconic hike in Norway?
For me, the best, or most iconic hike in Norway is a toss-up between Pulpit Rock and Besseggen Ridge. Both of these hikes are in the top 5 of the most popular hikes in the country, and I feel they have an excellent effort-reward ratio. The sense of accomplishment that I got after completing them was second to none.
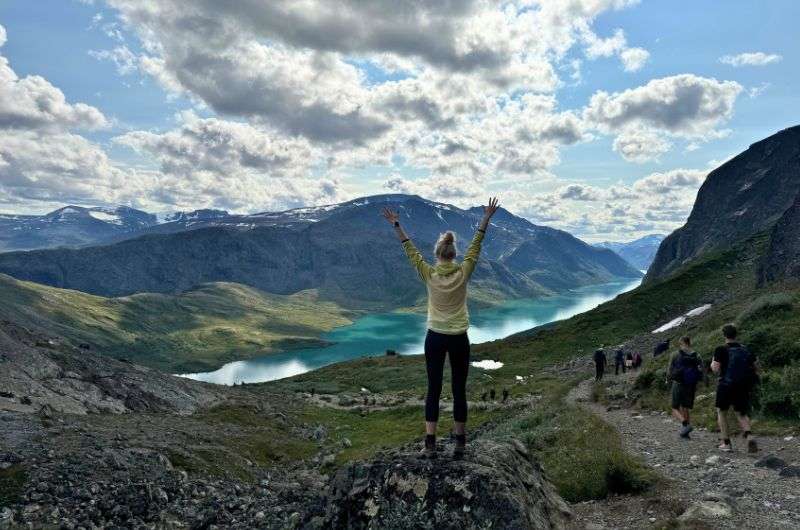
Besseggen Ridge is the one of the top two hikes that stole our hearts in Norway ♥
Essentially, if you're only looking for one amazing hiking experience in Norway, I say choose either Pulpit Rock or Besseggen Ridge.
Sometimes, all you need to do is take the first step... I've filtered out the best hotels in Norway for you
Save it for yourself to come back to later, or share with your friends on social media!
This post contains affiliate links. I earn a small commission if you make bookings through my links, at no additional cost to you. Thank you for your support!





Comments | Thoughts? Give us a shout!