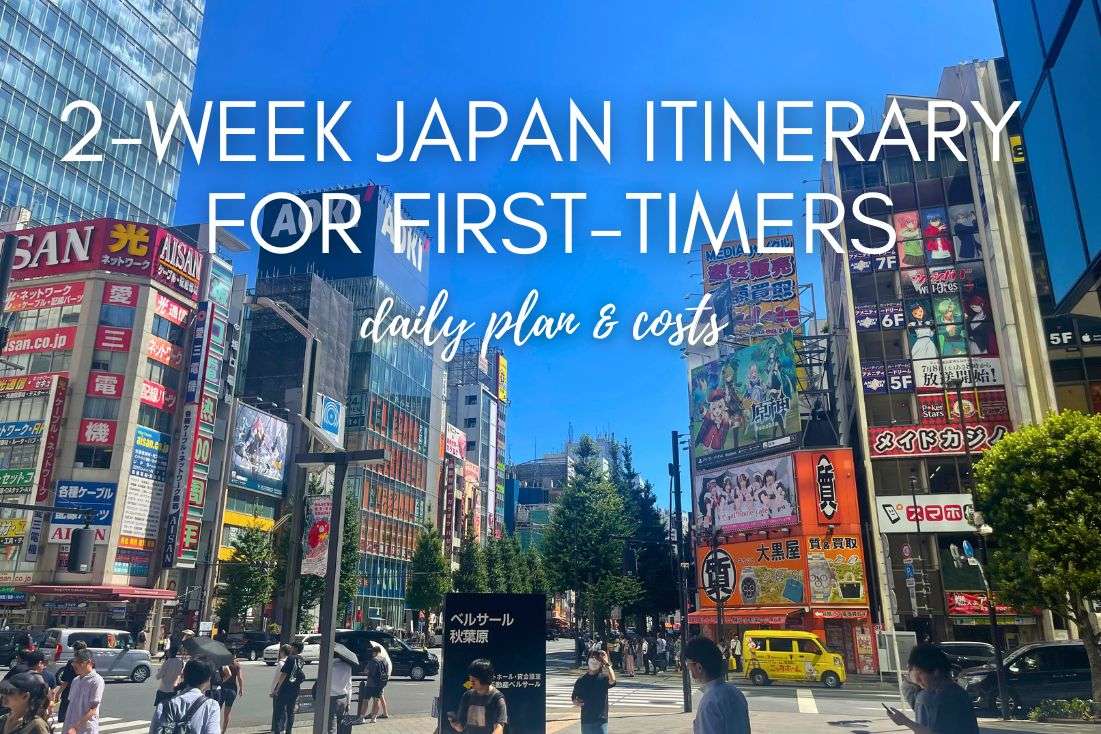
Ultimate 2-Week Japan Itinerary for First-Timers

Planning your first trip to Japan and don’t know where to start? This 2-week Japan itinerary hits the absolute top places I saw during my month-long trip, giving you just the best of the best so you’re not weeding through it all like I was (*cough*Tokyo sucks*cough*).
I’ll share my personal insights on how to navigate Japan’s peculiarities, fun facts for context, and travel tips so you’re not a clueless tourist.
You’ll get a mix of historic temples, fascinating cities and villages, mystical forests, and even tropical beaches. This itinerary is structured to maximize your experience without rushing through like a maniac. Travel times, directions, costs, and warnings—you name it, I’ve included it.
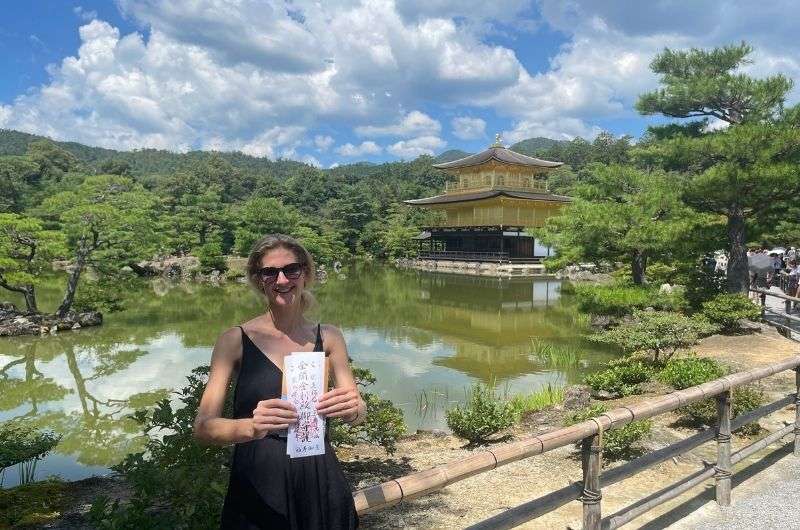
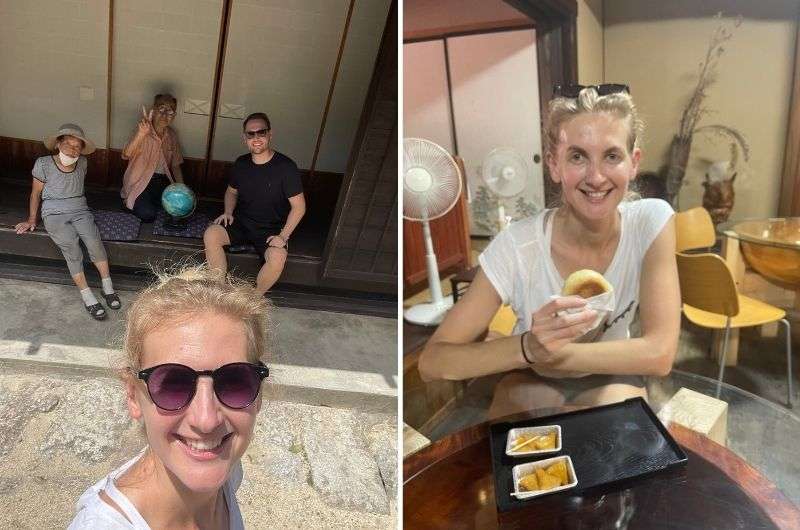
Who can read this @ Kyoto
Your two-week trip plan for Japan: cheat sheet
This 14-day trip plan is a carefully planned, step-by-step itinerary that balances a variety of culture and adventure, perfect for a first-time visitor:
- Days 1–2: Nikkō
- Day 3–5: Nagano (+ Edo villages Tsumago and Magome)
- Day 6–7: Mt. Fuji and Hakone
- Day 8–9 Kyoto (+ Arashiyama)
- Day 10: Day trip to Nara
- Day 11–12: Okinawa (for tropical vibes)
- Day 13–14: Tokyo
14 days in Japan is the bare minimum, and that’s considering you’d still need at least one more 3-week trip to cover the rest of the country. Not to mention the places you didn’t have time for on this 2-week itinerary, like DisneySea, Universal Studios in Osaka (and Osaka city), and much more!
Stay tuned! If you’re looking for a deeper dive into Japan’s northern gems like Hokkaido and Tohoku, stay tuned—another itinerary is coming soon!
Map of 2-week Japan itinerary
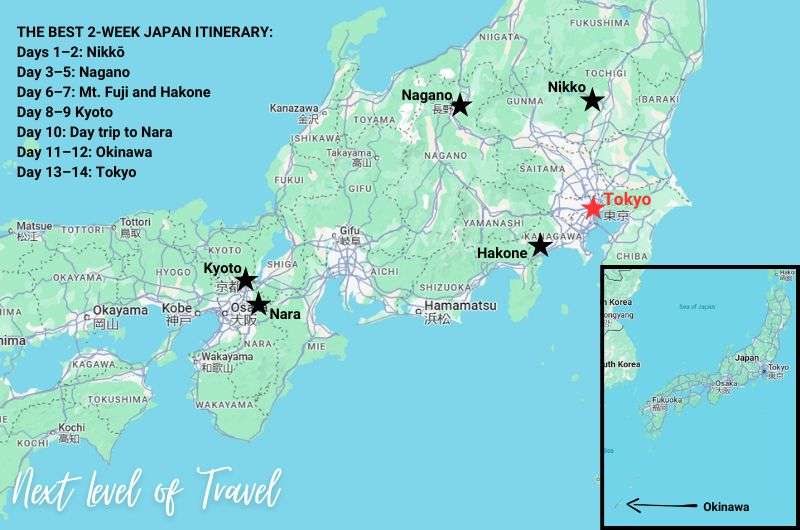
Here are all the spots you’ll visit during your 2 weeks in Japan
Sometimes, all you need to do is take the first step... I've filtered out the best hotels in Japan for you
Save it for yourself to come back to later, or share with your friends on social media!
I've already planned your ititnerary for the trip, complete with my travel tips.
Find more travel content, photos, and fun on:
10 Essential Japan travel tips for first-time visitors
I have an entire article that will prepare you for traveling in Japan for the first time, with tips about chopstick etiquette, bowing, and fun facts about the culture (read it here: 25 Travel Tips to Prepare You for Japan). Here are a few basics:
- Get a Suica or Pasmo card: These pre-paid cards make traveling on trains, buses, and even some vending machines and stores super easy. Buy one at the airport and just tap to pay.
- Cash is still king—Small restaurants, temples, and rural areas don’t accept credit cards. Withdraw cash at 7-Eleven ATMs, which work with foreign cards.
- Japan’s public transport is amazing—Trains are amazing, but I opted to rent a car for most parts of this itinerary because once you’re in a destination, buses can make things.
- Be mindful of train etiquette—Don’t talk loudly, don’t eat, and never answer phone calls on public transport. People will side-eye you in silent judgment if you do.
- Hotels are expensive (but restaurants aren’t): I generally paid USD 50–100 more per night to get the kind of standard I am used to. On the other hand, eating out in restaurants is cheap! Most of our dinners would have cost 3x as much in the United States.
- No tipping, ever—Tipping is considered rude in Japan simply because amazing service is considered standard and is a matter of pride for the staff.
- The Japanese are strict reviewers—When deciding to visit a place (like a restaurant) based on ratings, anything above a 3.5 will be great. People just have extremely high expectations and rate low. “Tabelog” is the best app for rating restaurants in Japan.
- Book major attractions in advance—Tickets for places like the Ghibli Museum and even some restaurants sell out weeks ahead.
- Pack light—space is limited—Hotel rooms are tiny, trains don’t have much luggage space, and some stations don’t have elevators. Read more: Packing for international travel. Oh, but don’t forget your best socks, they’ll always be on display for everyone to judge.
- Prepare for strict trash rules – There are hardly any public trash cans, so you’ll carry your trash until you find a place to dispose of it (for me, that was usually back in my hotel room when we did a daily backpack dump).
>> I’ve put tons more practical information about best months to visit, cherry blossom season, and getting around Tokyo in the FAQ section at the end of this article. <<
But now, let’s move on to the 2-week itinerary you’re here for:
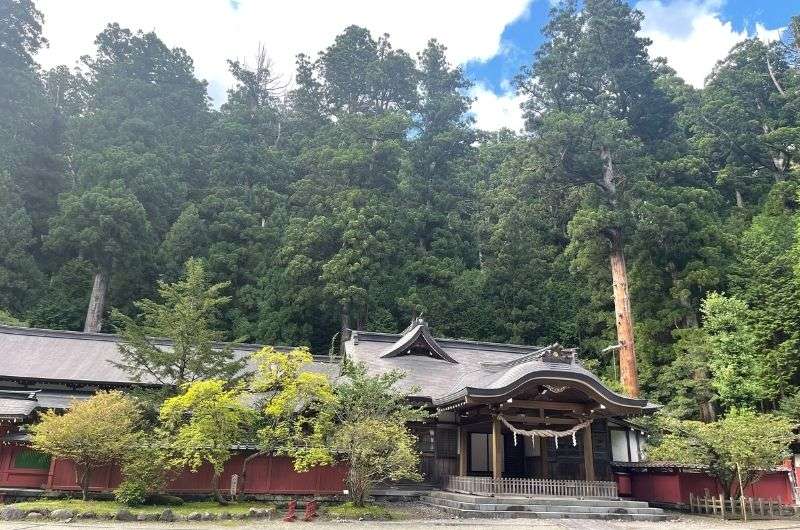
Day 1: Arrive in Tokyo → Drive to Nikko → Nikko National Park
Nikko National Park step-by-step — 2 week Japan itinerary
Activities and places visited on day 1:
- Morning landing in Tokyo
- Drive to Nikko (2.5 hours)
- Nikko National Park: The shrines and beautiful cedar forest (Toshogu Shrine, Futarasan Shrine, Rin’nōji Taiyū-in Mausoleum, Rin’nōji Main Hall)
- Shinkyo Bridge, because it’s famous and looks nice if you’re looking from the right angle
Recommended hotel: Fairfield by Marriott Tochigi Nikko for 2 nights
Restaurant tips: Grill & Steak Myōgetsubō | Numataya (both in Nikko)
Further reading: Nikko 2-day itinerary
Day 1, Getting There: Driving from Tokyo to Nikko (arrive 12 pm)
The drive from Tokyo to Nikko takes 2–2.5 hours, depending on traffic and which airport you landed at. I hope you’ve practiced your left-hand-side driving because now you get to try it out on your first day in Japan, jetlag and all!
Pro tip: See my tips on getting around Tokyo in the FAQ section at the end of this article.
Driving in Japan is, in a word, orderly. The locals give you space and follow rules with Zen-like patience, which is both refreshing and slightly unsettling. You feel that much more aware that you DO NOT know the rules and stick out like a sore thumb.
Here are a few driving tips for Japan:
- Tolls everywhere: Expressways have come with steep toll fees. Carry cash or get an ETC card to avoid fumbling at the booth.
- Speed limits: They’re lower than you might expect (60 km/h on regular roads, 100 km/h on highways). If you don’t stick to them, you’ll feel out of place.
- Follow the signs: Japan’s signs are surprisingly clear. Look for the English beneath the kanji—there’s usually a clue somewhere. You’re usually going slow enough to figure out the signs.
- Tiny roads: Rural and even some urban roads can be narrower than your comfort zone. Rent a tiny car and watch your mirrors.
Once in Nikko, there are plenty of parking lots all over, typically costing JPY 600–1000 per day. Pick one, and it’s time to explore.
Day 1, stop 1: Toshogu Shrine in Nikko National Park
- Price: JPY 1600 (USD 10)
- Opening hours: 9 am–5 pm
- Time spent here: 1.5 hours
About Nikko National Park
Nikko National Park is a cedar forest famed for its UNESCO World Heritage shrines and lush hiking trails. There’s a lot to explore, but it’s possible: I did it in the summer heat!
Nikko’s shrines and temples might look like one colossal complex on a map, but they’re actually separate entities; in practice, it doesn’t matter much because they’re all clustered together in roughly the same spot.

Fast & Furious: Japan edition
Visiting Toshogu Shrine
First, make your way to Toshogu Shrine, a Shinto shrine complex dedicated to Tokugawa Ieyasu, the first shogun of the Edo period. The White Gate, or Yomeimon Gate, has to be the most extravagant gate in Japan, with intricate carvings and decorations in flashy white and gold. I was honestly floored.
Spend a few minutes looking for the famous "See no evil, speak no evil, hear no evil" monkey carvings. You’ll find them near the Three Sacred Storehouses, near the Yomeimon Gate.
Next, it’s time to hike up the staircase to the actual tomb above the main hall. Along the way, the lush greenery really adds to the drama of the place.
Optional: As for the interior of the main hall. I say skip it if there’s a long line. The exterior is amazing, but inside, you have to shuffle around with the Japanese-speaking guide, and there’s nothing much to see anyway (though you will smell things… feet).
Read about etiquette at shrines and temples in Japan if you are apprehensive about doing the right thing at the right time.
Day 1, stop 2: Futarasan Shrine
- Price: Free to enter the complex, JPY 250–550 for some buildings
- Opening times: 8 am–5 pm
- Distance from last stop: 350 m (0.2 mi), a 4-minute walk
- Time spent there: 30 minutes
Right next door to Toshogu is Futarasan Shrine, which worships the area’s three sacred mountains. It was founded in 782 by Shodo Shonin, the man who brought Buddhism to Nikko.
I figured out pretty fast that bare and boring interiors are a theme in most of Japan’s shrines and temples, and I ended up skipping most of them. Stick to the outside.
Around Futarasan, you’ll notice plenty of those 'golden Easter bunnies', as my girlfriend calls them, or Japanese forest spirits as they’re actually known. Feel free to drop a donation; it's good shrine karma.
Touching history at Futarasan Shrine
Tea break? There’s a little shack behind the Haiden of Futarasan Shrine if you’re feeling like having a coffee or tea. They make their beverages from water from the sacred spring at the shrine.
Day 1, stop 3: Rin’nōji Taiyū-in Mausoleum (Rinnoji Taiyuin)
- Price: JPY 500 separately or JPY 1000 for a combination ticket that includes the mausoleum, the main hall, and the treasure house
- Opening times: 8 am–5 pm
- Distance from last stop: just a couple of steps
- Time spent there: 45 minutes
Rinnoji Taiyuin is guarded by a series of increasingly well-armored keeper statues—the closer you get to the tomb, the more impressive they get. I found that really neat, like they were displaying their power, saying, “Are you sure you want to get this close?”
After a climb past large lanterns covered by just the right amount of moss, you hit the mausoleum at the top. A guide will talk a bit about the history and show you around. I love history, so I was very much into it (though I had to read up on my own a bit).
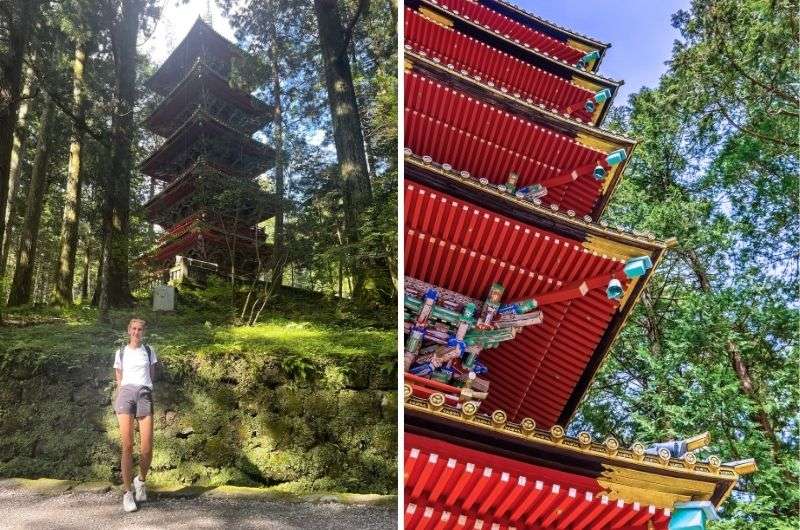
Just a casual five-story pagoda showing off in the middle of the forest. No big deal
Hungry? No worries
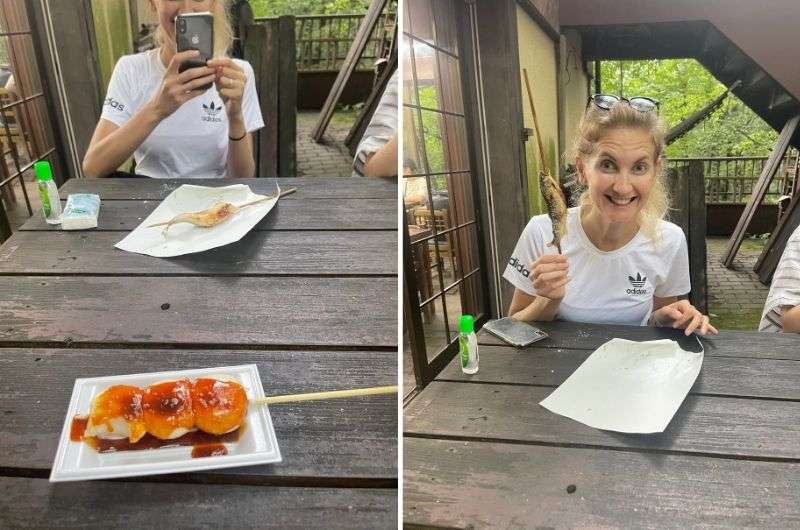
You’ll find plenty of food stalls selling everything from fried chicken to pancakes.
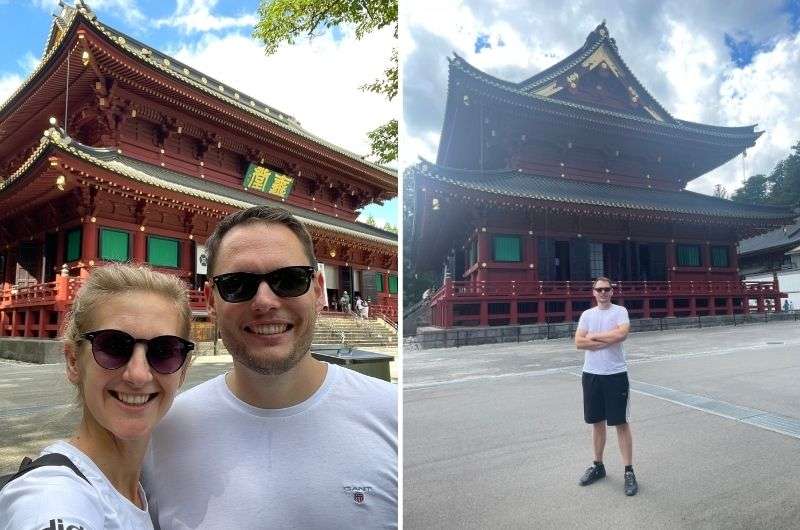
Day 1, stop 4: Nikkozan Rin’nōji Temple
- Price: JPY 400 or JPY 1000 for a combination ticket that includes the mausoleum, the main hall, and the treasure house
- Opening times: 8 am–5 pm
- Distance from last stop: 500 m (0.3 mi), an 8-minute beautiful walk
- Time spent there: 30 minutes
Nikkozan Rinnoji is a beast of a wooden structure that you can't miss. Unfortunately, the other hundreds of tourists won’t miss it either—this felt extremely crowded when I visited, so don’t expect serenity.
Right in front of the temple, there’s a 600-year-old cherry tree. Yeah, um, it’s just a big ol’ cherry tree. Honestly, I'm more of a cedar guy. There’s also a big bell in a little house right outside the main hall, and to me, this bell outshines even the Main Hall.
Not surprisingly, the interior of the main hall isn’t all that great either. But there is a big bonus there: it doesn’t smell like feet!
A quiet moment with centuries of history behind us @ Nikkozan Rinnoji
Optional stop: The Rinnoji Treasure House
We had bought the Rinnoji combination ticket, so the treasure house was already included in it, so we popped in. Gotta say, not sure I’d go again. If you feel like skipping it, you won’t be missing much. The little garden outside the treasure house was nice, though.
Day 1, stop 5: Shinkyo Bridge
- Price: JPY 300 or free if you don’t need to walk on the bridge (you don’t)
- Opening times: 8 am–5 pm (but you don’t need it to be open to take photos of it)
- Distance from last stop: 500 m (0.3 mi), an 8-minute walk
- Time spent there: 10 minutes
Shinkyo Bridge is often touted as one of the top three prettiest bridges in Japan, which I agree with, but it’s good to know that its beauty is largely due to the pretty natural background and the Daiya River views. Face the wrong way, all you’ll see are cars, tourists, and asphalt.
Pro tip: The bridge is the perfect last stop because it’s under the hill in the town. You can stop by any time just to take a photo and continue on your way.
Funny enough, you can’t actually cross it—it’s a bridge to nowhere. Feel free to pass on that (paid) experience. Instead, head over to the modern bridge right next to it, which actually gets you across and gives you the best photo ops of the old bridge.

My beautiful girlfriend in front of the pretty Shinkyo Bridge in Nikko
Fun fact: Legend says a priest needed to cross the river, so the mountain gods sent two snakes that turned into this crimson bridge.
Dinner in Nikko
Nikko’s restaurants are nothing to look forward to, so pay attention to reviews. My recommendations?
- Grill & Steak Myōgetsubō is close to Shinkyo Bridge, and the food is delicious. The best part is that you’ll be glancing at lush greenery through the large windows.
- Alternatively, have sushi at Numataya. It’s the smallest restaurant ever, so you’ll need to make a reservation or be ready to wait.
Day 2: Lake Chuzenji & surrounding waterfalls (Nikko)
Activities and places visited on day 2:
- Hangetsuyama Hike above Lake Chuzenji
- Kegon Falls, the tallest waterfall in Japan
- Yudaki Falls and optional walk around Yunoko Lake
- Senjōgahara Marshlands for just a quick look
- Ryuzu Falls, a waterfall shaped like a dragon (or so they say)
- British and Italian Embassy Villas for interesting architecture on the lake’s shore
Restaurant tips: eat lunch at one of the restaurants near Yunoko Lake
Further reading: Nikko 2-day itinerary
Rise and shine! Your second day in Japan and your second day in Nikko- what a lovely coincidence! Today is all about Japan’s incredible nature. First, you’ll head up to the hills to see the lay of the land, and then you’ll explore waterfalls, lakes, and more waterfalls. Let’s go!
Day 2, stop 1: Hike Hangetsuyama for the best views in just 30 minutes
- Price: Free
- Drive: 45 minutes from Nikko
- Time spent here: 1 hour
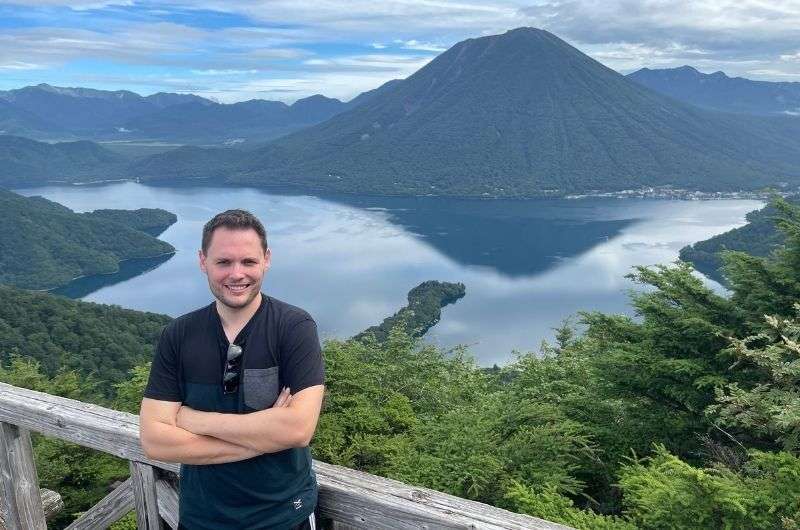
A 1 km (0.6 mi) hike to Mt. Hangetsu Observation Deck from the Mt. Hangetsu parking lot takes you to one of the best views of Lake Chuzenji (Japan’s highest natural lake) and Mt. Nantai (towering over it at 2,500 meters [8,200 ft]).
Gates open at 7 am, and I’d recommend you’re there at that time. I know, I know, but you traveled all the way to Japan to see things, right? No whining. You’re driving up most of the way up the mountain, so it’s not that hard—I’d call it a walk, not a hike.
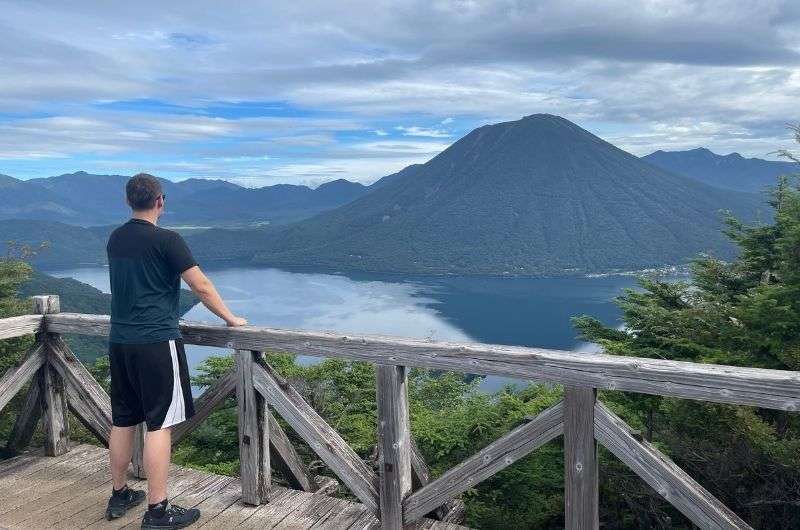
Stunning view with little effort at Mt. Hangetsu Observation Deck
It’s short, easy, and absolutely worth it—unless fog ruins everything. If you hike further, expect bears, monkeys, and a mosquito army. All this excitement and it’s not even 9 am yet!
Day 2, stop 2: Kegon Falls, Japan’s tallest waterfall
- Price: JPY 570 for elevator (worth it)
- Opening times: 8 am–5 pm
- Drive: 15 min
- Time spent here: 1 hour
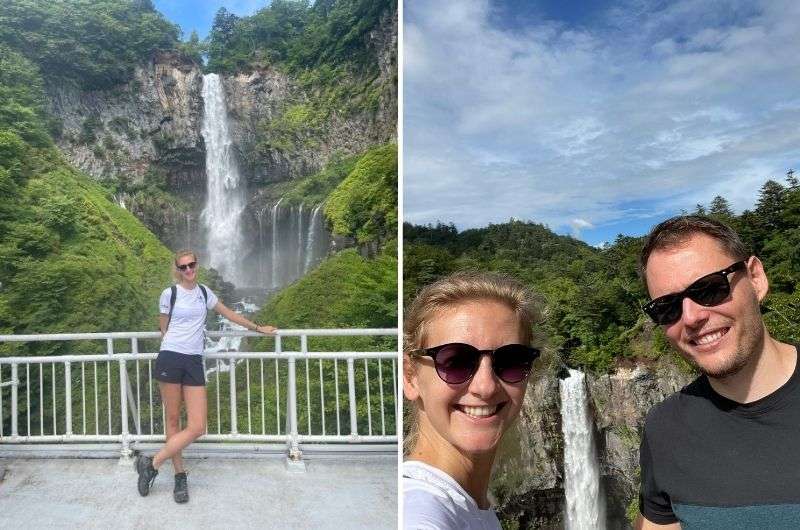
Posing by Kegan Falls
Japan’s tallest waterfall, Kegon Falls, is as impressive as they say, and it’s fun to visit, too.
The free upper platform is nice, but don’t stop there Take the elevator down for a way better angle. I know it sounds like a tourist trap but it’s not—the views are better from the bottom, and you can even spot a second waterfall if you try hard enough.
Bonus: If you have time, hit Akechidaira Ropeway for the perfect aerial view of Kegon Falls and Chuzenji Lake.
Day 2, stop 3: Yudaki Falls & Yunoko Lake walk or paddle boat
- Price: Free
- Drive: 20 min
- Time spent here: 1–2 hours (you can choose to skip the walk around Lake Yunoko)
Your next goal is to stare at Yudaki Waterfall from the top for a bit and then make your way through the short but steep (lots of stairs) path to the bottom of the falls where the views are much more dramatic.
Yudaki is massive (75 m/246 ft high, 25 m/82 ft wide) and looks more like a ski slope than a waterfall. There’s a little bistro up there where you can buy snacks and drinks to consume while you stare into the water.
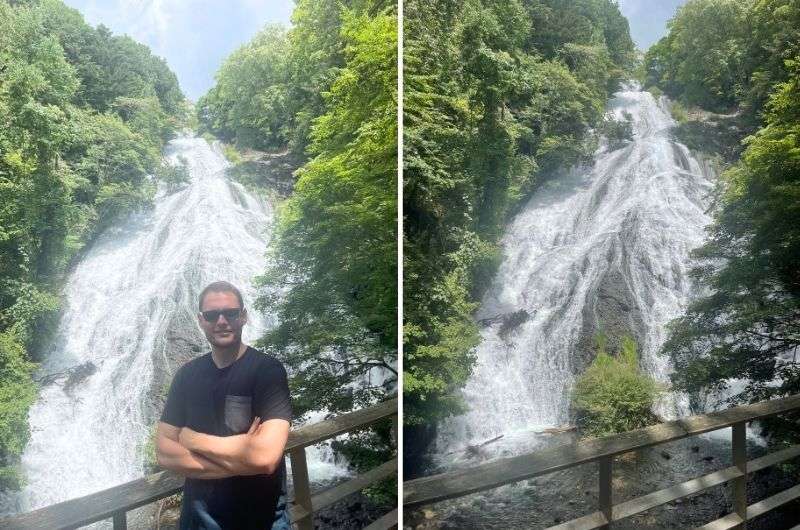
Find at least one difference (Yudaki Falls)
Then, walk the steep path to the base for the best view. I loved the walk down around the falls. There were so many dragonflies we wondered if they planted them there to make tourists happy! Remember, you are in bear territory, so stay on the path and don’t be quiet.
Optional: Yunoko Lake walk or rent a paddle boat
Optionally, you can continue around Lake Yunoko, a serene volcanic lake with sulfur-smelling air and stunning scenery. It takes about an hour on an easy trail, or you can rent a paddle boat and get out on the water.
Lunch break
There are some restaurants near Yunoko, but nothing spectacular, so just eat whatever you can find and carry on.
Who chose better? At the restaurant near Yunoko Lake
Day 2, stop 4: Senjōgahara Marshlands—just a quick peek is enough
- Price: Free
- Drive: 5 min
- Time spent here: 5–30 min
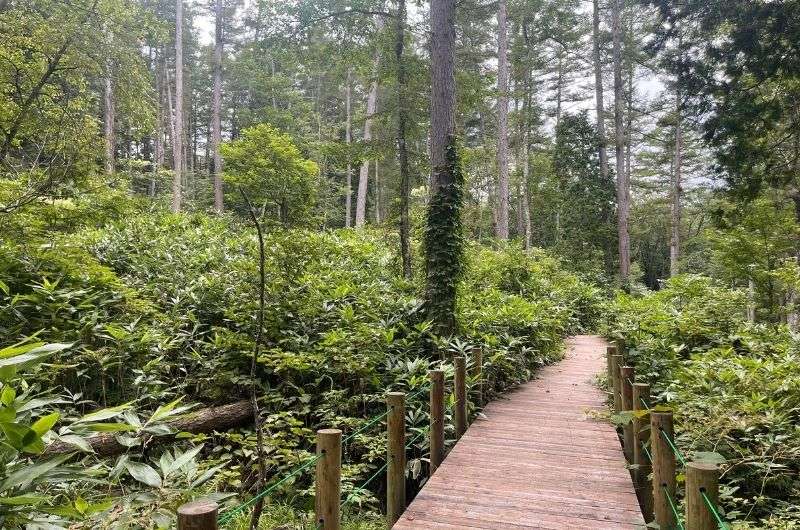
Flat. Grassy. Surrounded by mountain views. If you’re into marshes, walk the wooden paths for a while. We took an hour around the main parts from the Akanuma Nature Information Center, but it’s not something you’ll be extremely sad you missed if you opt out. The wooden boardwalk is pretty, though.
Otherwise, just stop at the main observation deck for a quick look and avoid unnecessary FOMO. It’s right by the road from Yudaki Falls—here it is on Google Maps. Notethat there’s no way to venture into the marshland from here.
Day 2, stop 5: Ryuzu Falls, the one that looks like a dragon
- Price: Free
- Drive: 5 min
- Time spent here: 30 min
I hope you’re not all waterfalled out just yet because there’s one more you can fit into your trip plan for today. It’s the biggest waterfall, but it is surrounded by beautiful foliage, and that makes all the difference.
The name means “Dragon Head”, but I admit spotting the dragon takes serious imagination. Or maybe I’m too analytical.
A lot of people like to stop and view the falls from the café—grab a seat, drink, and enjoy. But there’s also a path that you can walk (I did). It’s only 200 m (0.1 mi) one way, so don’t be lazy and check it out. I would’ve preferred a non-asphalt walkway because it takes away from the natural charm just a tad, but I’m not complaining (much).
Day 2, stop 6: British & Italian Embassy Villas
- Price: JPY 450 for both villas or JPY 300 each if bought separately
- Opening times: 9 am–5 pm, café and tearoom close at 4 pm
- Drive: 10 min
- Time spent here: Up to 1 hour
This stop is a quick culture break. The villas aren’t embassies anymore (and they haven’t been since the 1990s), but they showcase a cool blend of European and Japanese architecture right on Lake Chuzenji’s shore. You may need to hurry to get there on time, because they close at 5 pm, and if you want to have a tea or coffee inside, you need to arrive before 4 pm!
Practicalities: It's about a 10-minute walk from the Utagahama parking lot (JPY 500 per vehicle per day) to the embassy villas.
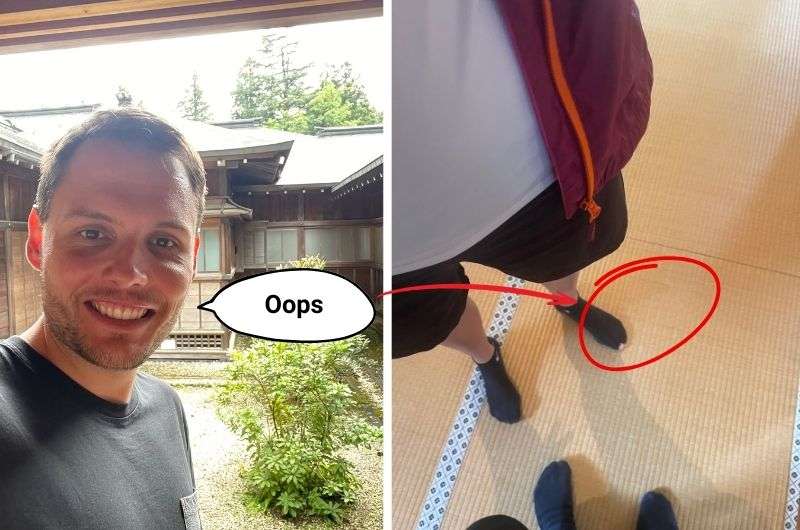
The culture of taking your shoes off—take your sewing kit with you! @ Villa in Nikko National Park
The British Villa is dark outside, bright inside, while the Italian one is the opposite. Grab a coffee on the patio for a perfect lake view. I prefer the British patio for open-air views. They are right next to each other, so you can see both easily.
Back to Nikko! A 30-minute drive gets you to Fairfield by Marriott (loved, can recommend!), where a shower is mandatory before heading out for dinner.
Day 3: Drive to Nagano → Explore Kiyotsu Gorge, snow monkeys, and Zenko-ji
Activities and places visited on day 3:
- Move on to Nagano, stopping at:
- Kiyotsu Gorge, a futuristic art tunnel in natural surroundings (3 hours from Nikko)
- Jigokudani Snow Monkey Park, a tourist trap until you see baby monkeys (1.5 hours from Kiyotsu Gorge)
- Zenko-ji, a mammoth wooden temple in Nagano (1 hour from the monkeys)
Recommended hotel: Hotel Metropolitan Nagano for 3 nights (or any other hotel; Nagano’s hotels aren’t the best)
Restaurant tips: Fujiya Gohonjin (must try!)
Further reading: 3-day Nagano itinerary
Cute little monkeys
Today’s lineup is stunning gorges, famous hot spring monkeys, and a temple older than Nagano itself. I told you this Japan itinerary will be a non-stop adventure! Just beware that you’ll need to go quite a bit of driving to get there.
Day 3, stop 1: Kiyotsu Gorge, the one with the funky tunnel
- Price: JPY 1,000 (reserve online in summer)
- Opening times: 8:30 am–5 pm
- Drive: 2 hours from Nikko
- Time spent here: 1.5 hours
Kiyotsu Gorge is Japan’s biggest gorge, but where in Europe they’d build a nice little walkway, Japan went all out and went straight for a funky tunnel! The Tunnel of Light is 750 m (0.5 mi) of art, reflective pools, and dramatic viewports carved into the gorge wall.
Practicalities: The one thing you need to remember is that there isn’t a lot of room in Japan, especially to build parking lots. So, when we arrived mid-morning, it was too late to park right at the gorge. Those lots were completely full. Parking further away meant we had to take a 20-minute shuttle bus to the entrance. Be smarter; wake up early!
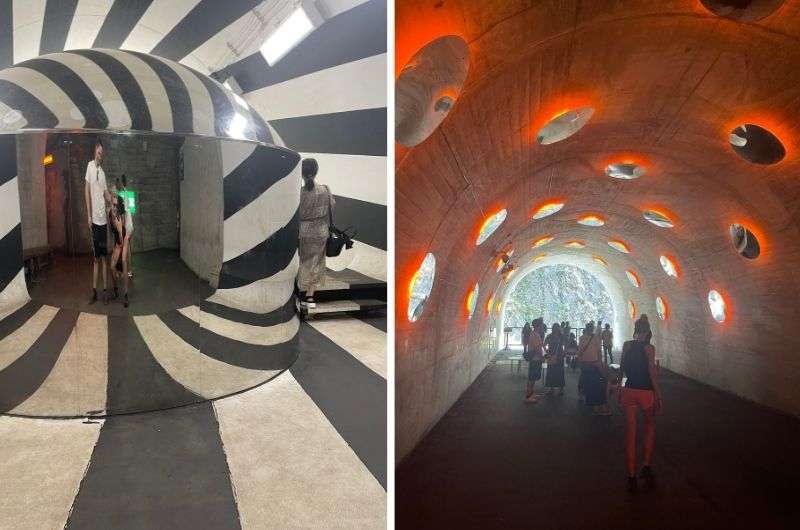
Funky travelers in the funky tunnel at Kiyotsu Gorge
As you’d expect from the endless lines of cars, Kiyotsu Gorge is busy. It makes sense to make reservations, especially in the peak summer months. You get a 1.5-hour time slot to roam the tunnel, which is plenty of time.
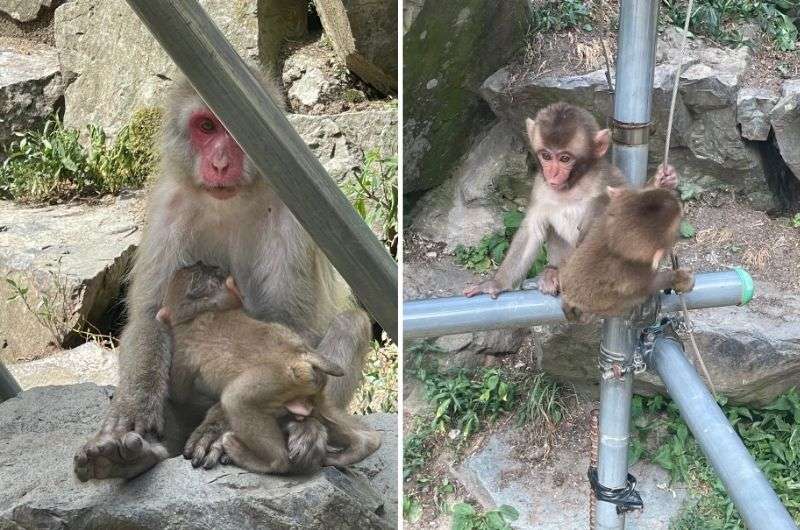
Day 3, stop 2: Jigokudani Monkey Park for monkeys bathing in onsens
- Price: JPY 800
- Opening times: 8:30 am–5 pm (closes an hour earlier in winter)
- Drive: 1.5 hours from the last stop
- Time spent here: 1 hour
At this next stop, you’ll meet Japan’s most famous macaques, aka the snow monkeys that may or may not be soaking in the onsen (depending on the season).
In winter, they chill in the hot springs. In summer, they mostly hang around on dry land but will enter the water if there is a treat in it for them. Yeah, that’s cheating and slightly tourist trap territory. Either way, it’s monkey mayhem, and they’re not shy, and they are entertaining to watch.
Expect a 20-minute walk through the forest to reach the park, and then maybe 20 minutes of staring at monkeys. I don’t think anyone needs any more time than that.
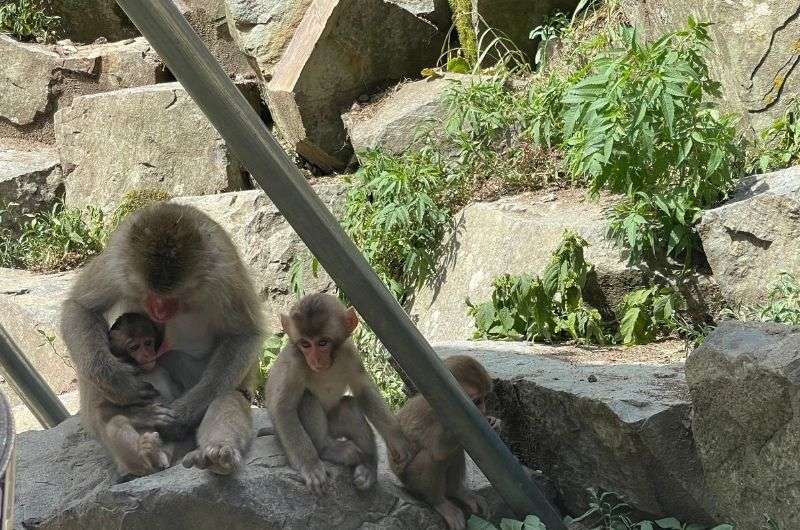
Can I take them home with me? Jigokudani Monkey Park
Pro tip: You can check the monkey cam online before visiting to see if they’re actually in the water if that’s really important to you.
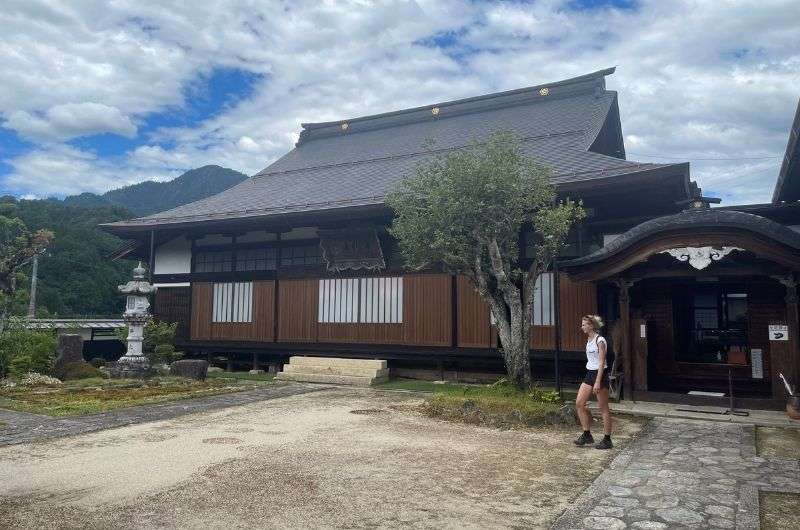
Day 3, stop 3: Zenko-ji, the temple older than Nagano itself
- Price: JPY 500 (Main Hall) + JPY 600 (Museum)
- Opening times: 9 am–4 pm
- Drive: 1 hour
- Time spent here: 1–2 hours
Nagano exists because of this temple, so it’s kind of a big deal. I actually wanted to skip Zenko-ji to save time in my itinerary (and because of a slight bout of temple burnout), but I’m so glad I didn’t. The massive wooden gates, a stunning main hall, and a pitch-black underground passage where you grope around for the "key to paradise"—all very cool.
Zenko-ji Temple houses one important, top-secret item: the first Buddhist statue ever to be brought into Japan. The statue is so special that nobody’s ever seen it… Though somehow, there is a replica that gets shown every 6 years. Your next chance is in 2028.
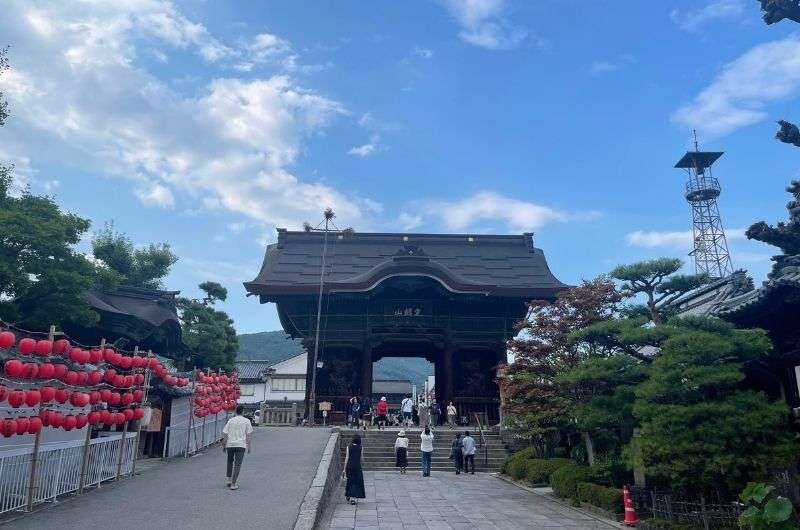
Gateway to adventure (and Zenko-ji)
Practicalities: There are plenty of small parking lots nearby (JPY 100 per 30 min). If staying in central Nagano, just drop off your car and walk—your dinner spot is nearby.
Dinner tip: Fujiya Gohonjin (must-try!)
Right at the end of Zenkoji Nakamise Street is the best restaurant we encountered on our Japan trip: the Fujiya Gohonjin. Hands down the best meal I had in Japan. The wagyu steaks and bagna cauda (dipping sauce) were exceptional. Expect to pay USD 100 for two and book ahead.
Day 4: Kamikochi Valley & Edo-period towns (from Nagano)
Activities and places visited on day 4:
- Kamikochi Valley: a highland valley that feels like a slice of car-less paradise
- Tsumago–Magome: two Edo-era villages connected by a scenic 7.5 km hike
The local bros @ Tsumago
Restaurant tips: Kamikochi Restaurant (for lunch) | The Source (Matsumoto) | Sousake 28 (Nagano)
Further reading: The best things to do in and around Nagano
Day 4, stop 1: Kamikochi Valley for a walk in stunning scenery
- Price: Free (but parking is JPY 700/day, and the mandatory bus costs JPY 1,200 one way)
- Opening times: 24/7, buses run 5 am–7 pm
- Drive: 2 hours from Nagano
- Time spent here: 2–3 hours
Day 4 of your 14 days in Japan starts out by driving to the picturesque Kamikochi Valley. It’s about 2 hours from Nagano, but it’s a very scenic road, so you won’t be annoyed that you have to sit in the car for so long.
Kamikochi’s the type of place that makes you forget your phone exists (except for photos—because wow). It’s just so pretty—turquoise river, snow-capped mountains, lush green forest… It’s also a car-free paradise, so you have to leave your car at Sawando or Hirayu parking lots and then catch a 20-minute bus into the valley.
There are many trails, but you’re not here to climb mountains—there’s no time for that today. Stick to the easy riverside routes:
- Option 1 (quick & gorgeous): Start at Taisho Pond, follow the Azusa River to Kappa Bridge (3.5 km/2 miles, 45 minutes), then catch a bus back. Easy and scenic.
- Option 2 (a bit more adventure): Walk from Kappa Bridge to Myojin Bridge, cross the river, and loop back via a quieter, forested trail (7 km/4.3 miles total, 1.5 hours). Less crowded, equally stunning.
It couldn't be greener @ Kamikochi
Lunch options:
- Kamikochi Restaurant (decent food, great views, but packed with tourists).
- Skip it and drive 45 minutes to Kiso, where food options improve.
Day 4, stop 2: Walk from Tsumago to Magome, the preserved Edo villages
- Price: Free (parking JPY 500)
- Opening times: 24/7
- Drive: 2 hours from Kamikochi
- Time spent here: 2–3 hours
After Kamikochi, it’s time for a time warp—the Tsumago-Magome trail is a 7.5 km (4.6 mi) walk through Edo-era Japan, complete with traditional villages, teahouses, and ancient roads. We parked outside Tsumago, walked to Magome, and took a bus back (but there are also taxis).
The hike is easy, mostly gentle slopes through forests, waterfalls, and rice fields, with a few old houses along the way. Halfway in, you’ll find Tateba Tea House, where a friendly host pours free hot tea (donations are welcome). If you’re lucky, they’ll randomly bring out snacks—but don’t count on it.
This is a completely different vibe from Kamikochi—a quiet, history-soaked stroll through old Japan, far from the usual tourist chaos. It took me 2 hours, but if you’re slow or take 500 photos, plan for 3.
Important: Pack a bear bell—not just locals, but real bears roam these parts.
The drive back to Nagano (ouch)
You’ve made it really far from civilization, so expect a 2–3 hour drive back to Nagano.
The hike from Tsumago to Magome is easy
Day 5: Togakushi & Matsumoto Castle (Nagano)
Activities and places visited on day 5:
- Togakushi Shrine is set in majestic cedar forests
- Bonus stop: Kagamiike Lake
- Ninja Museum: I found my inner child here and obviously excelled at shuriken throwing!
- Matsumoto Castle, aka “Crow Castle,” dramatically backdropped by mountains
- Daio Wasabi Farm (optional but interesting!)
Restaurant tips: Kamikochi Restaurant (for lunch) | The Source (Matsumoto) | Sousake 28 (Nagano)
Today is a strong finish to Nagano, starting with my absolute favorite spot in all of Japan—Togakushi Shrines. Then, it’s off to Matsumoto Castle, where your inner child’s samurai dreams come true. If time allows, wrap up with a visit to a wasabi farm.
Day 5, stop 1: Togakushi—an unforgettable trail linking 5 ancient shrines
- Price: Free (Ninja & Folk Museum JPY 650)
- Opening times: Always open
- Drive: 30 minutes from Nagano
- Time spent here: 4 hours
This place is pure magic. A phenomenal 5 km (3 mi) trail links five ancient shrines, all located in a towering cedar forest that is going to ruin all other forests for you from here on out. I know you won’t believe me when you read this, but wait until you get there. It’s so good.
The mythology behind Togakushi is that the sun goddess Amaterasu hid in a cave, the gods tricked her into coming out, then tossed the cave door away. It supposedly landed in Togakushi, giving the area its name (which means "hiding door").
The shrines are layered up the mountain. We parked at the main shrine, Okusha, and took it from there. Three hours of exploring later, you’ll have seen it all.
Channeling my inner ninja at the Ninja & Folk Museum in Togakushi
Natural, yes, comfy... not so much, I’d imagine
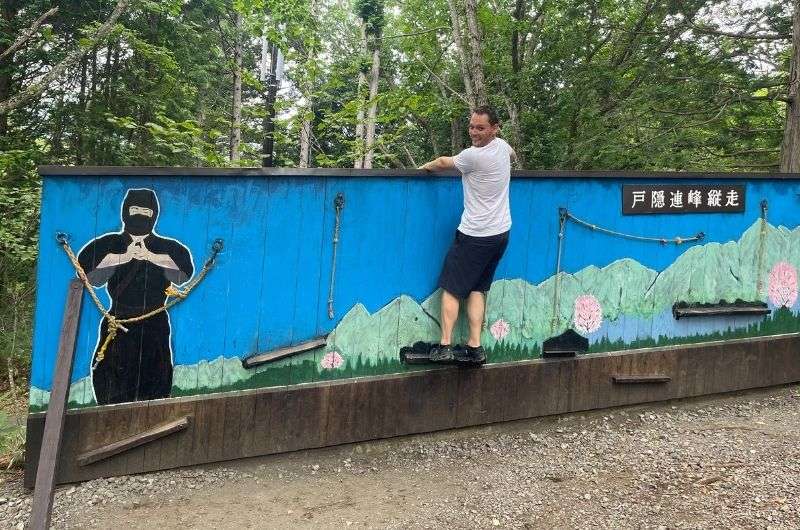
- Make a detour to the Ninja & Folk Museum—a 30-minute maze of traps, hidden doors, and confusing rooms that my girlfriend wouldn’t stop talking about for the rest of the trip.
- My secret tip: If you have time, add a visit to Kagamiike Lake for incredible reflections of the Togakushi mountains. Either hike there from Okusha (2-hour loop) or drive to save time.
Day 5, stop 2: Matsumoto Castle, where ninja dreams come true
- Price: JPY 700
- Opening times: 8:30 am–5 pm
- Drive: 1.5 hours from Togakushi
- Time spent here: 1.5 hours
Matsumoto Castle is exactly the kind of Japanese castle you dream about when you’re a kid fighting off evil with your mom’s spatulas. Or at least I did.
It leans slightly, supposedly because of a curse placed by a rebellious farmer in the 1600s (or, you know, structural issues). I go into detail about the two options in my Nagano itinerary.
Once inside, you’ll need to be ready for plenty of steep wooden stairs—this wasn’t a gentle museum experience. The second floor displays samurai weapons, which I internally screamed about the entire time I was there, while the top floor offers panoramic views. Also epic, especially when you imagine yourself standing there as a ninja.
Fit check with these ladies at Matsumoto Castle
Outside, you’ll find gardens with oversized koi and, if you’re lucky, ninja-costumed employees who are more than happy to pose for photos.
Day 5, stop 4: Daio Wasabi Farm (optional)
- Price: Free
- Opening times: 8 am–5 pm (closes at 4 pm in winter)
- Drive: 25 minutes from Matsumoto Castle
- Time spent here: 1 hour
If you have time and will left, make a final stop at Japan’s largest wasabi farm. You’ll see wasabi growing in crystal-clear streams.
You can tour the farm on your own on two different routes—the red trail takes 45 minutes, the blue just 20 minutes. Or, take a boat tour, though I highly doubt you’ll get there in time to go on it.
Try wasabi ice cream, wasabi croquettes, and even wasabi beer (which I do not recommend—just because it exists doesn’t mean it’s good).
If you’re out of time, skip the farm and head straight to your hotel.
That’s it—your epic Nagano adventure is complete. If you skipped Togakushi, I judge you. If you saw it all, you just had one of the best Japan itineraries out there!
Day 6: Drive to Hakone → See the iconic Mt. Fuji
Destination: Mt. Fuji
Activities and places visited on day 6:
- Drive from Nagano to Hakone (3.5 hours)
- Lake Ashi for potential Fuji views and pirate ships
- Hakone Shrine and maybe a stop at Heiwa no Torii, which is a tourist trap
- Shiraito and Otodome Falls: Your first stop on the Mt. Fuji loop
- Kitaguchi Shrine with massive torii gate, where Mt. Fuji pilgrimages used to start
- Chureito Pagoda for THE Mt. Fuji photo op
Hotel recommendation: Hakone Reatreat Före for 2 nights
Restaurant tips: Monta (in Hakone)
Further reading: My comprehensive Hakone itinerary
My tip: Get the Hakone Free Pass
The Hakone Free Pass gives you unlimited rides on Odakyu-affiliated transport, including the Hakone Tozan Train, Ropeway, and Lake Ashi’s pirate cruise, plus discounts at museums and restaurants. It’s available for 2 or 3 days at Odakyu stations, with an option to include a Tokyo–Hakone train (but you’re driving, so you don’t need that).
- Prices: JPY 6,500 (from Tokyo), JPY 5,000 (within Hakone), with 3-day passes costing JPY 400 more.
Day 6, first things first: Drive to Hakone from Nagano (3.5 hours)
The drive from Nagano to Hakone takes about 3.5 to 4 hours, and yes, you’ll pass Tokyo on the way—but don’t stop unless you enjoy traffic and overpriced everything.
Many people visit Hakone on a day trip from Tokyo, which is a terrible idea. You’ll be rushing through everything and missing half of the good stuff. So, take your time, stay two days, and do it properly.
Pro tip: You can visit Hakone without a car, but getting to each stop will be a pain, and it will take longer than if you had a car. A car really means freedom to roam and explore.
Day 6, stop 1: Lake Ashi & Hakone Shrine and your first Fuji views!
- Price: Free (swan boats are about USD 12 per 30 min)
- Opening times: Always open
- Time spent here: 1 hour
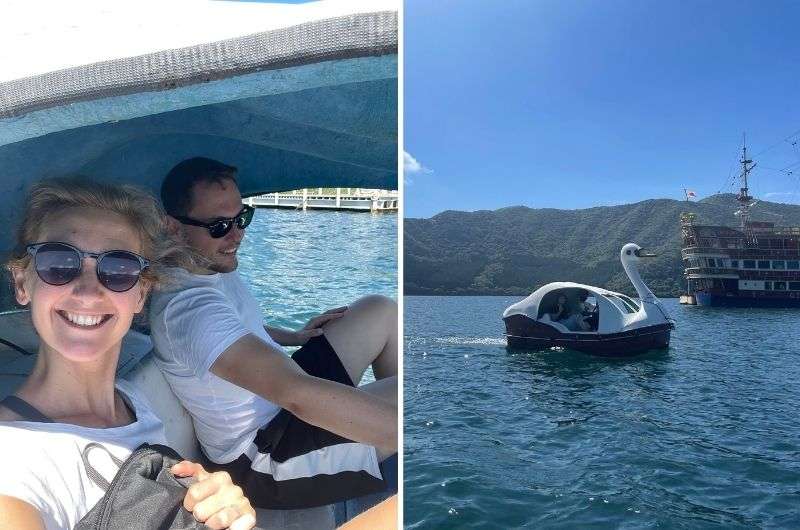
Once you make it over to Hakone, stretch your legs at Lake Ashi, where you have a chance for some fantastic views of Mt. Fuji… if the weather cooperates. Otherwise, it’s just a pretty lake with pirate ships and swan pedal boats.

Pirates (and a swan paddle boat) on the horizon! The boating options on Lake Ashi are slightly kitsch but still fun
You may also get the impression you’re here for Heiwa no Torii, the famous red gate in the water, because those crowds can’t be fighting with selfie sticks like they’re wielding swords for nothing, right? Right?! Honestly, it’s nothing extra. Follow my advice and head up into the Hakone shrine complex instead, where the real magic happens—ancient trees, stone lanterns, and actual peace and quiet.
- Extra tip: We rented one of those swan pedal boats and awkwardly floated around the lake, too, and it was great fun. Just don’t fall in—Lake Ashi is freezing, and swimming is banned.
Then, hop in your car and proceed with your loop drive around Mt. Fuji.
Day 6, stop 2: Shiraito & Otodome Falls, a pitstop along your loop around Fuji
- Price: Free (but parking is JPY 300–500)
- Opening times: Always open
- Drive: 1.5 hours
- Time spent here: 1 hour
After some scenic driving, you’ll reach Shiraito & Otodome Falls, an easy stop where you don’t have to hike far to be wowed. Plus, views of Mount Fuji are to be had even if you stay in the parking lot (why, though?)!
- Shiraito Falls: A curtain of water bursts from everywhere, just 400 m from the main parking area.
- Otodome Falls: On the other side of the parking area, this is a single powerful cascade that makes up in intensity what it lacks in width.
These falls are tourist-friendly, with paved walkways and even a decent parking-lot restaurant (called Shiraito General Store).
Day 6, stop 3: Kitaguchi Hongu Fuji Sengen Shrine, where Mt. Fuji hikes used to start
- Price: Free
- Opening times: Always open
- Drive: 45 minutes
- Time spent here: 30 minutes
This is a historically significant shrine that was once the starting point for Mt. Fuji climbers. Even if you’re not hiking, it’s a peaceful and impressive spot with ancient cedar trees and intricate wood carvings. Notice how the trees have ropes tied around them. I liked that detail a lot.
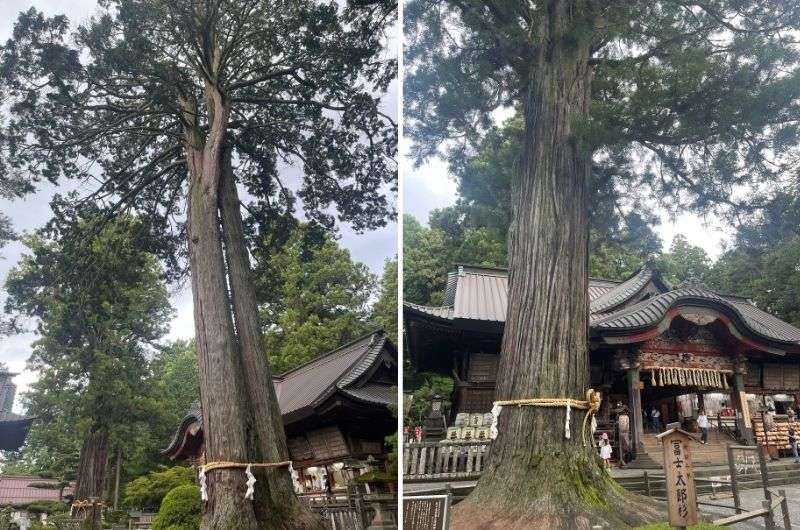
Kitaguchi Hongu with some seriously amazing huge trees
The massive wooden torii gate at the entrance is extra special, and you can see the original pilgrimage trail to Fuji. It was built in 1615, but there has been a shrine in this very spot since about 100 CE!
Spend half an hour here before moving on.
Special event tip: Celebrate climbing season
Though nobody starts climbing Fuji from Kitaguchi Shrine anymore, it still hosts the hiking season’s opening and closing ceremonies. On June 30, the Kaizan-zenyasai festival kicks off the season with a parade and rope-cutting ceremony. Then, on August 26–27, the Yoshida Fire Festival lights up the night with giant 10-foot torches. I wasn’t there to witness these, but it must be amazing to be a part of it.
Day 6, stop 5: Chureito Pagoda
- Price: Free
- Opening times: Always open
- Drive: 15 minutes
- Time spent here: 20 minutes (plus a 10-minute stair climb and god knows how long standing in line for a photo if you choose a busy day)
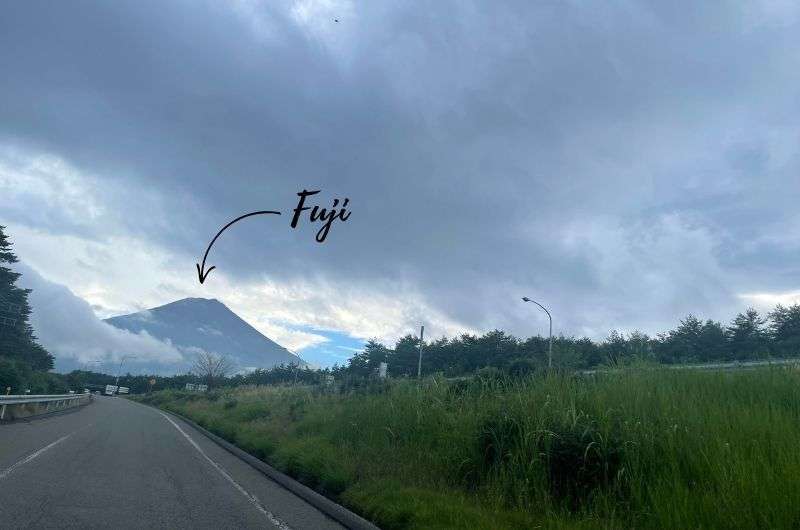
This famous red pagoda with Mt. Fuji in the background is THE postcard view of Japan… but again, only if you’re lucky and there aren’t clouds blocking Mt. Fuji. Guess how lucky we were… (Summers in Japan are notorious for cloudy skies.)
Beware that it’s 400 stairs up. And if I wasn’t clear, Chureito Pagoda is not about the pagoda at all. I personally liked it, but it’s just there for the composition of your Mt. Fuji photo. Or, if you’re us, the photo of you, your partner, and the clouds.
Bonus tip: If you come here at sunset, you win. If you go midday, you might get a Fuji-less sky because, again, clouds are jerks.
Dinner at Monta
A cozy, cat-themed restaurant where we accidentally ordered way too much food because everything looked good on the tablet ordering system.
Cats everywhere!... just not on your plate @ Monta Restaurant
Day 7: Mount Mitsutoge & more Hakone (and more Fuji views)
Activities and places visited on day 7:
- Mt. Mitsutoge Hike for the best Mt. Fuji views (a moderate 2–3 hours there and back)
- Owakudani: A sulfur-laden crater and black eggs said to add 7 years to your life
- Hakone Ropeway: Cable car or traffic jam—your call.
Restaurant tips: Tokyo Sushi (in Hakone)
Further reading: Full Hakone Guide
Having the best sushi in Hakone at Tokyo Sushi (confusing, I know)
Day 7, stop 1: Mt. Mitsutoge Hike, aka the ultimate Fuji viewpoint
- Price: Free
- Opening times: Always open
- Drive: 1.5 hours
- Time spent here: 2–3.5 hours
Forget climbing Fuji itself—if you want epic Fuji views, you need to be facing it, not standing on it. Enter Mt. Mitsutoge, a moderate hike that gets you one of the best panoramas of Fuji you can find. Actually, you don’t have to find anything, because I’ve already done the work for you. Just follow my lead:
Drive for about 1.5 hours from Hakone, and park at the free parking lot. Other blogs like to mention a 6-hour hike, but folks, that’s not necessary. You’re after views, so take the shortest route up, which is the purple route (Mt. Mitsutoge – Kanegakubo on AllTrails). It’s:
- Hike length: 6 km (3.7 miles) out-and-back
- Elevation gain: 460 m (1,500 feet)
- Difficulty level: Moderate
- Hiking time: 2–3 hours
- Parking and trailhead: Google Maps link
The mountain has 3 peaks, but you’ll be happy with one, I presume. The trail itself isn’t much to write home about, but the summit is unreal. My girlfriend and I were up there in 55 minutes and then stayed for 20, getting Mt. Fuji forever seared into our memories, before we were able to think about going back down again.
Keep calm & hike up Mt. Mitsutoge
Fuji dominates the view, along with the Southern Alps and Misaka Mountains. It’s really pretty. There’s even a tiny cabin with vending machines—because this is Japan.
When you’re done, drive back to Lake Ashi. This time around, park on the northern side of Lake Ashi because the pirate ships are calling your name!
Day 7, stop 2: All aboard Lake Ashi’s pirate ships, or check out the gardens instead
- Price: JPY 1,000 one way (JPY 1,850 return, free with Hakone Free Pass)
- Opening times: 9 am–4:30 pm
- Drive: 1.5 hours
- Time spent here: 1 hour
Yes, there are pirate ships on Lake Ashi, and no, it doesn’t make any sense. But Japan has a way of making you used to strange things really quickly. This boat ride does get you great Fuji views (if the weather is clear) and is weirdly fun.
The pirate ships go every 30 minutes or so, so just get your tickets and line up for the next one to arrive. You’ll go across the lake and back if you get a return ticket (which takes 20 minutes one way).
Swans against pirates @ Lake Ashi
Pro tip: Upgrade to first class for extra comfort and a guaranteed seat (It’s really a couch). Otherwise, you’ll need to brace yourself for a stampede of economy passengers fighting for seats. It’s like musical chairs, just without music. You get better views, too, though the best ones are to be had from the (shared) top deck anyway.
Alternative plan: Visit Onshi-Hakone Park
If boats or pirates aren’t your thing, skip the cruise and visit Onshi-Hakone Park, a peaceful Japanese garden with Fuji views on Lake Ashi’s southern shore. Make sure to take the 200 old stone stairs up to the higher section, where you can get cool views of the lake from the observation deck. It’s free to enter the park.
Day 7, stop 3: Owakudani Valley: the smelly, volcanic side of Hakone
- Price: JPY 2,500 round trip on Hakone Ropeway (free with Hakone Free Pass)
- Opening times: 9 am–5 pm
- Drive: 10 minutes (or take the ropeway from Lake Ashi)
- Time spent here: 2 hours
Owakudani is something you have to do when you’re in Hakone. It’s Hakone’s volcanic heart, where you can:
- Walk past steaming sulfur vents using the trails, it takes about 30 minutes total (and it stinks, deal with it).
- Try the famous black eggs—each egg costs JPY 500 and supposedly adds 7 years to your life (I’m very excited to live until 150!).
- Take in the post-apocalyptic scenery. It’s simply cool, and after an eruption in 2015, there still aren’t many trees creeping in on the views, which makes it even better.
If you’re there on a weekend, prepare for a loong wait for the ropeway. You can drive to Owakudani instead, but Google Maps isn’t lying about the traffic. Both are good options, though the Ropeway is a “must-do thing in Hakone”, so we did that and had zero regrets.
Exploring Owakudani
There’s a never-ending supply of 18-person gondolas that keep coming every minute or so, but they need to speed those babies up if they are going to keep up with the demand! But once you’re on one, you’ll really enjoy the 20-minute trip with nice views.
Day 7, stop 4: Tokyo Sushi for dinner—the best sushi of my life!
Tokyo Sushi has a confusing name, but it’s really in Hakone, I promise. The chef has 40+ years of experience, and every bite in this teeny tiny restaurant melts in your mouth. It was the best sushi of my life, hands down. I’m telling you, I’m like Pavlov’s dog right now. I hear “Tokyo Sushi,” and here comes the salivation.
Are you ready for week 2 of your 2-week Japan itinerary? You better be, because the next few days of this trip plan will be temple overload in the best way possible. You’ve seen Fuji from all angles, but now it’s time to head to Kyoto!
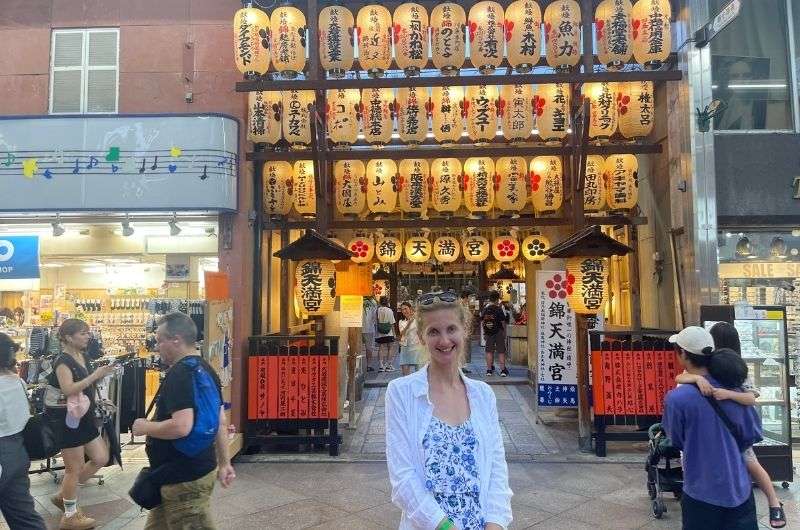
Day 8: Drive from Hakone to Kyoto → See central Kyoto
Activities and places visited on day 8:
- Make your way from Hakone to Kyoto (drive for 4.5 hours or train for 2.5 hours)
- Nijo Castle, a shogun’s former residence that’s so gold and black it’s almost ridiculous
- Gingakuji
- Nishiki Market for street food in crowded corridors- what’s not to love?
- Samurai Ninja Museum or Kyoto Railway Museum
- Gion, but just because it’s where you’ll have dinner
Restaurant tips: Nishiki Market | Teppan Tavern Tenamonya (make dinner reservations way in advance!)
Hotel recommendations: KAYA Kyoto Nijo Castle for 3 nights
Further reading: My Kyoto, Nara, and Osaka itinerary for 4 days
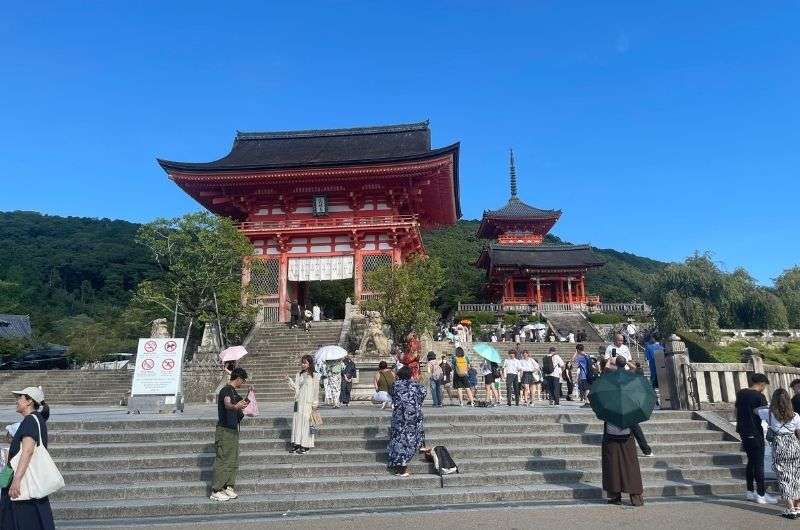
Next stop on the great route—Kiyomizudera in Kyoto
Day 8, Getting There: Drive or take the train to Kyoto
I’m giving you the first part of the day to make your way over to Kyoto. The earlier you leave, the more time in Kyoto you’ll have. Here are your options:
- You can drive from Hakone for 4.5 hours,
- or, if you’re able to make it work logistically with returning your rental car, you could be there by train in a little over 2 hours.
- Even if you return the car in Tokyo first, you'll still break even time-wise with the train. Your call, but Japan’s trains are fun and fast. Just saying.
Whatever you choose, you’ll want to have a car in Kyoto, it makes getting around and taking day trips so much easier. So, if you returned yours before coming here, pick up another one in Kyoto first.
Day 8, stop 1: Nijo Castle
- Price: JPY 800 (JPY 500 extra for Ninomaru Palace)
- Opening times: 8:45 am–5 pm
- Time spent here: 1.5 hours
Before you hop into Kyoto’s endless temples, let’s see a few different sites on your first day in Kyoto, starting with Nijo Castle’s walls, moats, palace buildings, and perfectly manicured gardens. Originally a shogun’s residence, then an imperial palace, and now a UNESCO site.
Ok, so the actual castle burned down in flames and was never rebuilt. Instead, there’s Honmaru Palace… but you can’t visit that either; it’s closed to the public unless it’s a special occasion. Scramble up on the former castle walls for the best views of it.
The highlight at Nijo Castle for me was Ninomaru Palace, where the shogun used to conduct business. You’ll pay JPY 500 extra to enter, but I thought it was very much worth it. The interiors scream power and wealth—black and gold everywhere, sort of like my own apartment! I knew I was shogun material!
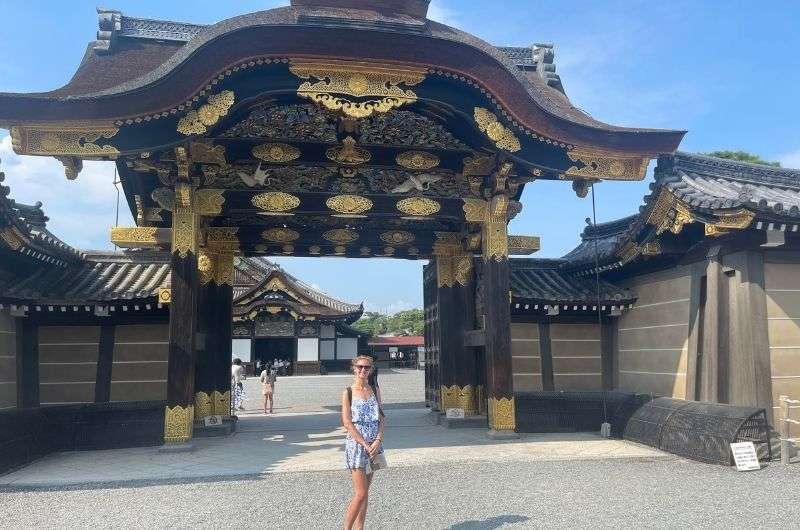
We conquered Nijo Castle
Pro tip: Pay attention to the nightingale floors that squeak with every step. It was a built-in security system so no one could sneak up on the shogun.
Day 8, stop 2: Ginkakuji, aka the "Silver Pavilion"
- Price: JPY 500
- Opening times: 8:30 am–5 pm
- Drive: 20 minutes
- Time spent here: 1 hour
So, this is more of a wishful thinking tip from me because I didn’t actually get to visit Ginkakuji myself—it was closed for no apparent reason when I got there. So, good luck when you go!
Despite its name, the temple’s not silver, and you can’t go inside (even when it’s open), but it was once a shogun’s retirement villa, inspired by his dad’s Golden Pavilion (Kinkakuji, which you’ll visit tomorrow). The nickname comes from that family connection rather than actual shiny metal.
The circular path around the temple is supposed to be beautiful, featuring a mossy garden, ponds, and a sand garden called "Sea of Silver Sand". There’s also a cone-shaped structure meant for moon-viewing, which sounds more like a Zen riddle than an actual design choice. If you make it inside, let me know if it’s worth it!
Day 8, stop 3: Nishiki Market for snacking and people-watching
- Price: Free
- Opening times: Varies by vendor (but roughly 10 am–6 pm)
- Drive: 20 minutes
- Time spent here: 30 minutes–1 hour
I usually hate markets—they’re crowded, overpriced, chaotic, and sell overpriced trash. But Nishiki Market, which my girlfriend forced me into, wasn’t half bad! Definitely a unique place in Kyoto.
It’s a long, narrow street packed with food stalls selling everything from beef skewers and tofu donuts to quail eggs and squid on a stick. There’s even a Mexican taco stand if you need a break from Japanese flavors. Yes, it’s a tourist trap, but a delicious one. If there’s one way to my heart, it’s through my stomach.

Feeling snackish @ Nishiki Market in Kyoto
Pro tip: Don’t walk while eating—it’s frowned upon in Japan. Find a spot, eat what they give you, and only then move on to the next one.
Day 8, stop 4: Samurai Ninja Museum (or Railway Museum alternative)
- Price: JPY 3,300
- Opening times: 10:30 am–7 pm
- Drive: 5 minutes
- Time spent here: 1 hour
A fun, interactive museum that’s on the expensive side, but come on, it’s a ninja museum! Of course I had to go, and I enjoyed myself to the fullest.
The guided tour covers samurai and ninja history, and while it’s a little basic for history buffs like me, the exhibits are cool—authentic Edo armor (imagine me staring wide-eyed at that for a good while), weapons, and even fake mustaches (because 12-year-old samurais needed to look older to intimidate enemies).
But the best part was throwing ninja stars at the end. I absolutely nailed it, proving that if I were born in feudal Japan, I’d be legendary. Read more about my museum visit in my Kyoto itinerary.
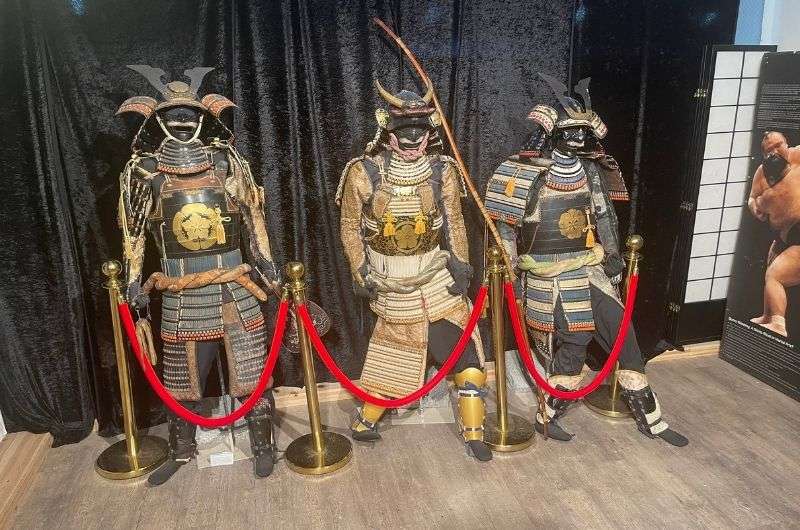
Samurai Ninja Museum
Pro tip: Pre-booking is smart, especially in peak season.
Alternative Stop: Kyoto Railway Museum
- Price: JPY 1,500
- Opening times: 10 am–5:30 pm
- Time spent here: 1–2 hours
If you’re not that into ninjas (or the steep entrance fee of the ninja museum), here’s an alternative option: The Kyoto Railway Museum. Japan is absolutely obsessed with trains, and this museum proves it. Expect historic locomotives, interactive exhibits, and a glimpse into the densha otaku (train fanatic) subculture. While some displays are only in Japanese, I still liked it. A train is a train, right? And so did the kids, squealing with joy at every display.
Day 8, stop 5: Gion Quarter for a pre-dinner stroll and geisha spotting
- Price: Free
- Opening times: Always open
- Drive: 20 minutes
- Time spent here: 1 hour
People love Gion, but I don’t get it. Yes, the old wooden merchant houses and tea houses are nice, and the riverside path is peaceful, but it’s nothing mind-blowing.
I wouldn’t even send you here on this Japan itinerary, but your dinner restaurant is close by, and I know you’d still check out no matter how I say it’s not worth it, so here’s your chance. Keep in mind:
- If you’re hoping to see geishas, good luck—we saw zero. Instead, you’ll get tourists in rented kimonos and people taking photos of random women, hoping they’re geishas. Not creepy at all.
- Seriously, stop being obnoxious! There’s even been a photo ban in Gion’s private alleys since 2019 because the tourists got too close for comfort.
- Check out Tatsumi Bridge if you want, but it’s nothing special either. Hanamikoji Street is the main drag, packed with restaurants and shops. Parking is easy, so you can be in and out fast if you want to.
No geishas but good snacks @ Gion Quarter
Fun fact: In Memoirs of a Geisha, Chiyo runs from Gion to Fushimi Inari Shrine to make a wish. Realistically, that’s a 5 km run—in traditional Japanese shoes. My feet hurt for her.
Dinner: Teppan Tavern Tenamonya
This tiny, legendary teppanyaki spot requires reservations well in advance. When I got the confirmation email, I wasn’t sure if I should laugh or be scared—it’s part warm invitation, part security warning:
"We lock the door because people without reservations try to storm our culinary castle. Some cry when we make them leave."
The food was fantastic, the staff was friendly, and that reservation process alone was worth it.
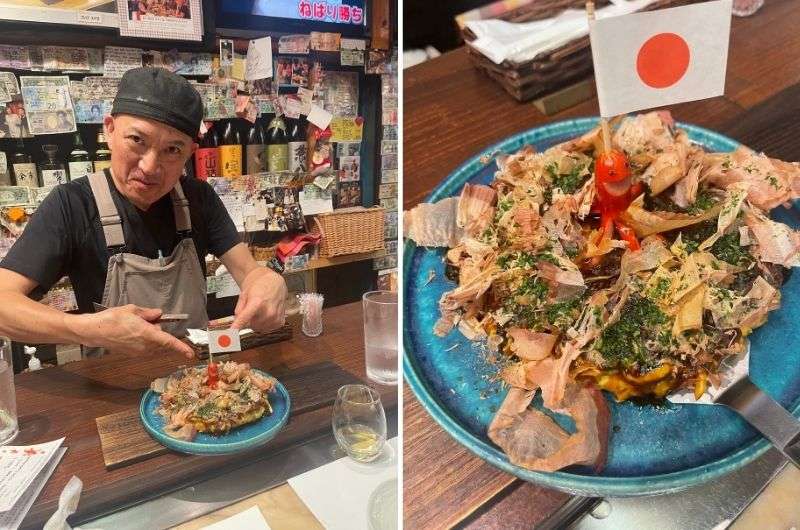
The chef @ the legendary Teppan Tavern
One warning: Skip the local specialty, okonomiyaki—it’s a weird cabbage pancake that I didn’t understand and don’t ever need to taste again.
Day complete! Kyoto’s off to a strong start—and tomorrow gets even better.
Day 9: Arashiyama Bamboo Forest and Kyoto’s Amazing Temples
Activities and places visited on day 9:
- Arashiyama Bamboo Grove is a photogenic forest jam-packed with bamboo and humans.
- Sagano Railway is a short scenic route on a vintage train.
- Kinkaku-ji (Golden Pavilion) is a golden house on a lake.
- Fushimi Inari-taisha has so many red torii gates that it’s hard to believe.
- Sanjūsangen-dō is a big wooden temple with 1,001 statues of a very clever goddess.
- Kiyomizu-dera is a gorgeous hillside temple with equally gorgeous Kyoto skyline views.

Nature’s green masterpiece @ Arashiyama bamboo forest
Restaurant tips: Dragon Burger | Smoked & Grill Lotus
Further reading: Arashiyama day trip from Kyoto
Day 9, stop 1: Arashiyama Bamboo Forest & Sagano Romantic Train
- Price: Free (JPY 620 one way for Sagano Romantic Train)
- Opening times: Always open
- Drive: 25 minutes
- Time spent here: 2 hours
You’ll kick off the day with one of Kyoto’s most iconic sights—the Arashiyama Bamboo Forest. Get there early because you’re not the only one who wants a solo photo under the towering bamboo stalks.
Pro tip: The forest is always open, so if you really want to be there alone, I’m sure you could find an hour of the day (or rather, the night) to do that.
The walking path is only 500 m (0.3 mi) long, so it’s a short, easy stroll. Even so, the dense, sky-high bamboo makes it feel otherworldly. I was surprised by how thick the bamboo was—these things are massive!
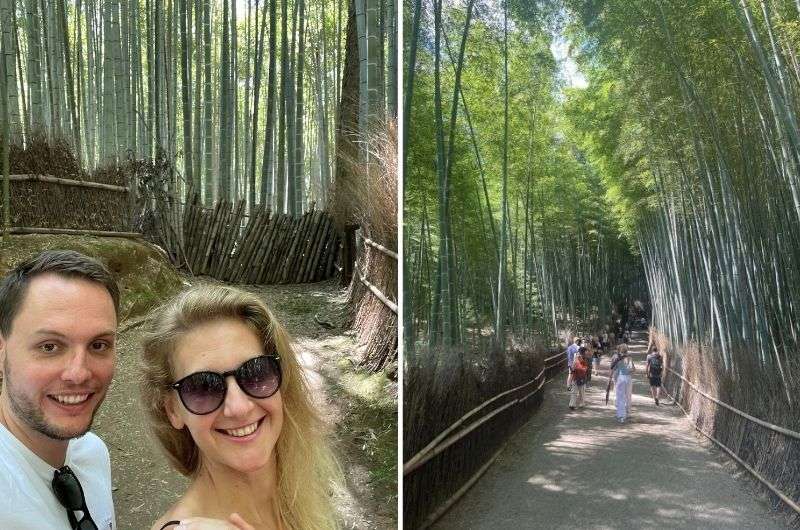
Managing to get some human-less selfies at Bamboo Forest @ Arashiyama
Practicalities:
- There are several parking lots near the entrance, but prices spike in peak tourist season. Some charge by the hour, others have flat daily rates, typically at JPY 1,000 a day.
- You can’t actually walk inside the bamboo (like between the individual stalks), just along one designated path, so everyone is funneled into a single narrow walkway—hence, the crowding.
Next, take the Sagano Romantic Train through a river gorge
After the bamboo walk, go for a ride on the Sagano Romantic Train, which slowly chugs through the scenic Hozugawa River Gorge for 7 km (4.3 miles). The open-air “rich car” (Car 5) is the best, but it sells out fast.
Tickets go on sale at 8:30 am at the station, so I’d recommend buying them first, then walking the bamboo forest while you wait for your departure time.
Pro tip: If it’s raining, expect to get wet—umbrellas aren’t allowed in the open-air car! That’s the only time everyone wants tickets for the less fancy cars that have actual walls.
Day 9, stop 2: Kinkakuji, aka Golden Pavilion, the one on the water
- Price: JPY 500
- Opening times: 9 am–5 pm
- Drive: 25 minutes
- Time spent here: 1.5 hours
From Arashiyama, drive 25 minutes to Kinkakuji, one of Japan’s three most important buildings (alongside Nikko’s Toshogu Shrine and Nara’s Tōdai-ji—you’ll see this one tomorrow). Unlike many overhyped tourist spots, this one delivers—the Golden Temple reflecting on the water is truly stunning.

Golden Pavilion
It was originally a shogun’s retirement villa, and he knew how to pick a good spot. The three-story structure sits perfectly on a lake, and you can only look at it from the lake shore. Pay attention to the different architectural styles of each level:
- 1st floor—Heian palace style
- 2nd floor—Samurai home style in Bukke style
- 3rd floor—Chinese Zen temple style, fully covered in gold leaf
Things to know:
- It gets packed, but there’s a one-way walking route, so the crowd moves along smoothly.
- Getting the perfect photo is a battle—Japanese tourists are polite and efficient, Western tourists… not so much. I was fed up with them, to say the least.
- The gardens and teahouse are a nice addition, and there are actual trash cans here—a rare luxury in Japan!
There’s nothing else to do, and in an hour, hour and a half tops, you will be back in your car, ready to move on to the next stop. It’s a famous one, too!
Day 9, stop 3: Fushimi Inari-taisha with thousands of red torii gates
- Price: Free
- Opening times: Always open
- Drive: 35 minutes
- Time spent here: 2 hours
Pro lunch tip: Before tackling Kyoto’s most famous shrine, stop for lunch at Dragon Burger—yes, a burger joint in Japan. But trust me, it might be the best burger you ever eat.
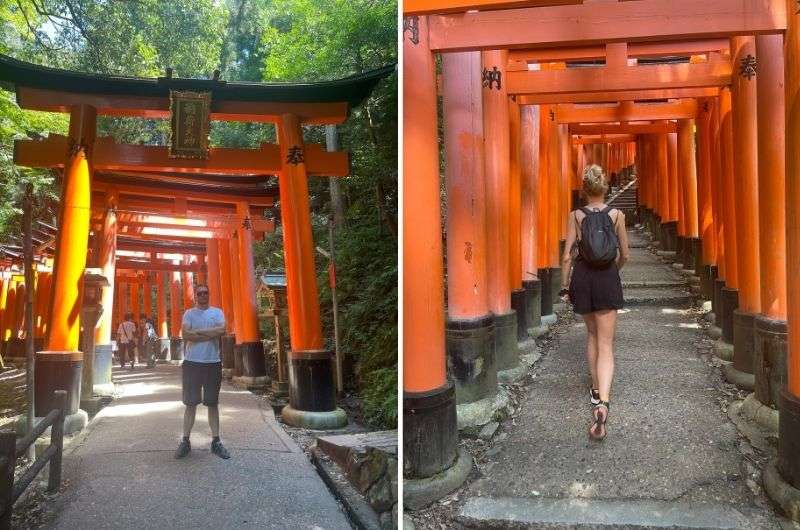
Some of the thousands of red torii gates at Fushimi Inari-taisha
Now, on to Fushimi Inari—home to thousands of red torii gates, stretching up a mountain. This is the shrine everyone visits, but the reality? It’s cool, but not as mystical as the photos suggest—because everyone and their grandma is here. But I have a trick up my sleeve (it requires more walking, but it’s worth it!):
- The first 30 minutes on the torii gate path are uncomfortably packed, but if you keep going past Yotsutsuji Shrine, you’ll get fewer crowds and better views.
- The full loop is 4 km (2.4 mi) and takes about 2 hours, but most people turn back halfway—do that if you’re short on time, but keep going if you want the place to yourself.
- The torii gates were donated by Japanese businesses as an offering to the god of rice and commerce—so if you own a business, you, too, can buy a gate!
Don’t spend too long hiking, though, because you still have a few more stops today. Moving on…
Day 9, stop 4: Sanjusangendo (Rengeo-in), the one with 1,001 Kannon statues
- Price: JPY 600
- Opening times: 8 am–5 pm
- Drive: 10 minutes
- Time spent here: 30 minutes
This next temple is just 10 minutes from the last, and parking is very easy. You won’t have trouble finding a spot at one of the many, many parking lots in Kyoto.
Most Japanese temples are all about the exteriors, but Sanjusangendo is the opposite. The 1,001 golden Kannon statues inside, each slightly different, are mind-blowing. It’s just a never-ending crowd of Kannons! Plus 28 other statues of her guardians.
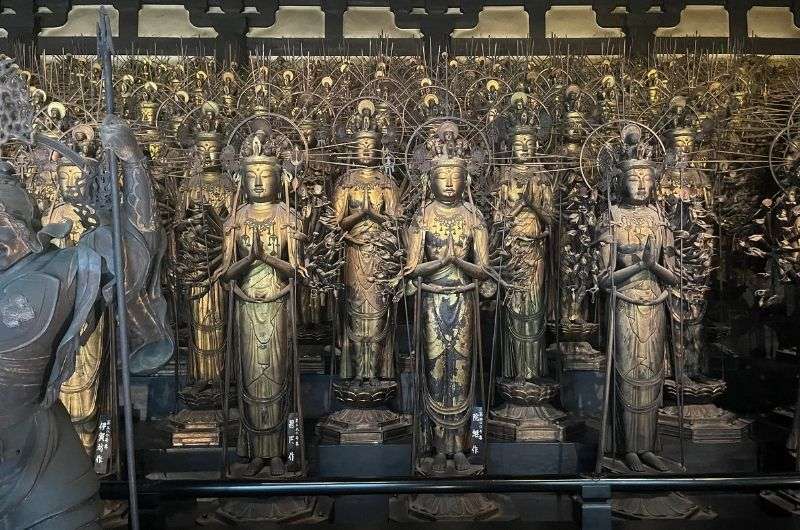
1,001 Kannon statues @ Sanjusangendo
Fun fact: Kannon has 11 heads to see suffering and 1,000 arms to help everyone out. Wait, what? Ok, so she has 42 arms, out of which the regular 2 don’t count (those are her personal arms for things like brushing her teeth and holding her coffee cup), and in Buddhism, there are 25 planes of existence. A little bit of simple math and you’ve got 1000!
And since I love numbers, here are some more: The temple itself is Japan’s longest wooden structure at 120 m/394 ft. “Sanjusangendo” literally means “33 bays”, referring to the support columns—because apparently, that was the most impressive thing they could name it after. Not the statues or arms or anything.
Day 9, stop 5: Kiyomizu-dera & Higashiyama Quarter
- Price: JPY 400
- Opening times: 6 am–6 pm (open until 9:30 pm on select dates)
- Drive: 10 minutes
- Time spent here: 2 hours
Last but not least, there’s one more temple you have to see today. It’s one of Kyoto’s most famous, Kiyomizu-dera. I visited it at the beginning of my Japan trip, so I didn’t realize just how fantastic it was when compared to other shrines and temples that I saw later on. So I urge you to take it all in; it is incredible!
It has it all:
- Epic city views
- A giant wooden terrace (built without nails!)
- Shrines for love, fortune, and childbirth
- A pitch-black “womb” walk (yes, really)
It closes at 6 pm, so be sure to get there by 4 pm to fully enjoy it. The hillside location makes for fantastic scenery, but it also means lots of stairs and crowds. The main gate (Niomon) is a bottleneck, so expect human traffic jams.
The views when walking to Kiyomizu-dera (you’ll get a similar one, just without my girlfriend)
One fun activity is the Otowa Waterfall, which lets you drink its water for love, success, or longevity—picking all three is greedy, so choose wisely! Watch the locals before taking your turn ladling the water into your mouth. Why? Offending them, Shinto, and Buddhist deities (because Kiyomizu-dera is dedicated to both!) would be a really bad way to end the 9th day of your trip to Japan!
Higashiyama Quarter, just outside the temple, is one of Kyoto’s busiest shopping streets. It’s touristy as heck, but I’ll admit it’s charming, packed with little souvenir shops, snack stalls, and traditional buildings.
Day 10: Day trip to Nara for temples and bowing deer (and surprisingly great coffee)
Activities and places visited on day 10:
- Drive to Nara from Kyoto (1 hour)
- Deer overload in Nara Park: Hundreds of half-tame, cracker-hungry sika deer that will bow to you (and not leave you alone once they spot snacks).
- Kofuku-ji is an ancient temple complex with a towering pagoda (that’s covered until 2031).
- Yoshikien Garden is a peaceful little oasis with moss, ponds, and a tea house.
- Isuien Garden is a pricier, meticulously designed garden with Tōdai-ji as its backdrop.
- Tōdai-ji has a massive wooden hall housing an even more massive Buddha—plus a nostril-sized hole you can crawl through for enlightenment.
- Naramachi is Nara’s old merchant quarter, now full of cafes, shops, and the best coffee I had in Japan.
- Kasuga Taisha is a bright red shrine drowning in lanterns and surrounded by yet more deer.
- Mt. Wakakusa has a viewpoint you can hike to from Kasuga Taisha or drive there if you’re lazy.
Restaurant tips: Tsukumo| Koyomi Café (both in Nara) | Teppansousaku Lien | Hanaroku | Terato Restaurant (in Kyoto)
Further reading: One day in Nara
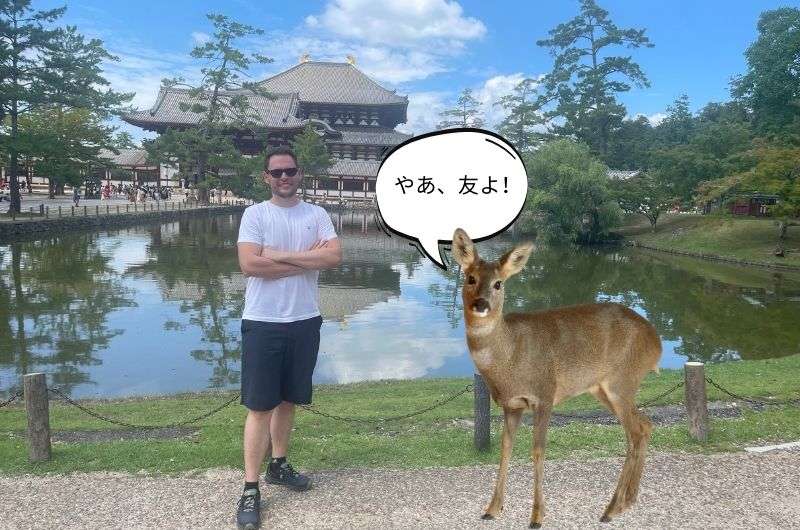
Hello, my friend @ Nara Daibutsu Todai
What is Nara famous for?
Between the Buddhist temples, Shinto shrines, great coffee, and endless pushy but adorable deer, it’s a must-visit on any Japan itinerary. Nara is small but packed with history, and despite being so close to Kyoto, it has a very different feel and tons to see. Perfect day trip material. Most of Nara’s attractions are clustered in Nara Park—a public park at the base of Mt. Kasuga.
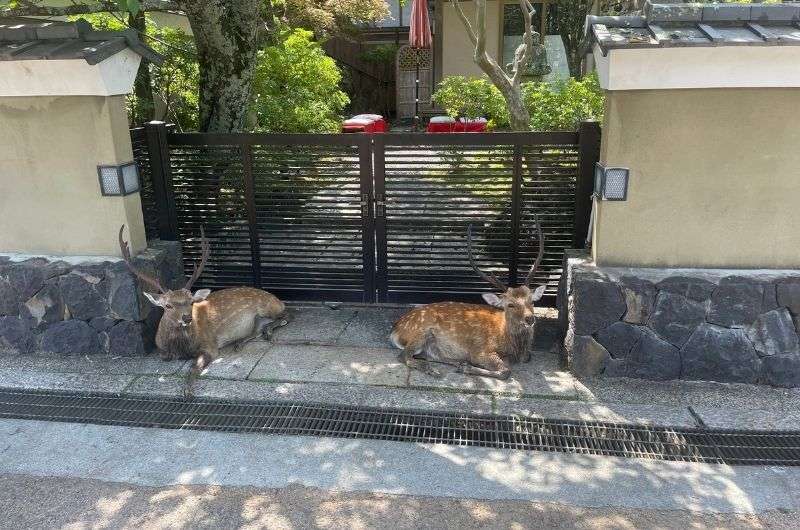
A note on Nara’s bowing deer
Nara Park is also where you’ll find most of the 1,400 deer, freely roaming around like they own the place. If you bow to a deer, they may bow back, which is adorable. If you don’t give them a deer cracker (called shika senbei) quick enough after that, they might bite your butt or chase you, which is slightly less adorable.
Fun fact: The deer are considered sacred due to a legend that a god once arrived in Nara on a white deer.
Read more Nara FAQs in my comprehensive Nara Guide + Itinerary
Day 10, stop 1: Kofuku-ji Temple (without the pagoda at the moment)
- Price: JPY 300–700 for different halls
- Opening times: 9 am–5 pm (grounds open 24/7)
- Drive: 1 hour from Kyoto
- Time spent here: 1 hour
Parking in Nara
After about an hour of driving from Kyoto, you’ll reach Nara. Parking in Nara’s city center is easy—loads of parking garages and cheap parking fees (something the other blogs get terribly wrong). We paid JPY 1000 for parking for our full day in Nara. You’ll be walking between all the sights.
Start exploring at Kofuku-ji
Your first stop of the day is Kofuku-ji, once the family temple of the Fujiwara clan, Japan’s most powerful aristocrats during the Nara and Heian periods.
The five-story pagoda is its most famous feature and Japan’s second tallest pagoda. Unfortunately for me and you, it won’t be fully visible until 2031 due to renovation work. Still, the walk to Kofuku-ji through Nara Park, surrounded by bowing deer, is a nice way to start the day, and there’s more to see at Kofuku-ji than the pagoda.
You can wander the temple grounds for free, but if you want to go inside, you’ll need to buy separate tickets for each hall. The Central Golden Hall, Eastern Golden Hall, and National Treasure Museum all charge JPY 300–700 each. If you’re a Buddhist art enthusiast, you’ll want to visit the museum—it houses the famous six-armed Ashura statue.
Day 10, stop 2: Yoshikien & Isuien Gardens for some peace and landscaping
- Price: JPY 1200 for Isuien, Yoshikien is free
- Opening times: 9 am–4:30 pm
- Walk: 10 minutes from Kofuku-ji
- Time spent here: 1 hour
On the way to Tōdai-ji, let’s first stop and take a look at some beautifully designed Japanese gardens, shall we?
Yoshikien Garden was built where Kofuku-ji’s priests once lived. It’s small but lovely, featuring three distinct gardens:
- Moss garden is exactly what it sounds like: very green, very soft.
- Pond garden—Small but scenic.
- Tea ceremony garden—Has a traditional tea house.
Isuien Garden, right across the river from Yoshikien, is twice the size and charges a fee. It uses Tōdai-ji’s Nandaimon Gate as a backdrop, so it’s a great photo spot. The staff are friendly and give short introductions to Japanese garden design (in English!).
These guardians
Pro tip: Unless you’re really into Japanese gardens, you can skip Isuien—it’s beautiful, but not JPY 1200 beautiful. There’s nothing wrong with moving on straight to the next stop instead.
Day 10, stop 3: Tōdai-ji Temple for a massive wooden hall with a huge Buddha
- Price: JPY 600
- Opening times: 8 am–5 pm
- Walk: 5 minutes from Yoshikien Garden
- Time spent here: 1–2 hours
Tōdai-ji is one of the most historically significant temples in Japan. If you’re into massive wooden structures and huge Buddhas, this is the place to be.
Built in 752, Tōdai-ji’s Daibutsuden (Big Buddha Hall) was the largest wooden building in the world until the 1990s, and even today, it’s only half the size of the original—remember that fun fact when you’re admiring how big it is. Just imagine how much cedar wood was needed to re-build this thing—forests were cleared, rivers dammed, and they still couldn’t make it as large as before. I’ve seen some huge cathedrals around the world, but this hall still blew me away by its size.
Inside, you’ll find the Buddha of the Cosmos, a 15-meter-tall (49 ft) bronze statue who, according to Buddhist tradition, created the entire universe and all other Buddhas.
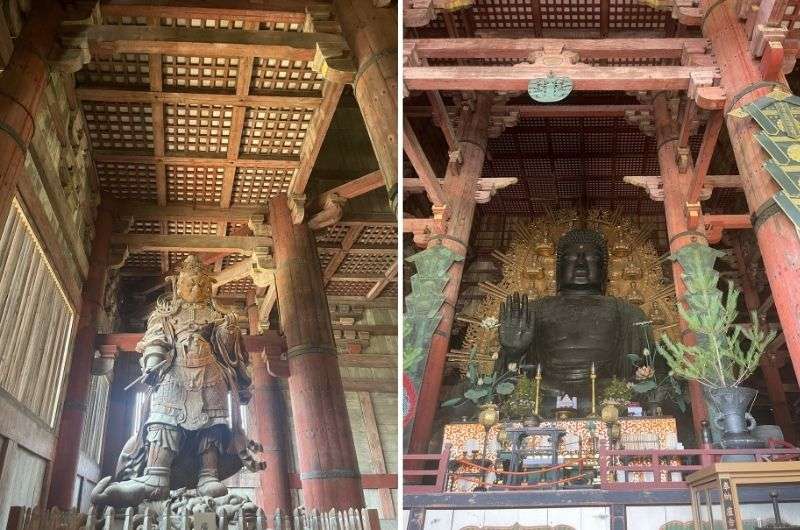
Huge Buddha in Tōdai-ji
Pro tip: There are free English-speaking guides available to tell you about Todai-ji’s significance and history.
Fun challenge: Try squeezing through the hole in the wooden pillar near the Buddha. It’s supposedly the same size as his nostril, and if you can fit, you’re said to achieve enlightenment. I didn’t even try; my bulging muscles wouldn’t let me, but I’d like to think I’m enlightened anyway (especially after eating all those black eggs at Owakudani).
Day 10, stop 4: Naramachi Quarter—Old Town & lunch & coffee
- Walk: 20 minutes from Tōdai-ji
- Time spent here: 1.5 hours
It’s probably well past noon by now, so leave Nara Park for a bit and head to the Old Town to de-temple and fuel up your body for more exploring.
Naramachi is Nara’s old merchant quarter, with narrow streets and historic wooden buildings that look so typically Japanese. It’s less touristy than Kyoto’s Gion, which makes it a million percent better.
Another positive? It’s the perfect place for lunch and a coffee stop! I had my best coffee in Japan somewhere here, but don’t ask me where—I failed at Google Maps that day. There are plenty of cozy cafes and bakeries, so wander and find your own hidden gem.
Day 10, stop 5: Kasuga Taisha Shrine and Mt. Wakakusa viewpoint… or not (choose from 3 alternatives)
After a rest in town, it’s time to make a decision. You can visit Kasuga Taisha Shrine, which is all red and lantern-y, OR visit the shrine and continue on a 1.5-hour hike to Mt. Wakakusa from there, OR just visit the hike’s final viewpoint (you can drive there).
Option 1: Just visit Kasuga Taisha Shrine and no hike
- Price: Free (JPY 500 for the inner shrine)
- Opening times: 6 am–5 pm
- Walk: 20 minutes from Naramchi quarter
- Time spent here: 30 minutes
Kasuga Taisha is Nara’s most special shrine because it is said to protect the city. It’s known for its thousands of lanterns, all donated by worshippers over the centuries. It’s visually stunning because of all the red and lanterns, but by this point in your Japan trip, it may fall victim to over-shrining, and you just may not be able to appreciate it enough (I know I wasn’t).
For me, the highlight was the stone lantern-lined path leading up to the shrine—very atmospheric, especially in the mid-morning fog.
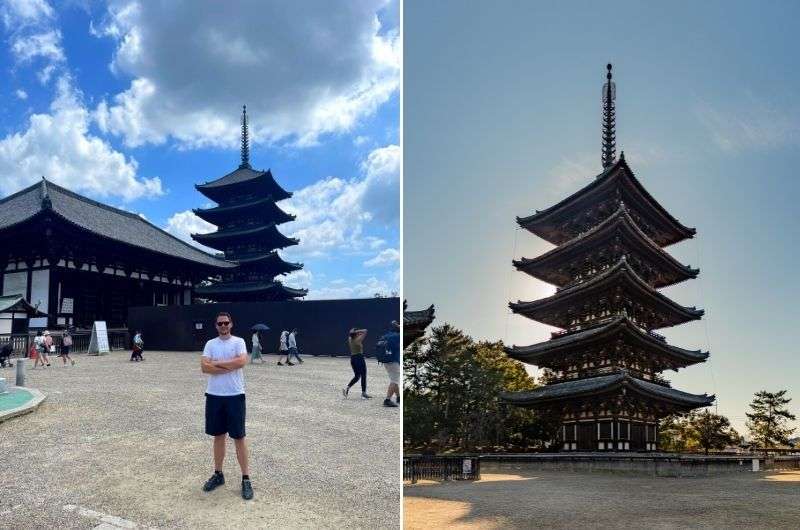
Who is taller? Kofuku-ji temple pagoda or me?
Pro tip: If you visit during the Lantern Festivals in February or August, all the lanterns are lit up at night, making it magical (I would think… I didn’t get to see it first-hand).
Fun fact: Behind the shrine, you can see the sacred Kasuga Primeval Forest. Keyword “see”… from afar—it’s off-limits to humans. These are Nara’s VIP trees, where nature has run wild for over 1,000 years!
Option 2: Start at Kasuga Taisha and hike 5 km (3 mi) to Mt. Wakakusa
The Full Mt. Wakakusa Hike (5 km/3 mi, 1.5 hours) is a gentle but scenic hike that starts at Kasuga Taisha. You walk further back through Nara Park, past small shrines and streams, before reaching Mt. Wakakusa’s summit for epic views over Nara. It’s a much calmer part of Nara Park, which introverts and those sick of crowds will appreciate.
Hike length: 5 km/3 miles (point-to-point)
Hike duration: 1.5 hours
Elevation gain: 200 m/600 ft

For full details of all the Mt. Wakakusa hiking options, read my Nara itinerary (stops 4 and 5)
Option 3: Visit just Mt. Wakakusa viewpoint (by driving there)
If you don’t have the time or will to walk but still want the view, you’re in luck! Get your car and drive almost all the way up and “hike” the last 500 m to the top in about 20 minutes. It’s no mountain, so don’t fret. See? You can have your cake and eat it ,too. Same great view, zero sweat.
Drive 1 hour back to Kyoto & dinner
You’ve covered Nara’s main sights and can now head back to Kyoto for dinner—the drive is about 1 hour long. Since you’re already templed out, a solid teppanyaki or sushi place in Kyoto sounds like a good idea:
- Teppansousaku Lien (modern teppanyaki)
- Hanaroku (classic teppanyaki)
- Terato Restaurant (sushi)
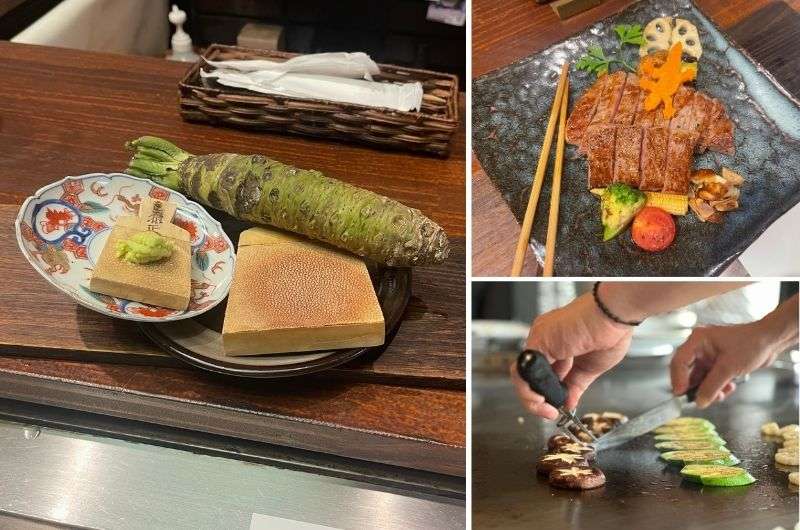
Teppanyaki yum and a huge wasabi rhizome
What is teppanyaki? Teppanyaki is grilled food meets live entertainment—a chef cooks steak, seafood, and veggies right in front of you on a blazing-hot iron griddle (teppan) while pulling off knife tricks and setting things on fire. This type of restaurant can be high-end or casual.
Day 11: Flight from Kyoto to Okinawa → Exploring southern Okinawa
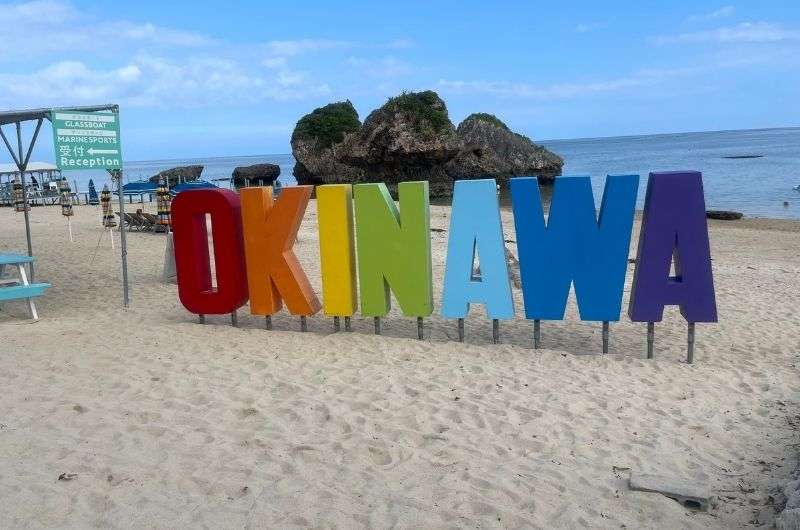
Okinawa sign @ Mibaru Beach
Activities and places visited on day 11:
- Flight from Kyoto to Okinawa (2 hours)
- Peace Memorial Park: A WWII memorial with cliffside views of the ocean.
- Mibaru Beach: A quiet, scenic beach with cool rock formations and painfully sharp coral.
- Okinawa World: A mix of a massive cave and, uh, venomous snake petting.
- Alternative: Karate Museum: A tiny, passionate tribute to Okinawa’s most famous export.
- Tropical Beach: A popular swimming beach with safety nets and picnic spots.
Hotel recommendation: Okinawa EXES Naha for 2 nights
Restaurant tips: Trattoria SOMEYA | Yunangi
Further reading: My 3-day Okinawa self-drive itinerary
Day 11, travel from Kyoto: Take a flight to Okinawa
Yikes, your Japan trip is coming to an end soon! You better keep up the energy and make the most of it! Start your 11th day in Japan with a morning flight from Kyoto to Okinawa, which takes about 2 hours.
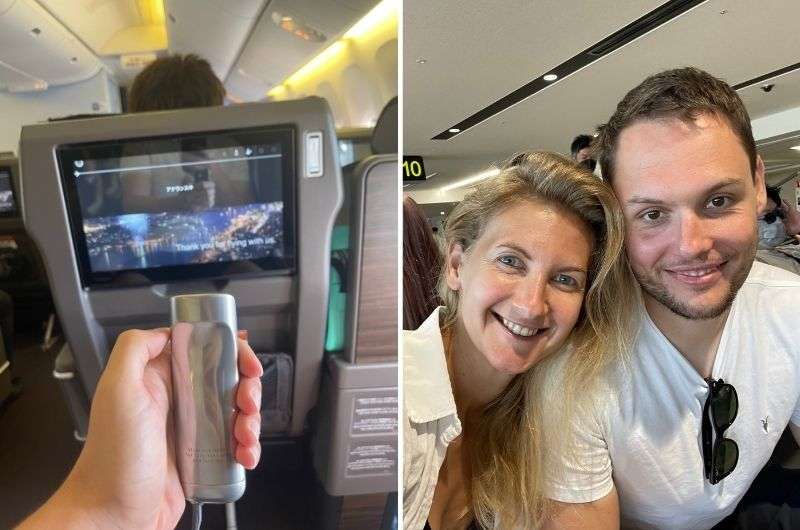
Let's fly away with ANA premium class
I booked us a flight with ANA Airlines and upgraded to Premium Class, which was the best decision ever. The comfort and level of service fromthe cabin crew was so good, I’m never flying economy again.
Rent a car in Okinawa
Once you land at Naha Airport, grab your rental car—because unless you want to waste half your trip waiting for buses, driving is the way to go.
Pro tip: Double-check that you reserved your car at a rental company directly at the airport terminal so you’re not getting on a stupid bus to the offsite rental lot like me.
Book a hotel in Naha
You'll be basing yourself in Naha, Okinawa’s capital, because it’s convenient for exploring the island and has the best hotels (of good value). Stay for 2 nights… this hurts my soul because it’s too short, but you only have 14 days in Japan, so what magic are you expecting from me?!
I loved Okinawa EXES Naha. It was the best hotel I stayed at in Japan.
Day 11, stop 1: Peace Memorial Park, a WWII memorial with ocean views
- Price: JPY 300 (USD 2) for the museum, otherwise free
- Opening times: 9 am–5 pm
- Drive: 40 minutes
- Time spent here: 1–2 hours
First, drive to the southern tip of the island to Peace Memorial Park—the main WWII memorial in Okinawa. Basically, it's a massive cemetery and open space dedicated to the Battle of Okinawa. Don’t expect anything flashy—it’s a peaceful park where you can take a solemn stroll among rows of monuments with the names of 240,000 people who died in the battle.
I spent an hour just walking around, soaking in the tranquility, because more wasn’t possible in the brutal heat. If nothing else, the cliff views are spectacular. I enjoyed getting a glimpse of history while also still feeling like I’m on an island.
Peace Memorial Park
There’s also the Peace Memorial Museum, which gives an overview of events before, during, and after the Battle of Okinawa. It’s a bit heavy, but well worth the JPY 300.
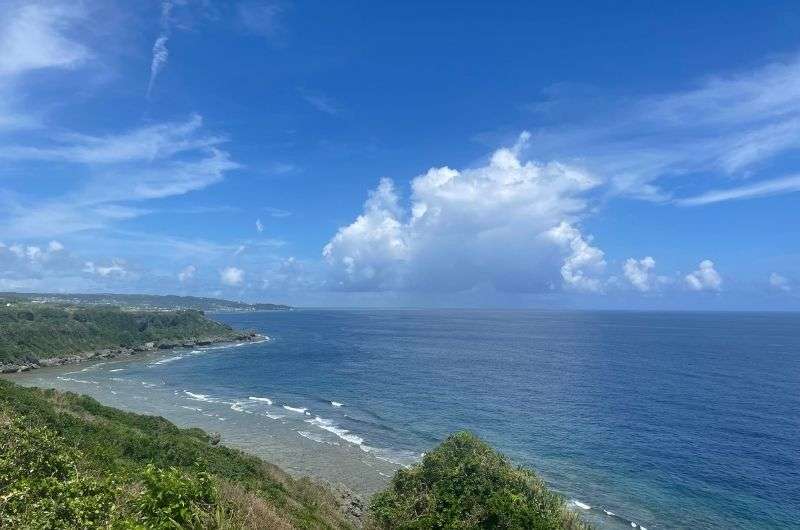
Day 11, stop 2: Mibaru Beach for a bit of a breather after your busy morning
- Price: Free (JPY 500/USD 3 for parking)
- Opening times: Always open
- Drive: 15 minutes
- Time spent here: 1 hour
Next, head just 15 minutes along the coast to Mibaru Beach (is it just me, or is everyone else calling it ‘Maribu’ accidentally?). Parking is JPY 500.
If you’re like me and generally have a ‘meh’ attitude towards beaches, this one might just win you over. So trust me and give it a shot. It’s never too crowded, the sand is (mostly) soft, and the clear water with rock formations just begs you to wade in and explore. Carefully.
Beware: Some of the rocks are sharp, so water shoes will come in handy. If you see anything moving in the water, don’t investigate too closely.
If you’d rather observe from a safe distance, take a glass-bottom boat tour instead—it’s like snorkeling without the commitment.

Baywatch @ Mibaru Beach
Day 1, stop 3: Okinawa World’s massive cave and snake petting
- Price: JPY 2000 (USD 12.50)
- Opening times: 9 am–5 pm
- Drive: 10 minutes
- Time spent here: 2–3 hours
Another quick drive and you’re at Okinawa World. It’s part cave, part zoo, and all kinds of weird fun.
The main reason to visit is Gyokusendo Cave, which is a whopping 5 km (3 mi) long (I love long caves!), though you’ll only walk about 900 m (0.5 mi) of it (too bad). It's well-lit, with an impressive underground river—there are even fish in it—and hundreds of stalactites. One big guy is 31 m (100 ft) in diameter!
Pro tip: If you see a school group ahead, don’t be shy and make your way in front of them ASAP. Nothing ruins a cave’s serenity like 50 kids screaming about how cool it is, but they do block off other people that aren’t as bold as we were, meaning they stay behind, and we get the caves to ourselves. High five!
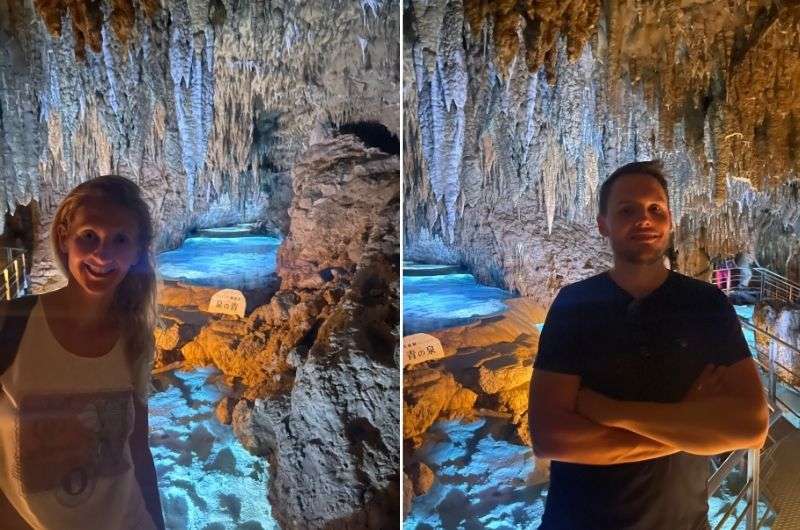
We love long caves! @ Gyokusendo Cave
After the cave, there’s a section on Okinawan crafts and culture (which I just breezed through) and a terrarium full of my favorite critters: venomous snakes. Because, you know, Japan. They have some extremely venomous water snakes there that I haven’t seen anywhere else. Sometimes, you can even touch some of them!
Alternative: Karate Museum (if you can get the timing right)
- Price: Free
- Opening times: Mondays, Wednesdays, and Fridays 11 am–4:30 pm; Saturdays 2 pm–4 pm; otherwise closed
- Drive: 20 minutes
- Time spent here: 30 minutes
We were able to visit a super local museum called the Okinawa Karate Museum. Okinawa is the birthplace of karate, so it only makes sense to stop by if you can—it’s an experience. The problem is the limited opening hours, so make note of them before you come over.
Imagine this small but passionate museum, located on the second floor of Mr. Tetsuhiro Hokama’s dojo—it feels more like a martial artist’s personal study than a traditional museum.
Even if you’re not into martial arts, Hokama Sensei’s enthusiasm is contagious. There are 500+ artifacts, old photos, and weapons on display, and if you’re lucky, you might even get a quick demo. You’ll probably be in and out in half an hour, but it was a very special place (and person) that I’m glad I got to see personally.
Day 1, stop 4: Tropical Beach to watch the sunset
- Price: Free
- Opening times: Always open
- Drive: 35 minutes
- Time spent here: 1 hour
After spelunking and befriending venomous reptiles (or a friendly Mr. Hokama), it's time to relax and once again remember you’re here to dip your toes in the Pacific. Or at least that was my girlfriend’s reasoning for “forcing” me to come to Okinawa in the first place. I quickly had to admit that it really is a stunning place, and the locals’ stress-free approach to life rubs off on you really fast.
So, of course, you’ll end the day at a beach. Tropical Beach is in Ginowan Seaside Park, and while it’s definitely more “mainstream” than Mibaru, it has its perks—mainly, safety nets to keep you from accidentally swimming into something that wants to eat you.
The facilities are decent (showers, restrooms, and BBQ areas), and there’s even a covered picnic area. Locals come here to grill, swim, and watch the sunset. This close to the end of your Japan trip you may be starting to feel a little tired, so I invite you to unwind and watch the gentle waves for a while.
Finally, drive 30 minutes back to Naha. It’s time for dinner.
Day 12: Explore more of Okinawa’s best sights
Looking for Nemo in the Oceanic Culture Museum in Okinawa
Activities and places visited on day 12:
- Shurijo Castle: A castle in the making (literally—it's under reconstruction, but you can see it happening).
- Nabee Beach & Kayaking: Crystal-clear waters perfect for kayaking or snorkeling.
- Cape Manzamo: Limestone cliffs.
- Churaumi Aquarium or Oceanic Culture Museum: Either one gets you an oceanic deep dive (one literal, one historical).
- Emerald Beach: This is one last stop to get sand between your toes for the final time.
Restaurant tips: Trattoria SOMEYA | Yunangi
Further reading: My 3-day Okinawa self-drive itinerary
Day 2, stop 1: Shurijo Castle for a unique look at traditional building techniques
- Price: JPY 400 (USD 2.50)
- Opening times: 8 am–7 pm (8 pm in summer)
- Drive: 15 minutes from central Naha
- Time spent here: 1 hour
- Until the end of 2026, expect scaffolding—this is a live reconstruction site.
Rise and shine, it’s your second—also known as your last—day in Okinawa! After breakfast, drive 15 minutes to Shurijo Castle, the former royal palace of the Ryukyu Kingdom.
Once upon a time, it was the grand seat of power… until it burned to the ground in 2019. Now, it’s a construction site, but a fascinating one, where you can witness artisans meticulously rebuilding the castle using traditional techniques.
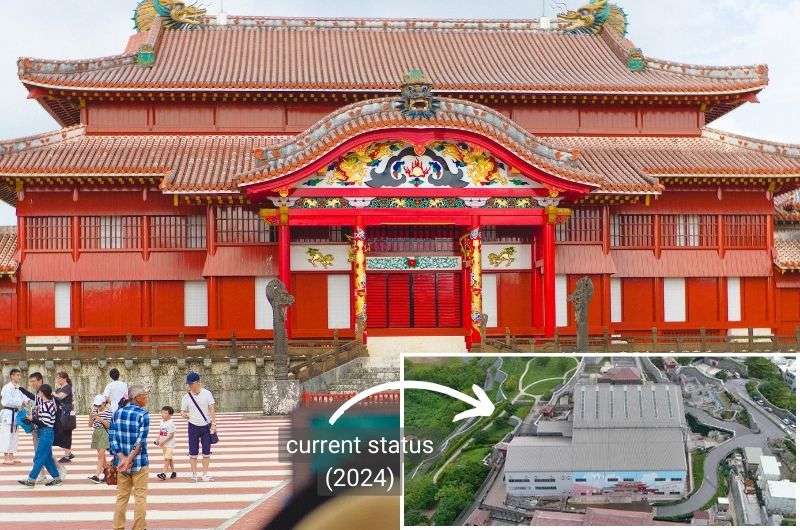
Shurijo Castle — Before and after
The entire bright red structure is under a massive hangar. Use the windows or the glass observation deck to take a behind-the-scenes look. I actually found it pretty cool—kind of like watching a time-lapse video in real life.
What you can see at Shurijo Castle in 2025:
- Shureimon Gate—The iconic red gate at the entrance, already beautifully restored.
- Sonohyan-utaki Ishimon—A sacred stone gate (UNESCO-listed).
- Kankaimon Gate & Zuisenmon Gate—Defensive gates leading into the castle complex.
- The outer walls & lookout points have great views over Naha.
- The castle park—Open spaces with historical markers and scenic walks.
And hey, maybe it’s a good thing the thing isn’t rebuilt yet. You need to move on to your next stops, stat!
Day 2, stop 2: Cape Manzamo
- Price: JPY 100 (USD not even 1 dollar)
- Drive: 45 minutes
- Time spent here: 20 minutes
Drive 45 minutes to Cape Manzamo, a scenic limestone cliff formation with excellent views of the East China Sea. It’s also where someone decided to build the "Manzamo Area Revitalization Facility", pushing the place into tourist trap territory. It's actually a shopping mall filled with souvenir shops and a food court. The observation deck on the third floor makes up for it a little bit, though.
If you can ignore this commercial nonsense, the cliffs themselves are fantastic. We walked on the paved path to the main viewpoint in just a few minutes. You can spend maybe 20 minutes here soaking in the ocean views before you’ll be ready for your next stop. Tip: Look for the elephant’s trunk.
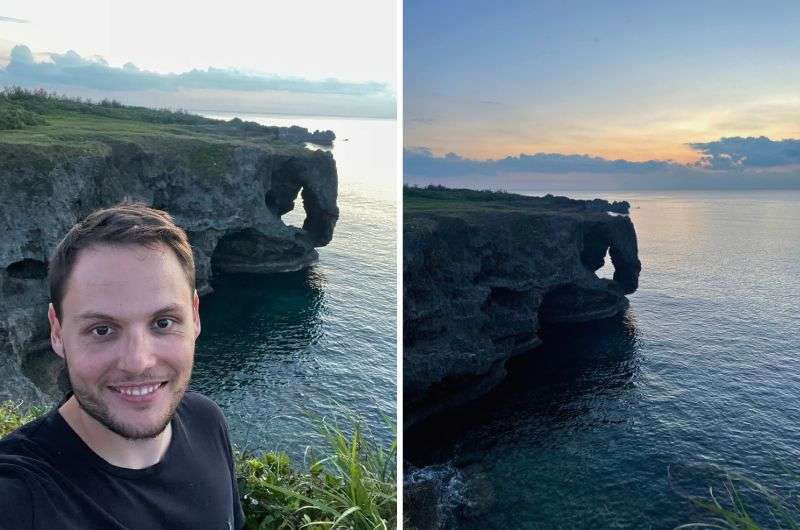
The golden hour even better — Cape Manzamo
Day 12, stop 3: Nabee Beach & Kayaking
- Price: JPY 6,500 (USD 40) for a 3-hour kayaking + snorkeling trip
- Drive: 5 minutes
- Time spent here: 2–3 hours
- Tip: Book your kayaking/snorkeling tour in advance; they fill up fast.
Time to swap land for sea. Nabee Beach is another pretty beach, but this time you’re not here just to lounge—this is your chance to hop in a kayak and explore the coral reefs.
Depending on your tour, you can paddle through sea caves or even use a glass-bottom kayak to spy on the underwater world. No matter what, you’ll be able to enjoy the crystal clear water and marine life.
There are several well-reviewed tour operators in the area—check Google Maps reviews and book ahead.
Alternative: If kayaking isn’t your thing or you’re terrible at planning and can’t be bothered to commit to a tour, stick to snorkeling or paddleboarding from the beach instead. Either way, expect to see colorful fish, coral, and maybe even a sea turtle or two.
Day 2, stop 4: Ocean Expo Park: Visit Churaumi Aquarium or Oceanic Culture Museum
- Price: JPY 2,180 (USD 14) for the aquarium / JPY 190 (USD 1.20) for the museum
- Drive: 1 hour
- Time spent here: 2 hours
You can’t visit Okinawa without exploring its oceanic heritage. There are several spots you can do that, but since you’re leaving tomorrow, you’ll likely only have time for one. Choose wisely:
Option 1: If you’re into marine life, Churaumi Aquarium is one of the world’s best aquariums, featuring huge tanks with whale sharks, manta rays, and deep-sea creatures. The Kuroshio Tank is the main attraction, and the dolphin show is free if you’re into that kind of thing. I especially loved the outdoor area with sea snakes and sea turtles. Bonus: The signs are in English!
Option 2: If you prefer history and exploration over staring at fish, the Oceanic Culture Museum does a great job showcasing the maritime history of the Pacific Islanders. The collection of canoes is world-class, and the planetarium is a nice bonus. Just be prepared—every sign is in Japanese, so I had Google Lens fired up the whole time I was there.
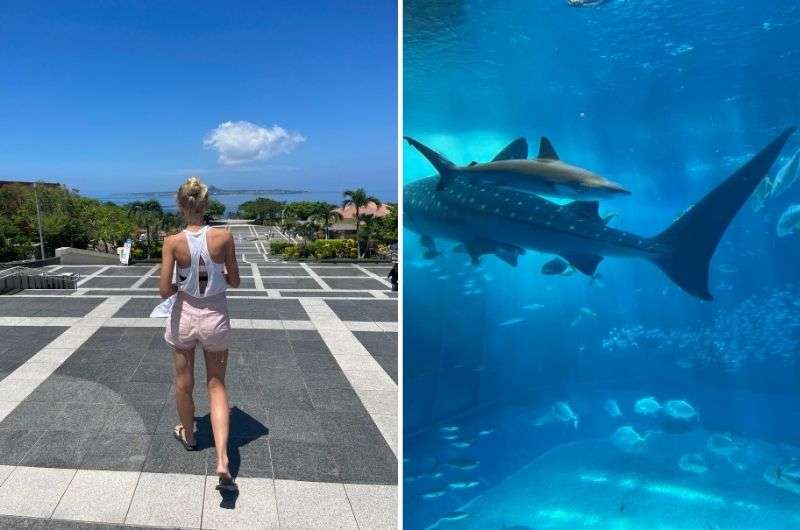
Up to the beauty of the ocean—Churaumi Aquarium
I visited both the aquarium and the museum, and I honestly thought both were fantastic. The Oceanic Culture Museum is one of the most unique museums I’ve ever seen, and it’s possibly my favorite museum in Japan. And the aquarium, I mean come on, what’s not to love? Oh, maybe the crowds. Yeah, I hated those.
Practicalities: There are plenty of free parking lots in Ocean Expo Park, the most convenient of which is a large parking lot between the aquarium and the museum (your next stop). Make sure to download the Churaumi Aquarium app if you’re going to the aquarium. It makes it easier to navigate the huge exhibition areas.
Day 2, stop 5: Emerald Beach (part of Ocean Expo Park)
- Price: Free
- Drive: Short walk from Ocean Expo Park
- Time spent here: 30 minutes (or longer if you want to beach bum around a bit more)
Cap off your day with some beach time at Emerald Beach, conveniently located in Ocean Expo Park. The water is clear, the sand is soft (mostly), and the whole place has a laid-back vibe. If you didn’t get enough swimming in at Nabee Beach, now’s your chance. Seriously, you’ll be in Tokyo tomorrow, so it’s now or never!
There are lifeguards on duty and plenty of shaded spots to relax, though food options are limited. Stick around for sunset if you want, but otherwise, it’s time to head back to Naha and grab some dinner.
Pro tip: I’ve written a 3-day Okinawa itinerary that includes even more places and attractions to explore. Check it out to see if you want to swap anything out:
Day 13: Flight from Naha to Tokyo → Neon lights, anime, and sky-high views in Tokyo
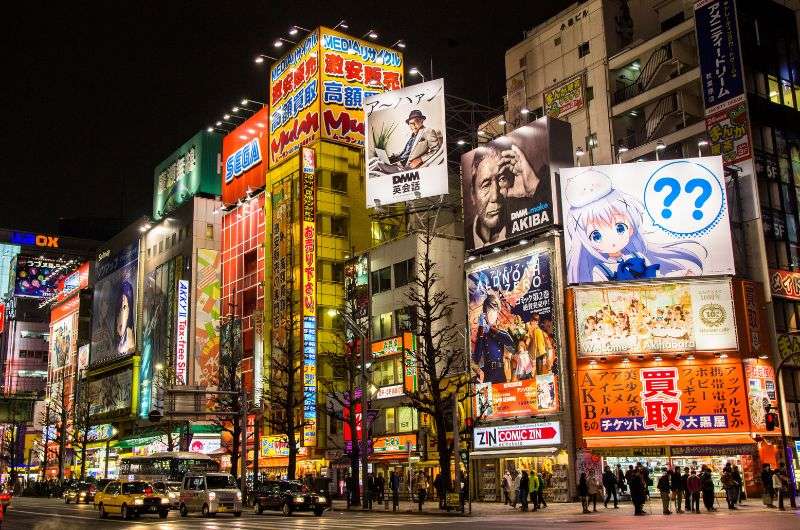
Neon lights and anime @ Akihabara neighborhood
Activities and places visited on day 13:
- Flight from Okinawa to Tokyo (2.5 hours)
- Akihabara neighborhood: Japan’s geek mothership. Neon, anime, vending machines… and the best place to find a hotel in Tokyo.
- Ghibli Museum: If Totoro doesn’t charm you, you might be dead inside.
- Tokyo Skytree: The tallest tower in the world, with expensive tickets and incredible Tokyo views.
Hotel recommendation: Nohga Hotel Akihabara Tokyo for 2 nights
Restaurant tips: Labs Syokudo (in Akihabara) | Koyoken | Kazu (both near the Skytree)
Further reading: My 3-day Tokyo itinerary
Day 13, stop 0: Morning flight to Tokyo & getting started
The flight from Okinawa to Tokyo takes about 2.5 hours. Here are some pointers on getting into Tokyo:
- You’ll most likely land at Haneda Airport (closer) rather than Narita (farther).
- No need to rent a car—Tokyo's public transport is king.
- From Haneda, hop on the Tokyo Monorail to Hamamatsucho, then transfer to the JR Yamanote Line to Akihabara. If you somehow end up at Narita, check my airport transport guide below.
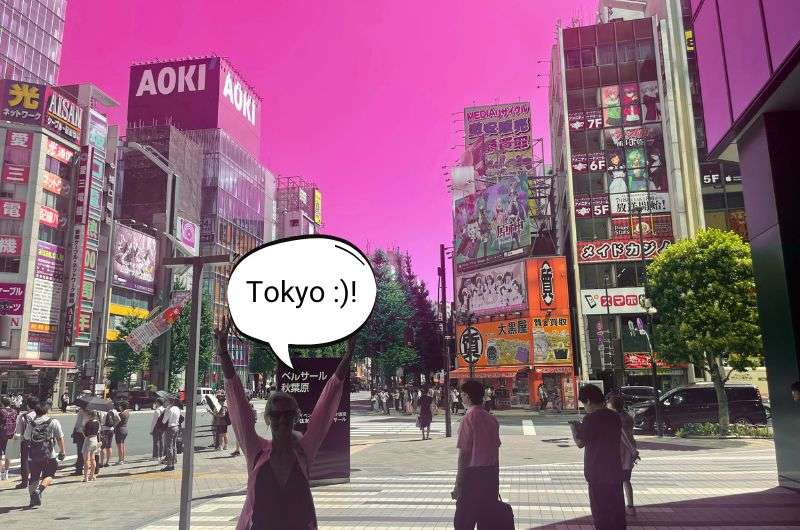
Anime city life
Pro tip: Not sure where to stay in Tokyo? Check out my guide to Tokyo’s best neighborhoods for foodies, shoppers, families, and others. I chose Akihabara because I think it’s the best of all worlds.
Day 13, stop 1: Akihabara, Japan’s geek & gadget wonderland
- Time spent here: 1 hour
Once you drop your bags at the hotel (I stayed at Nohga Hotel Akihabara Tokyo and would stay there again), take a moment to check out the neighborhood and breathe in the neon-drenched chaos. Tokyo is massive, so this first “stop” helps you ease in before moving on to the Ghibli Museum and Tokyo Skytree.
You’re in for a crash course in modern Japanese culture, but try not to buy too many weird (wonderful?) souvenirs just yet.
What’s in Akihabara?
- Maid Cafés: Imagine being served by waitresses dressed as anime-style maids, speaking in baby voices while drawing cats on your food. We went… for “research.” Never again.
- Pachinko parlors: A loud, chaotic, slot-machine-meets-pinball game where gambling is technically illegal, but somehow they do it anyway, and everyone pretends it’s not happening.
- Gadget & anime stores: Vintage video games, high-end cameras, or limited-edition figurines? Sure, Akihabara has it all! I was fascinated by how many ridiculous things vending machines can sell.
Day 13, stop 2: Ghibli Museum—pure magic, even if you aren’t an anime fan
- Price: JPY 1,000 (USD 7) Tip: Buy tickets online a month in advance!
- Opening hours: 10 am–6 pm
- Distance from last stop: 45–60 min by train
- Time spent here: 1.5 hours minimum
Even if you’re not into Studio Ghibli or anime in general, the Ghibli Museum is hands down one of the most charming places in Tokyo. I promise you’ll enjoy it, and not just because the rest of Tokyo was a complete flop for me (spoiler: you, too, will likely be underwhelmed because you’ve seen so much on your Japan itinerary already).
The Ghibli Museum building feels like something straight out of My Neighbor Totoro, and from the moment you walk in, it’s clear you’ve entered the whimsical, creative world of Hayao Miyazaki.
What to expect at the Ghibli Museum:
- Hidden details & rooftop Laputa robot: Explore all the little corners because every part of this place feels special. It’s 3 floors of wide-eyed characters and cool details about production.
- Exclusive short film: You can only see it here, nowhere else in the world!
- Exhibits on animation & storytelling: No English translations, so you’ll need the assistance of technology (your phone) for sure.
How to get there from Akihabara:
Take the JR Chuo Line from Akihabara to Mitaka Station (~35 min). From there, either walk 15 minutes or take the Ghibli Museum shuttle bus.
The Ghibli Museum is pure magic
Pro tip: If you’re there during cherry blossom season, take a detour to Inokashira Park for a stroll before heading back into the city.
Day 13, stop 3: Tokyo Skytree for the best view in Tokyo!
- Price: JPY 2,100–3,100 (USD 14–20) Tip: Buy tickets online to skip the long lines!
- Opening hours: 10 am–9 pm (last admission at 8 pm)
- Distance from last stop: 1 hour by train
- Time spent here: 1.5 hours (or more if you wait in line for tickets)
By now, you’ve probably spotted Tokyo Skytree multiple times—it’s impossible to miss. I think this is the perfect way to end the day because it’s almost like Tokyo’s mic drop—a final, jaw-dropping view of the giant city sprawling as far as the eye can see.
Standing 634 meters (2,080 feet) above it all makes you realize just how insane Tokyo really is. Actually, it’ll make you realize how insanely amazing your 14 days in Japan have been! Tomorrow, you’ll be one of the millions of ants navigating the streets down below.
You’ll want to buy tickets online in order to skip the line. The Skytree’s two observation decks offer floor-to-ceiling glass windows, a slightly scary glass-floor section, and views that stretch as far as Mt. Fuji if you’re lucky (and don’t arrive after sunset).
Views of the Skytree
Pro tip: If you visit Tokyo Skytree closer to nighttime, you’ll see it lit up in alternating colors (they switch it up, so I can’t tell you what it will look like when you visit).
How to get to Skytree from Ghibli Museum:
Take the JR Chuo Line towards Tokyo, transfer at Kanda Station to the Tokyo Metro Ginza Line, then switch at Asakusa Station to the Tobu Skytree Line. Overwhelming? Welcome to Tokyo! (It’s actually not that crazy once you’re there, so no worries.)
Dinner near Tokyo Skytree
After your day of travel, sightseeing, and possibly questionable life choices in Akihabara, it’s time for dinner. You could head back to your hotel and just eat there, or here are some options near Skytree:
- Koyoken: No English menu, but if you like pork, this is your spot.
- Kazu: A fantastic BBQ place where they grill everything.
- What about Skytree restaurants? Overpriced, but the views are great.
After dinner, head back to your hotel and rest up—tomorrow is another packed Tokyo day!
Day 14: Tokyo’s top tourist attractions… and karaoke
Activities and places visited on day 14:
- Senso-ji: Tokyo’s oldest temple, full of history and incense.
- Imperial Palace: Where Emperor Naruhito jogs and plays the viola (probably not at the same time).
- Ginza: A luxury shopping district where you can spend any leftover budget you had for your Japan trip.
- Shibuya Crossing: The world's busiest intersection (just a big tourist trap if you ask me).
- Takeshita Street: Another typically Japanese hotspot with Hello Kitty, crepes, and weird fashion.
- Meiji Jingu: A peaceful Shinto shrine hidden inside a forest.
- Karaoke: Because you can’t leave Japan without humiliating yourself first!
Further reading: Is Tokyo worth visiting?
Day 14, stop 1: Senso-ji
- Price: Free
- Opening hours: Temple grounds: Always open. Main hall: 6 am–5 pm. Shops: From 9 am until late.
- Distance from Akihabara: 15 minutes by metro
- Time spent here: 1 hour
Start your final full day in Japan at Tokyo’s oldest Buddhist temple, built way back in 645. You know something’s really old when it only has three digits in the year! But, because history here is basically just “build, burn, repeat,” the temple's been rebuilt a few times. But you know this by now; you’ve been in Japan for 14 days and are a certified expert, right?
Here’s how to get to Senso-ji: hop on the Hibiya Line from Akihabara Station to Ueno, switch to the Ginza Line, and continue to Asakusa Station—total travel time is about 15 minutes unless you get lost and try to call a taxi (not that that’ll make things faster).
Expect huge crowds as you enter through Kaminarimon, the famous red gate with the massive lantern. Then it’s similarly over-humaned at Nakamise Shopping Street, lined with souvenir shops, snacks, and more Hello Kitty merchandise.
Senso-ji
Before stepping into the main hall, take part in the temple rituals: bathe yourself in incense smoke for wisdom, drink from the purification fountain, and try an omikuji fortune slip (for fun, unless you’re my girlfriend, who takes these things very seriously).
Day 14, stop 2: Imperial Palace, aka the emperor’s house
- Price: Free
- Opening hours: Palace grounds: Always open. Guided tours: 10 am & 1:30 pm (except Sundays & Mondays).
- Distance from Senso-ji: 20 minutes by metro
- Time spent here: 1 hour (longer if you take the guided tour)
Next, head to the Imperial Palace, home to Emperor Naruhito, who—fun fact—plays the viola, enjoys jogging, and is an expert on London’s riverboats.
How to get there: From Asakusa Station, hop on the Ginza Line straight to Tokyo Station, then take a 10-minute walk to the Kikyo-mon Gate.
While you can’t enter the palace itself, you can explore the Outer Gardens, admire the Nijubashi Bridge, and, if you want to feel like a VIP, take a guided tour of the Inner Gardens (book online or try your luck with a walk-in ticket).
Pro tip: Twice a year—January 2nd and February 23rd—the emperor makes a rare balcony appearance to wave at the commoners. I doubt you’re in Japan in the winter though, so its mostly locals.
Day 14, stop 3: Ginza—(Window-)shopping with a side of people-watching
- Price: Free to browse, $$$ to buy
- Walk: 15 minutes from the Imperial Palace
- Time spent here: However long your wallet can handle
It’s time to shift gears and see Ginza, Tokyo’s luxury shopping district. Even if you’re not into shopping, you kind of have to see it—just to pass the insanely expensive stores and ask yourself, “Who actually buys this stuff?!” Ok, I am exaggerating a little; there is plenty to browse even if you aren’t after your next Prada outfit.
Here are a few tips:
- The main street, Chuo Dori, becomes a pedestrian zone on weekends, which is the best time to visit.
- Look out for the Seiko House Ginza, a historic clock tower famous for its over-the-top window displays.
- Check out the Sony and Nissan showrooms at Ginza Place.
- A must-see for stationary nerds: Itoya, an 8-floor stationary paradise where you can buy the world’s fanciest pens and notebooks.
That’s all. Not sure what else people do in Ginza besides maybe grabbing a meal and coffee.
Day 14, stop 4: Shibuya Crossing because of FOMO, not because it’s that great
- Price: Free
- Distance from Ginza: 15 minutes by metro
- Time spent here: 15 minutes? Or however long it takes to get your shot
Shibuya Crossing… my opinion about it is that even if it’s the busiest one in the world, and probably the most photographed one at that, it’s just a crosswalk! Thousands of people cross it every time the lights change, and half of them are tourists filming themselves doing it.
For the best view, grab a seat at Starbucks, head to the Magnet 109 rooftop (for JPY 1500, which includes a drink), or take the pedestrian bridge at Shibuya Station.
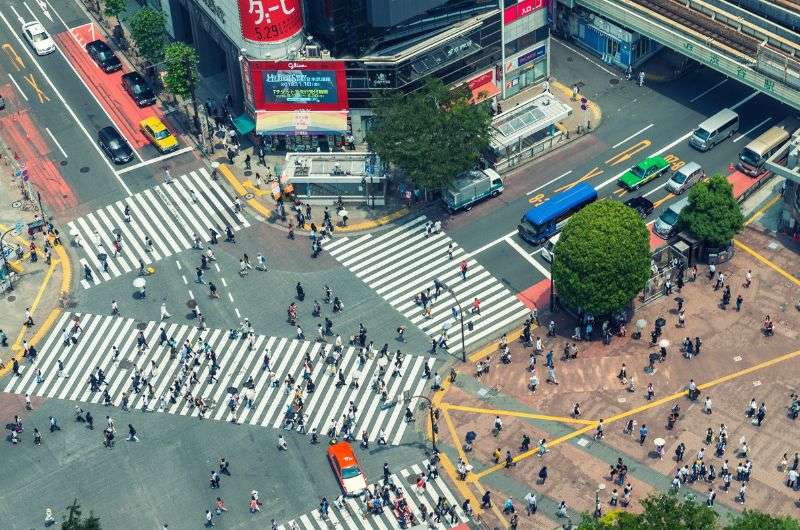
It’s just a crosswalk if you ask me—Shibuya Crossing
Add some heartstring-pulling moments to an otherwise underwhelming stop: While you’re here, pay respects to Hachiko, the world’s most loyal dog, whose statue is at Hachiko Square on one of the corners of Shibuya Crossing.
Day 14, stop 5: Takeshita Street, Harajuku
- Price: Free, but you’ll probably buy something weird
- Distance from Shibuya: 5-minute train ride or 20-minute walk
- Time spent here: 20–30 minutes
If you’ve ever seen a Temu ad, Takeshita is that, but in real life. Takeshita Street is where Japan’s youth spend their time—think cosplay outfits, anime merch, and way too many crepe shops and bubble tea shops all over the place.
Not my thing, but it’s so iconic that you kind of have to go. And it’s on the way to your next stop, so just do it and move on when you find out if it’s your thing or not.
Day 14, stop 6: Meiji Jingu—a peaceful respite in the middle of the forest
- Price: Free
- Opening hours: Sunrise to sunset
- Distance from Takeshita Street: 5-minute walk to the start of the forest
- Time spent here: 1 hour
From the crazy Takeshita Street, you’ll be happy to step into peaceful Meiji Jingu (I sure was), a Shinto shrine surrounded by a massive forest. The 10-minute walk through the trees is half the experience, with towering torii gates marking your way. I’m not a big Tokyo fan—sensory overload, but not in a good way—so stepping into nature was definitely what I needed in that moment.
The shrine is dedicated to the beloved Emperor Meiji and Empress Shoken. Unlike some of the more colorful temples you’ve seen elsewhere on your journey through Japan, Meiji Jingu keeps things simple—massive wooden torii gates and traditional Shinto architecture.
The Treasure House Museum exhibits artifacts related to the imperial couple. Inside the main shrine complex, you can witness traditional Shinto wedding ceremonies if you’re lucky. But like I said, it was the forest that did it for me.
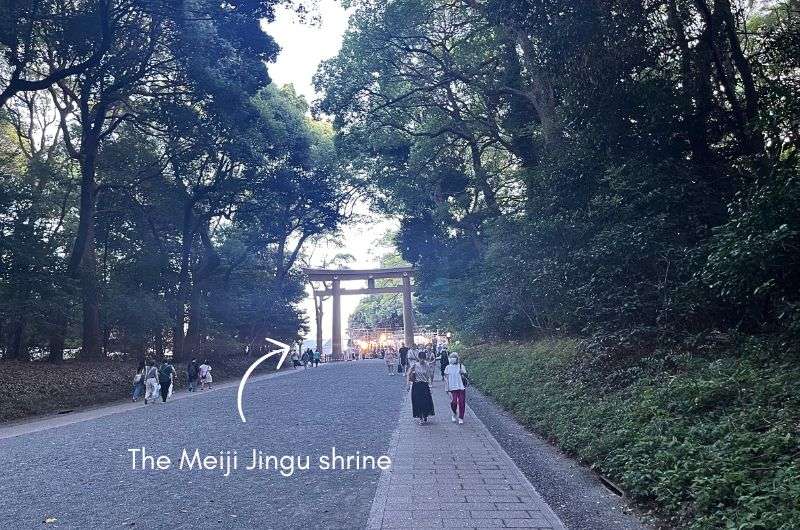
Find Jan... @Meiji Jingu
Pro tip: If you visit in early January, you’ll see thousands of locals making their first shrine visit of the year, called hatsumode.
Buy an ema (prayer plaque) for JPY 500 and write your wish—historically, people donated live horses, but that’s frowned upon nowadays. Just hang your ema on the tree and carry on to your last activity of the day: karaoke!
Day 14, stop 7: Karaoke, baby!
- Price: JPY 1000+ per hour per person
- Distance from hotel: It could be just a short walk, depending on the karaoke house you choose
- Time spent here: 1.5 hours or until you lose your voice
- Best karaoke chains in Tokyo: KaraokeKan, Big Echo, and Uta Hiroba
You’ll probably want to go get freshened up at your hotel (and warm up your vocal cords) first, so go ahead and do that. Choose a good outfit because it’s time to channel your inner pop star! Or, in my case, your inner rapper. I know; I had no idea, either!
Your trip will not be complete without karaoke. Trust me: this, and the Ghibli museum, were my favorite experiences out of my full 3 days in Tokyo. Even if you can’t sing, you have to try it. You’ll be in a private room, so don’t be shy.
My karaoke experience in Tokyo
I’ll admit, I went in skeptical. You get your own soundproof room (one of dozens!). The touchscreen song list was intimidatingly massive, with Japanese hits, international chart-toppers, and even Disney songs (don’t ask how I know). My girlfriend jumped straight into a power ballad while I tested my rapping skills, which, for the record, were excellent.
You order drinks and snacks on the same touchscreen where you pick songs, and a waiter magically appears at the door like some kind of karaoke butler.

Karaoke @ Tokyo
It’s fun, ridiculous, and strangely addictive—an hour disappears in a flash. Karaoke in Japan is a full-on experience, so even if you think karaoke isn’t your thing, do it anyway. It’ll probably be one of your favorite memories from your trip.
Getting around Tokyo, subways & airport transfers
Simple — Tokyo
Tokyo’s public transport is legendary—efficient, frequent, and always on time. But I didn’t find it that different from any other subway system around the world. I mean, it’s still just a web of trains.
Yes, it can get busy, but don’t believe the horror stories—getting on a train isn’t a very exciting or life-threatening event, and nobody will be shoving you in with sticks.
You’ll mainly use two systems:
- JR Yamanote Line—A loop train connecting major districts like Shinjuku, Shibuya, and Tokyo Station.
- Subway Lines—13 color-coded metro lines operated by Tokyo Metro and Toei Subway, covering most of the city.
Tips for Tokyo’s subway:
- Station signs and ticket machines are in English and Japanese, so navigating is easy.
- Get an IC card (Suica or Pasmo) to avoid buying tickets for every ride. Fares are the same, but it saves time.
- Trains share tracks—check line maps to avoid getting on the wrong one.
Taxis & driving in Tokyo
Taxis cost around JPY 2,000 (USD 13) for a 10-minute ride—fine for late nights but not worth it for everyday use. Driving is possible but not recommended—parking is tight, speed limits are slow, and traffic is non-stop.
Getting from Tokyo’s airports to the city
Tokyo has two main airports:
- Haneda Airport (HND): Closer to central Tokyo (15 km), best for domestic and short-haul flights.
- Narita Airport (NRT): Farther out (60 km), mainly for long-haul international flights.
Haneda to Tokyo:
- Tokyo monorail (15 min, JPY 500–700)—Best for Hamamatsucho Station & Yamanote Line connections.
- Keikyu line (20 min, JPY 300–400)—Budget-friendly option.
- Limousine bus (30–40 min, JPY 1,000–1,500)—Direct to major hotels.
Narita to Tokyo:
- Narita Express (N’EX) (60 min, JPY 3,000)—Best for Tokyo Station, Shinjuku, and Shibuya.
- Keisei Skyliner (40 min, JPY 2,500)—Fastest route to Ueno & Nippori.
- Limousine bus (90 min, JPY 1,000–2,000)—Great if you have lots of heavy luggage.
Which airport is better?
- Haneda = Closer, faster, and easier for most travelers.
- Narita = Better for international flights, but good transport options exist.
For all this in more detail, check out my Tokyo guide.
Mickey Mouse waiting at DisneySea Tokyo
What are the best months to visit Japan?
Japan has four distinct seasons, each with its own pros and cons. Some months will charm your socks off, while others will melt your face off. If you ask me, October or May are probably the best months you can choose.
Here’s when to go (or not go) and why:
Spring (March–May): Cherry blossoms & lovely days
- Why go? Cherry blossoms & mild weather
- Weather: Comfortable, mild, perfect for wandering without sweating buckets.
- Downside? You and a million other tourists had the same brilliant idea. Expect crowds, and try to book hotels and trains way ahead. See below for cherry blossom schedule.
Summer (June–August): Hot, humid, and a bad idea
- Why go? I really don’t know if there’s a good reason. Maybe longer days? Otherwise, there’s the occasional typhoon (mostly in August) and frequent cloudy skies. But Okinawa (a beach destination) is fantastic this time of year.
- Weather: Miserable and hot! Like 38°C (100°F) hot, and the humidity that is almost unbearable.
- Downside? You’ll spend half your trip hiding in convenience stores for the air-conditioning.
Autumn (September–November): Fewer tourists & colorful trees
- Why go? Red, orange, and yellow leaves make Japan’s already beautiful forests look absolutely stunning. And there are fewer tourists than in spring.
- Weather: Cooler and comfortable. October is the sweet spot with temperatures of 18–24°C (64–75°F) in major cities. Typhoons still come in early September.
- Downside? Literally can’t think of any. This is the best time to visit.
Winter (December–February): Snow, not the best sightseeing & even fewer crowds
- Why go? It’s the cheapest, and if you like skiing or soaking in hot springs while watching snow fall, this could be your season.
- Weather: Cold, but not brutal unless you’re up in Hokkaido (-10 to 2°C/14–36°F). Tokyo rarely sees snow and mostly stays above freezing.
- Downside? Not the best for classic sightseeing. Some attractions shut down or have limited hours. And walking around all day is less than enjoyable anyway.

Love is in the air @ Kiyomizu-dera in Kyoto
What is the best month to see the cherry blossoms in Japan?
The best time for cherry blossoms in Japan is early April if you’re visiting the classic tourist cities in Honshu like Tokyo and Kyoto. Other places that are more to the north or in higher elevations hit their peak bloom later—mid- to late April.
- Peak bloom usually hits between March 25–April 10, depending on the year and location.
- Late March is too early in many spots, and mid-April is risky as the petals start falling fast.
- Kyoto and Tokyo are busiest from April 1–10, so if you go in the last days of March or right after peak bloom (April 7–12ish), you might miss the worst crowds while still catching the magic.
- Cherry blossoms at higher elevations bloom later. In Nagano, peak bloom is around April 10–20, and Nikko is even later, around April 15–25. Even further north, in Hokkaido, you will see sakuras blooming in late April and even into early May.
Sometimes, all you need to do is take the first step... I've filtered out the best hotels in Japan for you
Save it for yourself to come back to later, or share with your friends on social media!
I've already planned your ititnerary for the trip, complete with my travel tips.
Find more travel content, photos, and fun on:
This post contains affiliate links. I earn a small commission if you make bookings through my links at no additional cost to you. Thank you for your support!


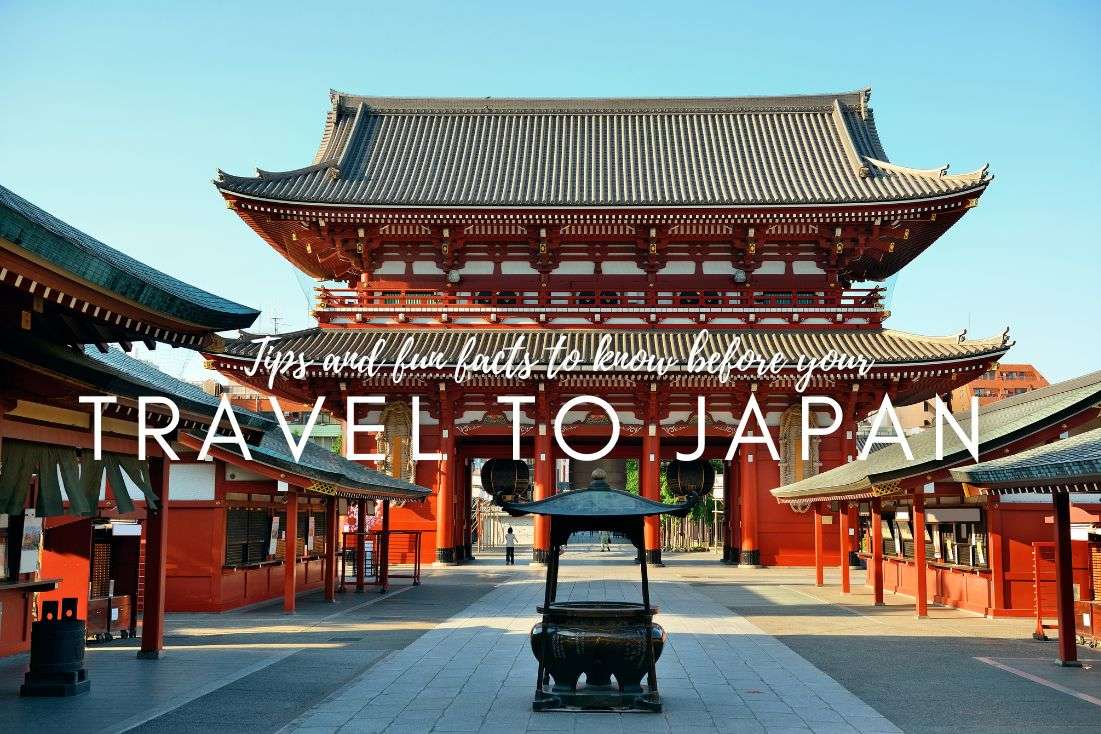

Comments | Thoughts? Give us a shout!